Author name: Louis Mugan

Louis Mugan is a seasoned technology writer with a talent for turning complicated ideas into clear, practical guidance. He focuses on helping everyday readers stay confident in a world where tech moves fast. His style is approachable, steady, and built on real understanding.

He has spent years writing for platforms like EasyTechLife, where he covers gadgets, software, digital trends, and everyday tech solutions. His articles focus on clarity, real-world usefulness, and helping people understand how technology actually fits into their lives.

Outside of his regular columns, Louis explores emerging tools, reviews products, and experiments with new tech so his readers don’t have to. His steady, friendly approach has made him a reliable voice for anyone trying to keep up with modern technology. get in touch at louismugan@gmail.com

Unlocking the Potential: Installing Android on Your Amazon Fire Tablet

Unlocking the Potential: Installing Android on Your Amazon Fire Tablet

Android is a popular operating system developed by Google that is used on a wide range of mobile devices, including smartphones and tablets. One such tablet is the Amazon Fire tablet, which runs a modified version of Android called Fire OS. While Fire OS offers some unique features and integrates well with Amazon services, it also has some limitations, such as limited access to the Google Play Store and the inability to install certain apps. If you own a Kindle Fire tablet and want to expand its capabilities by installing the Android operating system, you have a few options. One method is to root your device, which essentially grants you administrative access and allows you to make changes to the system files. However, rooting your device can be a complex process and may void your warranty. Another option is to replace the Fire OS entirely with a custom ROM, such as LineageOS or CyanogenMod, which are popular aftermarket Android distributions. This requires wiping your device and installing the custom ROM, which can be a more advanced process but offers greater flexibility and access to the full range of Android features and apps. Before you start the process, it’s important to identify which Amazon Fire tablet you have, as different models have different hardware specifications and may require specific instructions. You can usually find this information in the device settings or by checking the model number on the back of the tablet. Once you know your device model, you can search online for guides and tutorials specific to your tablet. These guides will provide step-by-step instructions on how to unlock the bootloader, install a custom recovery, and flash the custom ROM onto your device. It’s important to follow these instructions carefully and make sure you understand the risks and consequences of modifying your device. Keep in mind that installing a custom ROM may not be suitable for everyone. While it offers greater flexibility and access to the Google Play Store, it also carries the risk of bricking your device or causing other issues. Additionally, installing a custom ROM may not be supported by Amazon or the device manufacturer, which could impact future software updates and support. If you’re looking to expand the capabilities of your Amazon Fire tablet, installing the Android operating system is an option worth considering. However, it’s important to thoroughly research and understand the process, as it can be complex and may void your warranty. Proceed with caution and make sure to follow reputable guides and tutorials specific to your device model. Can I Install Android On Amazon Fire Tablet? It is possible to install Android on an Amazon Fire tablet, but it involves replacing the Fire OS that comes pre-installed on the device. This process requires wiping your Kindle Fire and voiding its warranty, so it is important to proceed with caution and be aware of the risks involved. Here are the steps you can follow to install Android on your Amazon Fire tablet: 1. Backup your data: Before proceeding, make sure to backup any important data on your Kindle Fire, as the installation process involves wiping the device. 2. Enable Developer Options: To begin the installation, you need to enable Developer Options on your Kindle Fire. To do this, go to Settings, then tap on Device Options. Scroll down and tap on Serial Number seven times until you see a message confirming that Developer Options have been enabled. 3. Install ADB and Fastboot: ADB (Android Debug Bridge) and Fastboot are command-line tools used for flashing Android devices. Download and install these tools on your computer. 4. Download the Android ROM: Find a compatible Android ROM for your specific Kindle Fire model. There are various custom ROMs available online that are specifically designed for Kindle Fire tablets. Make sure to download a ROM that is compatible with your device. 5. Unlock the bootloader: In order to install a custom ROM, you need to unlock the bootloader on your Kindle Fire. This process can vary depending on the model, so it’s essential to follow the specific instructions provided by the ROM developer. 6. Install the custom ROM: Once the bootloader is unlocked, connect your Kindle Fire to your computer and open a command prompt window. Use the ADB and Fastboot commands to flash the custom ROM onto your device. Again, the specific commands may vary depending on the ROM you are using, so follow the instructions provided by the ROM developer. 7. Reboot and configure: After the installation is complete, reboot your Kindle Fire. It may take a few minutes for the new ROM to load. Once it boots up, you can proceed with the initial setup and configuration of your Android device. It’s important to note that installing Android on your Kindle Fire will void its warranty and may pose certain risks. Additionally, not all features and functionalities may work perfectly on custom ROMs, so it’s essential to do thorough research and find a reliable and well-supported ROM for your device. Remember to proceed with caution and understand the potential consequences before attempting to install Android on your Amazon Fire tablet. Is Amazon Fire Tablet Android Compatible? Amazon Fire tablets are compatible with Android. Amazon Fire OS, the operating system that runs on Amazon Fire tablets, is actually a modified version of Android. This means that if your app runs on Android, it will most likely run on Amazon Fire tablets as well. However, it is important to note that there may be some differences and limitations when running apps on Amazon Fire tablets compared to traditional Android devices. Amazon has its own app store called the Amazon Appstore, which is the primary source for downloading apps on Fire tablets. While most popular Android apps are available on the Amazon Appstore, there may be some apps that are not available or have limited functionality. To ensure compatibility with Amazon Fire tablets, it is recommended to follow Amazon’s device targeting and compatibility guidelines. These guidelines provide information

How to Close Spotify on Both Android and iOS Devices

How to Close Spotify on Both Android and iOS Devices

Is Spotify running in the background and consuming battery power or resources? In this guide, I will show you how to stop Spotify from running in the background and forcefully quit Spotify on Android and iOS. It’s pretty simple, so keep on reading!  How to Close Spotify on Android There are two ways to close Spotify on Android. To close Spotify from the recent apps menu, press the recent apps icon at the bottom of your screen. It often looks like three lines and may be on the right or left side of the bottom of your screen, depending on the manufacturer.  Scroll through the recent apps by swiping the apps to the side until you see Spotify. Swipe it up to the top of the screen to close it.  You can also force close Spotify from your Android settings. Open Settings, navigate to Apps, and find and click on Spotify. Then, click on Force Close or Force Stop and confirm.  How to Close Spotify on iPhone (iOS Devices) On iOS, you can stop Spotify using the app switcher. Swipe up from the bottom of the screen and hold (or double-click the Home button if your iPhone has one). Then swipe sideways until you see Spotify, and swipe it up to close it.  Does Spotify Automatically Turn Off? If Autoplay is turned on, Spotify will continue playing until you stop it manually. This can consume unnecessary battery (such as if you fall asleep while listening to music).  However, there are some ways to get Spotify to stop playing in the background.  You can also try restricting background usage for Spotify, which could cause it to get killed by your phone when using up too much battery.  On Android, navigate to Settings > Apps > Spotify > App Battery Usage. Select “Restricted” to restrict background usage.  On iOS, go to Settings > General > Background App Refresh and turn Background App Refresh off (or toggle it off for Spotify only).  Troubleshooting Spotify When It Won’t Close If Spotify won’t close, and you can’t force it to close using one of the methods above, try restarting your phone. This will cause Spotify to get shut down automatically.  Another thing to try is to uninstall and reinstall Spotify. This could also fix such issues.  Make sure you upgrade to the latest version of Android/iOS and have the latest version of Spotify installed. Also, make sure you have enough space on your phone and don’t have too many applications running at the same time.  Conclusion We hope this guide on how to close Spotify on iPhone and Android was helpful. To stop Spotify from running in the background, use the tips we mentioned, such as restricting its background usage or using the sleep timer feature. Louis MuganLouis Mugan is a seasoned technology writer with a talent for turning complicated ideas into clear, practical guidance. He focuses on helping everyday readers stay confident in a world where tech moves fast. His style is approachable, steady, and built on real understanding. He has spent years writing for platforms like EasyTechLife, where he covers gadgets, software, digital trends, and everyday tech solutions. His articles focus on clarity, real-world usefulness, and helping people understand how technology actually fits into their lives. Outside of his regular columns, Louis explores emerging tools, reviews products, and experiments with new tech so his readers don’t have to. His steady, friendly approach has made him a reliable voice for anyone trying to keep up with modern technology. get in touch at louismugan@gmail.com

How to Know If Your Firestick Is Going Bad?

How to Know If Your Firestick Is Going Bad?

Firesticks are a popular streaming device that allows you to access a variety of content on your TV. However, like all electronic devices, they can encounter problems over time. One of the most common questions people ask is whether or not Firesticks go bad. The answer is that, like any electronic device, a Firestick can go bad or stop working properly over time. However, this does not necessarily mean that your Firestick is destined to fail. There are a few factors that can impact the lifespan of your device. One of the most important factors is how well you take care of your Firestick. If you use it regularly and do not properly maintain it, you may experience issues with slow speeds, apps crashing, or a black screen. To avoid this, it is important to regularly update your Firestick’s software, ensure that you have a stable internet connection, and ensure that your power supply is sufficient. Another factor that can impact the lifespan of your Firestick is how frequently you use it. If you use it for several hours a day, every day, it is more likely to wear out over time. However, if you use it sparingly, it may last longer. The type of content you stream can impact the lifespan of your Firestick. If you frequently stream high-quality, high-bandwidth content, your device may be working harder than if you primarily stream lower-quality content. While Firesticks can go bad over time, there are steps you can take to prolong the lifespan of your device. By properly maintaining it, using it in moderation, and being mindful of the content you stream, you can help ensure that your Firestick lasts as long as possible. Identifying Signs of a Faulty Fire Stick If you suspect that your FireStick is not functioning properly, there are a few signs that can help you determine if it’s bad. 1. Slow speed: If your FireStick is taking too long to load or stream content, it could be a sign that it’s not performing at its optimal speed. 2. No internet connection: If you are unable to connect to the internet or experiencing frequent disconnections, it could indicate a problem with your FireStick device. 3. Apps crashing: If your apps are frequently crashing, it may be due to a problem with your device’s hardware or software. 4. Black screen: If your FireStick is showing a black screen or not displaying any content, it could be a sign of a hardware issue. 5. Unresponsive remote: If your FireStick remote is not responding or not working as it should, it could be a sign that your device is faulty. If you are experiencing any of the above issues with your FireStick device, it’s time to consider checking its hardware and software components or replacing it with a new one. The Lifespan of an Amazon Fire Stick According to Amazon, Fire TV devices typically receive security updates for around six to eight years from their original launch date. This means that users can expect their Fire Stick to last for at least this amount of time before becoming obsolete. However, it’s worth noting that the lifespan of a Fire Stick can also depend on factors such as usage, maintenance, and technological advancements. In general, though, users can expect to get several years of use out of their Fire Stick before needing to upgrade to a newer model. Causes of Fire Stick Malfunctioning Fire sticks can stop working due to a variety of reasons, including outdated software, connectivity issues, and power supply problems. Some specific reasons why a Fire Stick may stop working are: – Outdated software: If you haven’t updated your Fire Stick’s software in a while, it may stop working properly. This can cause issues with apps not loading, media not playing, or the device itself not functioning properly. – Connectivity issues: The Fire Stick requires a strong and stable internet connection to work properly. If your Wi-Fi signal is weak or you’re experiencing network outages, this could cause the Fire Stick to stop working. – Insufficient power supply: The Fire Stick should be plugged into a power source that provides enough power to run the device. If the power supply is insufficient, it can cause the Fire Stick to malfunction or stop working altogether. Other factors that can cause a Fire Stick to stop working include hardware failure, software conflicts, and user error. In order to troubleshoot and resolve these issues, you may need to perform some basic troubleshooting steps or seek assistance from Amazon’s customer support team. Conclusion Firesticks can go bad but it is not a common occurrence. More often than not, issues with Firesticks are caused by outdated software, internet connectivity problems, or insufficient power supply. With proper care and maintenance, Firesticks can last for several years without any issues. It is important to keep the device up-to-date with the latest software updates and to ensure it is connected to a stable internet connection. Additionally, avoiding overuse and overloading the device can also help extend its lifespan. Firesticks can go bad but with proper care and maintenance, they can last for a long time without any issues. Louis MuganLouis Mugan is a seasoned technology writer with a talent for turning complicated ideas into clear, practical guidance. He focuses on helping everyday readers stay confident in a world where tech moves fast. His style is approachable, steady, and built on real understanding. He has spent years writing for platforms like EasyTechLife, where he covers gadgets, software, digital trends, and everyday tech solutions. His articles focus on clarity, real-world usefulness, and helping people understand how technology actually fits into their lives. Outside of his regular columns, Louis explores emerging tools, reviews products, and experiments with new tech so his readers don’t have to. His steady, friendly approach has made him a reliable voice for anyone trying to keep up with modern technology. get in touch at louismugan@gmail.com

Which Experimental Webkit Features Should Be Turned On?

Which Experimental Webkit Features Should Be Turned On?

The Safari web browser, developed by Apple, offers a range of experimental features designed for developers to improve and debug their web experiences. These features are not meant for regular users, but they can be activated if necessary, especially when seeking technical support from Apple. WebKit is the underlying technology that powers Safari, and it constantly evolves to support new web standards and provide better performance. With the introduction of iOS 12/11, Apple introduced Safari WebKit Experimental Features, allowing developers to explore and test new functionalities within their apps. But which experimental features should you consider turning on? Let’s take a closer look at some of them: 1. Web Push on iOS and iPadOS: This feature enables websites to send push notifications directly to iOS and iPadOS devices. It enhances the user experience by keeping them updated with relevant information, such as news updates, promotions, or reminders. 2. Improvements for Web Apps: These experimental features aim to enhance the performance and functionality of web applications on Safari. They can provide developers with tools to optimize their apps, resulting in smoother and more responsive user experiences. 3. Web Components: Web Components are a set of web platform APIs that allow developers to create reusable custom elements for web applications. By enabling this experimental feature, developers can leverage these APIs to build modular and easily maintainable web components. 4. CSS Enhancements: Experimental CSS features can unlock new possibilities for web design and styling. These features often introduce cutting-edge techniques, such as new layout models, animations, or visual effects. Enabling these features can empower developers to create unique and visually appealing websites. 5. HTML Improvements: Safari’s experimental HTML features can provide developers with access to new HTML elements, attributes, and APIs. These additions can enhance the structure and functionality of web pages, allowing for more interactive and engaging user experiences. 6. JavaScript and WebAssembly: These experimental features focus on improving the performance and capabilities of JavaScript and WebAssembly in Safari. Developers can utilize these features to create faster and more powerful web applications that can rival native software. 7. Web API Expansions: Safari’s experimental Web API features can expand the capabilities of web applications by offering new APIs for accessing device functionality, such as cameras, sensors, or location services. Enabling these features can unlock exciting possibilities for developers to create innovative web experiences. 8. Images, Video, and Audio Enhancements: Experimental features related to multimedia content can provide developers with access to advanced image and video processing capabilities, improved audio playback, and better integration of media elements on web pages. These features can enhance the viewing and listening experiences of users. It’s important to note that enabling experimental features may come with potential risks, such as compatibility issues, performance limitations, or security vulnerabilities. Therefore, it is recommended to only activate these features if you are a developer or have a specific need for them. Regular users should avoid enabling experimental features to ensure a stable and secure browsing experience. To enable or disable experimental features in Safari, navigate to Settings -> Safari -> Advanced -> Experimental Features. From there, you can toggle individual features on or off. If you encounter any issues or have specific queries, it’s always a good idea to reach out to Apple’s technical support for guidance. Safari’s experimental WebKit features offer developers the opportunity to explore new web technologies and enhance their web applications. However, it is crucial to exercise caution when enabling these features, as they may come with potential drawbacks. Always weigh the benefits against the risks before activating any experimental features in Safari. Do You Need Experimental WebKit Features On Your iPhone? It is not necessary for the average iPhone user to enable experimental WebKit features. These features are typically designed for developers and advanced users who want to test new functionalities or provide feedback to Apple. Enabling experimental features may introduce instability or compatibility issues, and could potentially impact the performance and security of your device. Here are a few reasons why you may not need experimental WebKit features on your iPhone: 1. Stability: Experimental features are still in the testing phase and may not be stable. They could potentially cause crashes or other issues while browsing the web. 2. Compatibility: Some experimental features may not be compatible with all websites or web applications. This means that certain websites may not function correctly or may not load at all. 3. Performance: Enabling experimental features may have a negative impact on your device’s performance, as they are not optimized for everyday use. 4. Security: Experimental features may have security vulnerabilities that could expose your device to potential risks. It is generally recommended to use stable and well-tested features to ensure a higher level of security. Unless you are a developer or have specific reasons for enabling experimental WebKit features, it is generally best to stick with the stable and officially supported features of Safari on your iPhone. What Does Experimental WebKit Features Mean? Experimental WebKit features refer to new functionalities and capabilities that are being tested and developed by Apple within the Safari web browser. These features are not yet fully stable or officially released, but they are made available to developers for testing and experimentation purposes. Key points about experimental WebKit features: 1. Purpose: These features are designed to provide developers with early access to new technologies and enhancements within Safari. They allow developers to explore and experiment with cutting-edge web capabilities before they are officially released. 2. Testing and feedback: By making these experimental features available, Apple encourages developers to test them and provide feedback. This feedback helps Apple identify and address any issues or bugs before the features are included in stable releases. 3. Developer-focused: Experimental WebKit features are primarily targeted towards developers who want to leverage the latest web technologies and stay ahead of the curve. They enable developers to build and optimize web experiences within their apps using the latest advancements in Safari. 4. Debugging and optimization: These features also provide

How to Add Contacts To Amazon Fire Tablet

How to Add Contacts To Amazon Fire Tablet

The Amazon Fire Tablet is a powerful and affordable tablet device, packed with features, that allows you to stay connected and entertained while on the go. With its intuitive and easy-to-use interface, you can browse the internet, watch movies, listen to music, read books, and play games. The Amazon Fire Tablet also comes with Amazon Alexa built-in, so you can ask questions and get answers quickly. One of the great features of the Amazon Fire Tablet is that it allows you to add contacts so you can easily stay connected with friends and family. Adding contacts to your Amazon Fire Tablet is easy and straightforward. Adding Contacts to Amazon Fire Tablet To add contacts to your Fire Tablet, follow these Contacts app instructions.  Open the Contacts app on your Amazon Fire Tablet (you can also download various third-party apps from the app store). Tap on the Add Contact button. Enter all of the relevant information for that contact (e.g., name, email address). When finished adding all the contact information, tap Done in the top-right corner of the screen.  You can also add contacts directly to Alexa:  If you want to sync contacts you have already stored on other devices, read on.  Syncing Contacts From Other Devices and Services You may be able to sync contacts on your Amazon Fire Tablet from other sources. For example, you can import contacts from Google by going to Contacts > Settings > Add Account and adding your Google account for Google account integration.  Using Alexa to Manage Contacts KKPCW(Kyu3), CC BY-SA 4.0, via Wikimedia Commons Did you know that Alexa offers contact management as well? If you add contacts to Alexa, you can enjoy all of its communication services and features, such as the ability to call a contact with a voice command.  Earlier, we explained how to add a contact to Alexa. You can also delete contacts from Alexa in the same place. Note that adding a contact to Alexa doesn’t add it to your main contact app.  Making Calls and Sending Messages From Fire Tablet KKPCW(Kyu3), CC BY-SA 4.0, via Wikimedia Commons Once a contact is added, you can make a call to that contact on your Fire Tablet. Open the Alexa app, click on the More tab at the bottom, click on Communicate, and click on the call button. You can then call any contact via an Alexa to Alexa video call, without any other communication apps installed.  Managing Contact Groups and Favorites You can create contact groups to better manage your favorite contacts and enable more efficient communication. Follow these steps to create a group:  Troubleshooting Common Contact Issues Here are some tips to troubleshoot contact issues on a Fire Tablet: Conclusion We hope you enjoyed this guide on how to manage contacts on a Fire Tablet. Fire Tablets offer easy contact management to enhance connectivity with family and friends. Make a video call or send an email and enjoy all that the Fire Tablet has to offer! Louis MuganLouis Mugan is a seasoned technology writer with a talent for turning complicated ideas into clear, practical guidance. He focuses on helping everyday readers stay confident in a world where tech moves fast. His style is approachable, steady, and built on real understanding. He has spent years writing for platforms like EasyTechLife, where he covers gadgets, software, digital trends, and everyday tech solutions. His articles focus on clarity, real-world usefulness, and helping people understand how technology actually fits into their lives. Outside of his regular columns, Louis explores emerging tools, reviews products, and experiments with new tech so his readers don’t have to. His steady, friendly approach has made him a reliable voice for anyone trying to keep up with modern technology. get in touch at louismugan@gmail.com

Will Removing My SIM Card Delete Everything From Your Phone?

Will Removing My SIM Card Delete Everything From Your Phone?

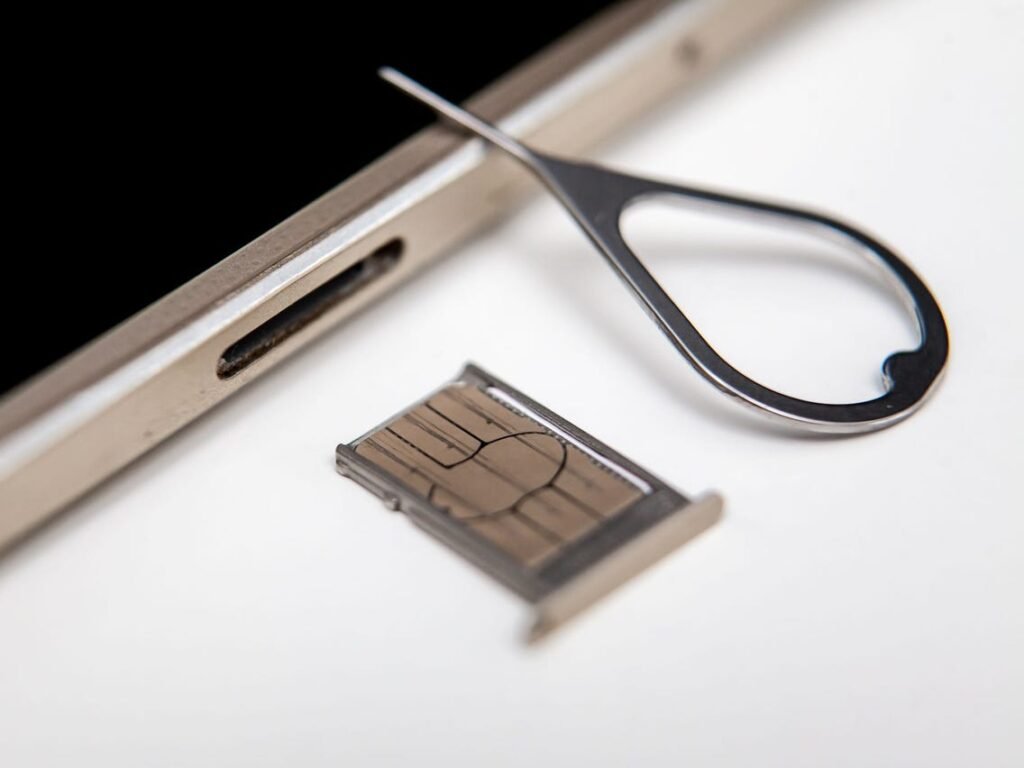
A SIM card, or Subscriber Identity Module, is a small card that contains information such as your phone number and contacts. It connects your phone to a wireless network and allows you to make calls, send texts, and use data. However, many people wonder whether taking out their SIM cards will delete everything on their phones. The answer is no, removing your SIM card will not delete anything on your phone. Your phone will still have all of its data, including your pictures, messages, and apps. However, while your phone will still function without a SIM card, you will not be able to make phone calls, send texts, or use mobile data. It is important to note that while your SIM card does contain some information, it does not store all of your data. Your pictures, messages, and other data are saved to your phone or to an SD card, not to your SIM card. Therefore, removing your SIM card will have no effect on your data. If you do need to remove your SIM card, be sure to turn off your phone first. This will prevent any damage to your phone or your SIM card. To remove your SIM card, simply locate the SIM card slot on your phone (usually located on the side or back of your phone) and gently push in to release the SIM card. Be sure to store your SIM card in a safe place, as it contains important information that you may need in the future. Taking out your SIM card will not delete anything on your phone. Your phone will still have all of its data, and you will still be able to use it for many functions. However, it is important to remember that your SIM card does contain important information, and should be stored in a safe place if you need to remove it. What Happens When SIM Card Is Removed? When you remove the SIM card from your phone, the phone number associated with the SIM card will no longer be available for use. This means that you will not be able to make or receive phone calls, send or receive text messages, or access mobile data using the SIM card that has been removed. However, you will still be able to access any data that is stored on your phone, including contacts, photos, and apps. It is worth noting that some phones may require a SIM card to be inserted in order to function properly, so removing the SIM card may cause some features to be unavailable. Additionally, if you are using a phone that is locked to a particular network, removing the SIM card may not allow you to use the phone with a different network. Will I Lose My Pictures If I Remove My SIM Card? You will not lose your pictures if you remove your SIM card. Your pictures are saved to your phone’s internal storage or to your SD card, depending on your phone’s settings. The SIM card only contains information related to your mobile network subscription, such as your phone number and contacts. Removing the SIM card will not affect your phone’s storage or the pictures saved on it. However, if your phone is set to save pictures to the SIM card, then removing it may cause you to lose those pictures. Therefore, it’s always a good idea to check your phone’s settings to ensure your pictures are saved to the internal storage or SD card before removing the SIM card. Will I Lose My Text Messages If I Remove My SIM Card? When it comes to removing your SIM card from your phone, you may be curious about the impact on your text messages. The good news is that removing your SIM card will not delete your text messages. This is because text messages are stored on your phone’s internal memory or its SD card, not on the SIM card. However, it’s important to note that if you switch to a new phone and don’t transfer your text messages over, you may lose them. To avoid this, you can back up your messages to a cloud service or your computer. So, to sum it up, removing your SIM card won’t delete your text messages, but it’s always a good idea to back them up to ensure you don’t lose them. Conclusion SIM cards are an essential component of any mobile device as they connect our phones to wireless networks and store essential information such as our phone numbers and contacts. However, it is important to note that SIM cards do not store any data such as pictures, videos, or text messages. Instead, this information is saved either on the phone itself or on an SD card. Removing the SIM card from your phone will not result in the loss of any of your personal data. SIM cards are a crucial element of our mobile devices, and understanding their role and limitations can help us make the most out of our phones. Louis MuganLouis Mugan is a seasoned technology writer with a talent for turning complicated ideas into clear, practical guidance. He focuses on helping everyday readers stay confident in a world where tech moves fast. His style is approachable, steady, and built on real understanding. He has spent years writing for platforms like EasyTechLife, where he covers gadgets, software, digital trends, and everyday tech solutions. His articles focus on clarity, real-world usefulness, and helping people understand how technology actually fits into their lives. Outside of his regular columns, Louis explores emerging tools, reviews products, and experiments with new tech so his readers don’t have to. His steady, friendly approach has made him a reliable voice for anyone trying to keep up with modern technology. get in touch at louismugan@gmail.com

Uninstalling Android Updates: A Guide to Reverting to Previous Versions

Uninstalling Android Updates: A Guide to Reverting to Previous Versions

Do you want to uninstall Android updates? Perhaps the newer version of Android isn’t compatible with apps you have downloaded and either doesn’t support those apps at all or is causing bugs. Or, perhaps you simply like certain features in older Android versions.  In this guide, I will tell you all you need to know about reverting your Android version to a previous one. Unfortunately, it’s not usually possible, but there are some ways you can still downgrade Android OS.  Can You Uninstall an Android Update? Unfortunately, no. Direct Android update rollback is not possible on Android, unlike on platforms like Windows. This is for security reasons. Android does not support rolling back new updates because they often contain critical security patches.  Why Android Updates Cannot Be Reversed Easily So, why can Android updates not be undone? As mentioned, this is due to security reasons. New updates generally contain security patches, and rolling them back can lead to security risks. Furthermore, updates are usually managed by device manufacturers and often overwrite the existing system, making rollback complex.  Previously, you were able to uninstall app updates. Now, however, this feature has also been removed from the Play Store, so once you update an app, you can’t uninstall that update.  Important Things to Do Before Reverting Your Android Version If you do need to revert your Android version to an earlier version, I will tell you a few ways to do so. However, make sure to prepare for your Android downgrade by backing up your Android first.  There is an important caveat. Generally, a backup of a newer Android version cannot be restored on an older Android version. So, if you backed up your entire phone on the latest Android version, you can’t usually restore it once you go back to an earlier version.  However, you can still back up important data. For example, you can back up all your images using Google Photos and all your files using Google Drive. Also, make sure that you have access to your 2FA method, if you have 2FA set up for your Google account. Consider adding your phone number as a 2FA method if you have a physical sim card, so you can get the 2FA code as soon as you factory reset your phone, and print out your backup codes.  How to Revert Android Using Factory Reset Most of the time, factory resetting your Android will cause it to downgrade to the version it came with originally. This doesn’t allow you to roll back your phone to a specific version that isn’t that original version, but you can reset your phone to factory settings and revert it to the original Android version it shipped with.  However, this will wipe all of your data. So, make sure to back up your important data first.  To reset your Android to factory settings, go to Settings > System Management > Reset Options and select Factory Reset. If you can’t find it, search for “Factory Reset” in your Android settings. Click on Factory Reset and follow the on-screen prompts to confirm.  How to Downgrade Android by Flashing a Factory Image Some phones, including most Pixel phones, also allow you to flash a factory image using the Android Flash Tool. Here is a list of phones the Android Flash Tool supports:  To flash an image, first enable Developer Options, USB Debugging, and OEM Unlocking on your phone by following these steps:  Next, install a flash image by following these steps:  Note that you can also browse builds for different devices here. Scroll down, accept the terms and conditions, and browse available builds. Click on “Flash” next to a build to open it up in the SAndroid Flash Tool and proceed as above.  Note that only certain older Android versions are supported.  How to Downgrade a Specific App Although downgrading apps to a previous version isn’t possible in the Play Store anymore, you may be able to find APK files of older app versions online, either on third-party websites or the app developer’s website. You can then download and install the APK file.  Note that the app may not work as intended with your newer Android version. Also, downloading APK files from third-party websites is risky. Make sure to download it from a trusted third-party website (avoid those with excessive popups) and scan your device for malware using an antivirus app after installing it.  Risks of Downgrading Android Versions There are several risks to downgrading your Android version. It could cause device instability with certain apps, and it could also cause you to lose important data, hence why I stressed the importance of data backups. It could also open you open to security vulnerabilities, especially if you download APK files from untrustworthy sources.  What to Do if You Do Not Like a Recent Android Update If you do not like a recent Android update, you may not have any other choice than to wait for the issue to be fixed in future versions. You may be able to adjust certain things, such as your notification bar and theme, in your settings. Depending on your phone, you may be able to revert to your factory build or flash a build using the Android Flash Tool. However, Android doesn’t allow for granular rollback of system updates like Windows does.  Conclusion I hope this Android downgrade guide was useful and helped you learn how to revert your Android version safely. While rollback isn’t officially supported on most phones, you may be able to restore your phone to its factory build or flash a build on some phones. Avoid using third-party flashing tools, as they lead to security risks.  Louis MuganLouis Mugan is a seasoned technology writer with a talent for turning complicated ideas into clear, practical guidance. He focuses on helping everyday readers stay confident in a world where tech moves fast. His style is approachable, steady, and built on real understanding. He has spent years writing for platforms like EasyTechLife, where

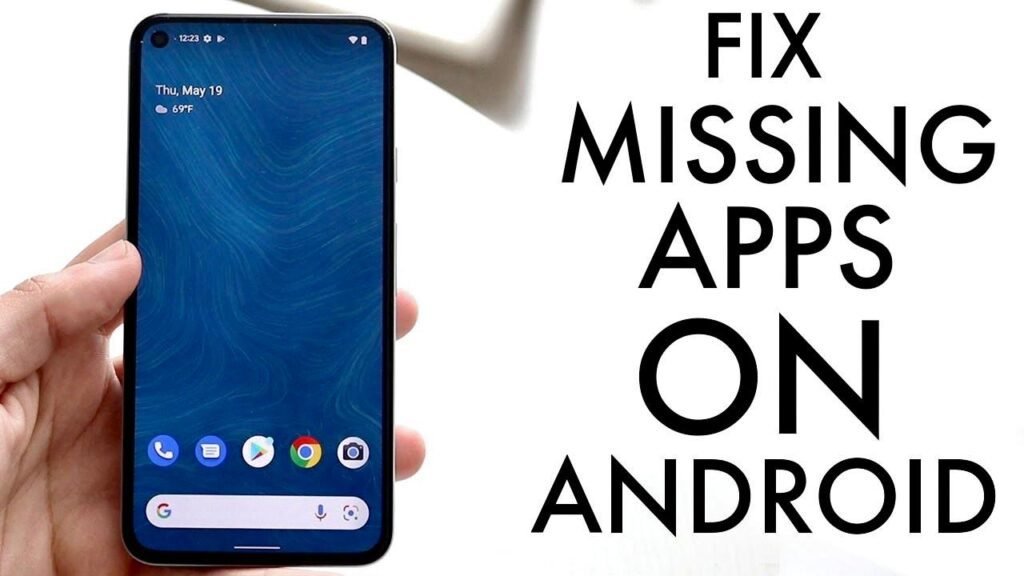
Why Did My Apps Disappear

Why Did My Apps Disappear

Have you ever experienced the frustration of apps mysteriously disappearing from your device? It can be quite baffling, but fear not, as there are a few possible explanations for this occurrence. In this article, we will explore why apps may disappear and what you can do to find and restore them. One possible reason for missing apps is that they may have been deleted. It’s quite easy to accidentally delete an app, especially when you have numerous apps cluttering your device. To check if this is the case, navigate to your device’s Settings and then to the Apps & Notifications section. From there, select “See all apps” and look for the app in question. If you find it listed, it means it’s still installed on your device. However, if it’s not there, it means it has been deleted. Another possibility is that the app has been disabled. Some devices, like certain Xperia™ devices running Android™ version 4.2 or higher, allow you to disable apps, effectively hiding them from the Application screen. To check if this is the case, go to the Apps & Notifications section in your device’s Settings, select “See all apps,” and then choose “Disabled apps” from the drop-down menu. If you find the missing app in the disabled apps list, simply tap on it and click “Enable” to restore it. Furthermore, it’s worth considering that the app may have been hidden. This can happen if you have a particularly cluttered home screen or if you’ve unintentionally moved the app to a different location. To locate a hidden app, swipe upwards on your home screen to open the App Drawer. From there, you have two options: you can either scroll through the list of apps until you find the missing one, or you can use the search function to quickly locate it. Once you’ve found the app, tap and hold it, then drag it to your preferred location on the home screen. If none of these methods help you locate your missing app, it’s possible that it has been moved to the App Library. The App Library is the last home screen on some devices. To access it, simply swipe left on your screen until you reach it. Once in the App Library, you can search for your app and then touch, hold, and drag it out of the library and onto your desired location on the home screen. If your apps have disappeared, there are several potential reasons for this occurrence. They may have been deleted, disabled, hidden, or moved to the App Library. By following the steps outlined in this article, you should be able to locate and restore your missing apps with ease. So don’t panic, take a deep breath, and get your favorite apps back where they belong! Why Did My App Suddenly Disappear? There could be several reasons why your app suddenly disappeared. Here are some possible explanations: 1. App Deletion: It is possible that you or someone with access to your device accidentally deleted the app. Check your app drawer or home screen to see if it has been completely removed. 2. App Disabling: Some devices allow users to disable certain apps. This means that the app is still installed on your device but is not visible or usable. Check your device settings to see if the app has been disabled. 3. App Hiding: Certain devices, like Xperia™ devices running on Android™ version 4.2 or higher, have the option to hide apps from the Application screen. This means that the app is still installed but is not visible in the app drawer. Check your device settings or launcher settings to see if the app has been hidden. 4. App Update: Sometimes, when an app is updated, it may temporarily disappear from your device until the update is complete. Check your device’s notification center or app store to see if there are any pending app updates. 5. System Glitch: Occasionally, a system glitch or software bug can cause apps to disappear from the device. In such cases, restarting your device or performing a software update may resolve the issue. If none of these explanations apply to your situation, it is possible that there may be a more specific issue with your device or app. In that case, it may be helpful to contact the app developer or your device manufacturer for further assistance. How Do You Get Your Apps Back When They Disappear? To retrieve your missing apps, follow these steps: 1. Go to your device’s Settings.2. Look for the “Apps & Notifications” or “Applications” option and tap on it.3. In the next screen, select “See all apps” or a similar option to view all the installed apps on your device.4. At the top of the screen, you’ll find a drop-down tab labeled “All apps.” Tap on it.5. From the drop-down menu, choose “Disabled apps” or a similar option. This will display a list of apps that are currently disabled on your device.6. Scroll through the list and look for the app that has gone missing. If you find it among the disabled apps, tap on it.7. On the app’s information screen, you should see an option labeled “Enable.” Tap on it to re-enable the app.8. Once the app is enabled, you should be able to find it in your app drawer or on your home screen, depending on your device’s settings. By following these steps, you can easily recover your missing apps and bring them back to your device’s regular functionality. How Do I Get My Apps Back On My Home Screen? To get your apps back on your home screen, follow these step-by-step instructions: 1. Swipe upwards on your Home screen to open the App Drawer. This is where all your installed apps are stored.2. Now, there are two ways to find the app you want to add back to your home screen:– Scroll through the list of apps in the App Drawer until you find the one you’re looking

How to Turn Off Sharing Between Apple Devices

How to Turn Off Sharing Between Apple Devices

Apple devices share data in various ways, but there are easy ways to turn off data sharing with other people and devices.  Do you want to stop your Apple device from sharing data with other devices or people? There are several ways Apple devices share data with each other and with other people. In this comprehensive guide, you will learn all you need to know about completely turning off sharing on Apple devices. Let’s get into it.  Use Safety Check to Quickly Stop Sharing (Fastest All-in-One Step) You can easily see everyone you are sharing data with and stop sharing by using Safety Check.  The first thing to do, if you want to stop sharing data with other devices, is to use Safety Check, which allows you to review sharing access and also use the emergency reset option to completely stop sharing data with others.  However, it requires iOS 16 or later. It is not available on earlier iOS versions.  Go to Settings  > Privacy & Security > Safety Check to access it. There, you will see important information, such as who you are sharing data with, which devices are connected to your Apple Account, and more.  You’ll be taken through three steps:  Turn Off iCloud Sync for Specific Apps (Photos, Messages, Drive, Safari, Keychain, etc.) On your iPhone, go to Settings > [Your Name] > iCloud and click on “See All” to select which apps to stop syncing to iCloud.  Another thing you can do is turn off iCloud sync for specific apps, such as Photos. Go to your iPhone settings, click on your name, and then tap on iCloud and then on “See All” next to “Saved to iCloud.”  You will see a list of apps that are currently syncing to iCloud and can toggle iCloud sync on and off for each of them. You can do the same on your Mac by going to iCloud in the System Settings (or System Preferences).  Stop Continuity/Handoff and Universal Clipboard Between Devices To turn off Continuity and Handoff, which are tools that allow different Apple devices to communicate with each other, open the settings on your iPhone and navigate to General > Airplay and Continuity/Handoff and toggle it off. On a Mac, go to System Settings (or System Preferences) > General > AirDrop & Handoff and toggle off Allow Handoff.  Turning off Handoff will also disable Universal Clipboard.  Control AirDrop So Nearby Devices Can’t Share to You To make sure people can’t send you files via AirDrop, go to Settings > General > AirDrop and switch it to Receiving Off. This will ensure that nobody can send you files via AirDrop.  Alternatively, you can select Contacts Only, which will only allow people you have saved as a contact to send you files via AirDrop.  Stop Safari Sharing (iCloud Safari & Shared Tab Groups) Stop sharing your tabs with collaborators if you don’t want them to see your browsing activity anymore.  To turn off Safari sharing, such as saved bookmarks, turn off iCloud sync for Safari. You can follow the process explained above for turning off iCloud sync  for specific apps. You can also stop sharing a group of tabs you have allowed others to collaborate on. To do that, tap the profile icon.  On an iPhone, it will be in the top-right corner on Safari. It will be in the Safari toolbar on your Mac. Then, click on Manage Shared Tab Group. You can then tap someone’s name and remove them.  Stop Sharing Your Location and Other Personal Data If you have an adult account, you can click on Stop Using Family Sharing to leave your family group.  The easiest way to stop sharing location and personal data is to use Safety Check, as explained earlier. However, if you do not have Safety Check on your iOS version, you can also remove people from the Find My app and stop sharing data with them. Open the Find My app, navigate to the People tab, and tap on a person’s name and then on Stop Sharing My Location.  Alternatively, head to the Me tab in Find My, where you can stop sharing your location with everyone at once.  You can also stop sharing a shared album in Photos. Open the Photos app and click on Albums and then on Shared Albums. Tap on an album and then on People. You can tap on a person’s name and stop sharing the album with them.  Leave Family Sharing To stop Family Sharing, open your Settings and tap on your name and then on Family or Family Sharing. Find your name, tap on it, and click on Stop Using Family Sharing. On a Mac, go to System Settings > Family, find and tap on your name, and click on Stop Using Family Sharing.  Kids can not remove themselves from Family Sharing, so this only works if you are an adult.  Note that removing yourself from Family Sharing will remove yourself from the family group, which means you will lose access to shared subscriptions and purchases.  Conclusion I hope this guide was useful! The most important thing to do is use Safety Check. That’s the best way to see all of the people you are sharing data with and which data you are sharing with them. It will allow you to quickly remove people and stop sharing data with them and also remove devices from your account and reset app permissions.  Louis MuganLouis Mugan is a seasoned technology writer with a talent for turning complicated ideas into clear, practical guidance. He focuses on helping everyday readers stay confident in a world where tech moves fast. His style is approachable, steady, and built on real understanding. He has spent years writing for platforms like EasyTechLife, where he covers gadgets, software, digital trends, and everyday tech solutions. His articles focus on clarity, real-world usefulness, and helping people understand how technology actually fits into their lives. Outside of his regular columns, Louis explores emerging tools, reviews products,

Understanding the Causes of Busy Signals and How to Fix It?

Understanding the Causes of Busy Signals and How to Fix It?

Have you ever tried to call someone, only to hear a busy signal? It can be frustrating, especially if you need to reach that person urgently. But why does this happen? In this article, we will explore the reasons behind the busy signal and how to fix it. There are several reasons why you might hear a busy signal when calling someone. One of the most common is that the person is already on the phone with someone else. In this case, you will need to wait until they are finished with their call before you can get through. Another reason for a busy signal is that the person you are calling is calling someone else at the same time. This can create a temporary block on their line, preventing you from getting through. Sometimes, the busy signal may be due to a technical issue with the phone or phone line. For example, if the other line is left off-hook, it can create a busy signal. In this case, the person may not even be aware that their phone is engaged. If this is the case, you may need to contact their phone service provider to resolve the issue. Now that we have covered the reasons for a busy signal, let’s look at how to fix it. There are several things you can try to resolve the issue and get through to the person you are trying to reach. Firstly, check if your phone is in airplane or flight mode. Sometimes, this can cause a busy signal when you try to make a call. If this is the case, simply turn off airplane mode and try again. Another thing to check is call barring. If this is enabled, it can prevent you from making calls to certain numbers. Check your phone settings to ensure that call barring is not enabled. If you are still experiencing a busy signal, check the Do Not Disturb (DND) settings on your phone. If DND is enabled, it can prevent calls from coming through. Disable DND and try calling again. You should also check the auto-reject settings on your phone. If a number is added to the auto-reject list, calls from that number will be automatically rejected. Make sure that the number you are trying to reach is not on this list. Check the display over other app settings on your phone. If this is enabled, it can prevent calls from coming through. Disable this setting and try calling again. A busy signal can be frustrating, but there are several reasons why it might occur. The person you are trying to reach may be on the phone with someone else, or there may be a technical issue with their phone or phone line. To fix the issue, check your phone settings for things like call barring, DND, and auto-reject settings. By following these steps, you should be able to resolve the issue and get through to the person you are trying to reach. The Reasons Behind a Busy Telephone Line A line can sound busy due for various reasons. One common reason is that the called number is already engaged in a conversation with another caller, which results in a busy signal being heard by the caller. Another reason could be that the number is currently making another call, which means that the line is temporarily unavailable. Additionally, it is possible that another person is trying to call the same number at the same time, causing the line to sound busy. In some cases, the other line might have been left off-hook, which could also result in a busy tone being heard. These are some of the common reasons why a line may sound busy. Troubleshooting a Line Busy Issue If you are experiencing a line busy issue, there are several possible solutions that you can try to resolve the problem. Here are some methods that you can use: 1. Check your phone’s network signal: If you are in an area with poor network coverage, you may experience a line busy issue. Try moving to an area with a better network signal and check if the problem persists. 2. Disable Call Waiting: If you have call waiting enabled, it may interfere with incoming calls and cause a line busy issue. To disable call waiting, go to your phone’s settings, select “Call settings” and then “Additional settings”. From there, you can disable call waiting. 3. Check your phone’s call forwarding settings: If your phone is set to forward calls to another number, it may result in a line busy issue. Check your phone’s call forwarding settings and make sure they are disabled. 4. Restart your phone: Sometimes, simply restarting your phone can resolve line busy issues. Turn off your phone, wait for a few seconds, and then turn it back on. 5. Check with your service provider: If none of the above solutions work, contact your service provider. They may be experiencing network issues that are causing the line busy problem. What Causes a Continuous Busy Signal? A continuous busy signal, also known as a fast busy signal or a reorder tone, is an audible indication that the phone line or the phone number you’re trying to reach is currently unavailable. This could be due to a number of reasons such as the other party being on another call, their phone being turned off, or their phone line being out of order. In such cases, you will not be able to connect to the other party until the line becomes available again. It’s important to note that a continuous busy signal is different from a regular busy signal, which occurs when the other party is already on a call but their line is still open to incoming calls. It’s always a good idea to try reaching out to the other party through alternative means such as email or social media, especially if the busy signal persists for an extended period of time. Understanding the Meaning

Where Are Photos Stored On Android Phone

Where Are Photos Stored On Android Phone

Photos are an essential part of our lives, capturing precious moments and memories that we cherish. With the advent of smartphones, taking photos has become easier than ever. Android phones, in particular, offer a convenient way to store and access your photos. If you’re wondering where your photos are stored on your Android phone, you can find them in the Google Photos app. To access it, simply open the app on your phone or tablet. Once you’re in the app, tap on the “Library” tab at the bottom of the screen. In the Library, you’ll find the “Photos on device” folder. Tap on this folder to view the photos that are stored directly on your device. If you want to see photos from other folders on your device, you can open them within the Google Photos app. But what if you can’t find a specific photo in the Google Photos app? Don’t worry, there are other ways to locate your missing item. One option is to open the Gallery app on your Android device. You can find this app by tapping on the “Apps” icon on your Home screen and then selecting “Gallery” from the list. Once you’re in the Gallery app, you can open it from the Camera application by tapping on the thumbnail image in the lower right corner of the screen. From there, you can navigate through your device folders to find the missing photo. If you want these device folder items to appear in your Google Photos tab, you can back them up automatically. To do this, go back to the Google Photos app and tap on the three horizontal lines at the top left corner of the screen to open the menu. From there, select “Settings” and then choose “Back up & sync.” Toggle the switch to enable the backup of your device folders. Now, when you take photos or save them to specific folders on your Android device, they will automatically be backed up to your Google Photos account. This ensures that your photos are safe and accessible from anywhere, as long as you have an internet connection. When it comes to the actual location of the photos on your Android device, they are typically stored in the DCIM (Digital Camera Images) folder. To access this folder, you can open the File Explorer on your computer by pressing Win + E. Look for the Android device icon on the left panel of the File Explorer and click on the “Internal storage” option. Double-click on the “DCIM” folder to find your photos. If you have an SD card inserted in your device, you can also find the photos in the “SD card” folder under “DCIM.” It’s important to note that the specific location of the DCIM folder may vary slightly depending on your device’s manufacturer and operating system version. However, the general path should be similar across most Android devices. Photos on your Android phone are typically stored in the Google Photos app and the DCIM folder on your device. By utilizing these storage options and enabling automatic backup, you can ensure that your photos are safely stored and easily accessible whenever you need them. Where Are My Pictures On My Android Phone? To locate your pictures on your Android phone, follow these steps: 1. Open the Google Photos app on your Android device. If you don’t have it installed, you can download it from the Google Play Store. 2. Once the app is open, tap on the “Library” tab at the bottom of the screen. This will take you to the main library section of Google Photos. 3. In the library, you should see a section titled “Photos on device.” Tap on this section to view the folders on your device that contain your pictures. 4. If your pictures are stored in specific folders on your device, you can tap on the “Device folders” option to see a list of all the folders available. 5. Browse through the folders to find the specific folder where your missing pictures are potentially located. Tap on the folder to view its contents. – If you want to back up the items in your device folders to ensure they appear in your Google Photos library, you can enable the automatic backup feature. This will upload the photos and videos from your device folders to your Google Photos account, making them accessible in the Photos tab. – To enable automatic backup, go to the “Settings” section of the Google Photos app. Look for the “Back up & sync” option and ensure it is turned on. You can also customize the backup settings according to your preferences. By following these steps, you should be able to locate your pictures on your Android phone using the Google Photos app. Where Is The Gallery Folder In Android? To locate the gallery folder on your Android device, follow these steps: 1. From your Home screen, locate and tap on the “Apps” icon. It is usually represented by a grid of dots or squares, and it is typically found at the bottom of the screen or in the app drawer. 2. Once you have opened the Apps menu, scroll through the list of applications until you find the “Gallery” app. The Gallery app is used to view and manage your photos and videos on your device. 3. Tap on the “Gallery” app to open it. This will display all the photos and videos stored on your device. Alternatively, you can also access the Gallery app directly from the Camera application. When you open the Camera app, you will typically see a small thumbnail image in the lower right corner of the screen. Tapping on this thumbnail will open the Gallery app, allowing you to view the recently captured photos and videos. The Gallery folder on Android can be found by accessing the Gallery app either through the Apps menu or by tapping on the thumbnail image in the Camera application. Where Is The

How To View Text Messages On Icloud

How To View Text Messages On Icloud

ICloud is a powerful tool that allows you to store and sync your data across all of your Apple devices. With iCloud, it’s easy to keep your messages in sync across all of your devices, and view them anywhere. When you set up iCloud, all of your text messages are automatically backed up and stored on the cloud. This means that even if you delete a message on one device, it will still be available on other devices. This can be incredibly helpful if you accidentally delete an important conversation or message thread. To view your text messages in iCloud, open the Settings app on an iOS device or Mac computer and select “iCloud” from the list of options. Once there, you can turn on the “Messages” option to access all of your saved messages. On iOS devices, you can also select “Text Messages” from this same menu to access only text conversations. You can also view text messages from other Apple devices by signing into their iCloud account on yours. Just open the Messages app, select “Preferences” from the top menu bar, and then click “Accounts” in the window that pops up. From here you can add multiple Apple accounts so that all of their conversations appear in one spot for easy viewing and searching. It’s worth noting that while iCloud is convenient for keeping track of conversations between multiple Apple devices, it isn’t a foolproof way to save conversations forever. If someone deletes a conversation from their device after they’ve backed it up to iCloud, it will no longer be available on any other device connected to their account. For this reason, it’s always a good idea to back up important conversations using another service or method like screenshots or external drives just in case they get deleted unexpectedly. In conclusion, iCloud is an incredibly useful tool for keeping track of messages between multiple Apple devices and for retrieving accidentally deleted conversations and threads. With just a few clicks inside the Settings app or Messages app, you can easily view any message stored within your iCloud account as well as add other people’s accounts so that their messages appar alongside yours in one convenient location! Retrieving Old Text Messages from iCloud Yes, you can look up old text messages on iCloud. To do so, first make sure that iCloud Backup is enabled on your iPhone in the Settings app. Then open the Settings app, select your name at the top, choose iCloud > Manage Storage > Backups > Backup Now to save a backup to iCloud. Once the backup is complete, open the Find My app and go to Me > iCloud Settings > Manage Storage > Backups and select your device from the list. Tap Show All Apps and you’ll see a list of apps with data stored in your iCloud backup. Select Messages from this list to view all of your text messages saed in the backup. Source: macrumors.com Do Text Messages Get Saved in iCloud? Yes, text messages are saved in iCloud. All messages sent and received on your iPhone, iPad, and Mac are stored in iCloud and can be accessed from any device set up with your iCloud account. When you delete a message from one device, it is immediately removed from all other devices connected to the same iCloud account. Your messages are also encrypted before bing sent to iCloud for extra security. You can also back up your text messages to a third-party app or local storage if needed. Unable to View Messages on iCloud Messages in iCloud is end-to-end encrypted, which means that no one besides you and the recipient can access the contents of your messages. This means that you cannot view or access your Messages online via a browser, as the contents of your Messages are stored securely on Apple’s servers and accessible only from your devices. This added security helps keep your conversations private, ensuring that only those you intend to see them can view them. Viewing What Is Stored in iCloud To view what is stored in your iCloud, you will need to open the Settings app on your iPhone or iPad. From there, tap “iCloud” followed by “Storage & Backup” and then “Manage Storage.” Under the Documents & Data section, you can see whch apps have stored documents in your iCloud. This includes both iOS and OS X apps. You can also view how much storage space each app is using on your device and manage it accordingly. Additionally, if you want to free up some space in your iCloud storage, you can delete files or folders that are no longer needed directly from the Manage Storage page. Conclusion In conclusion, iCloud is a powerful tool for backing up and storing important data. It offers users the ability to sync messages, photos, mail, contacts, notes, passwords and more across multiple devices. Messages in iCloud are updated automatically so you can keep them up-to-date on all your devices. If you ever need to recover deleted text messages from your iPhone, iCloud has you covered by allowing you to restore it with an iCloud backup. With iCloud’s easy setup and wide array of features, it’s no wonder why so many people trust their data with Apple’s cloud service. Louis MuganLouis Mugan is a seasoned technology writer with a talent for turning complicated ideas into clear, practical guidance. He focuses on helping everyday readers stay confident in a world where tech moves fast. His style is approachable, steady, and built on real understanding. He has spent years writing for platforms like EasyTechLife, where he covers gadgets, software, digital trends, and everyday tech solutions. His articles focus on clarity, real-world usefulness, and helping people understand how technology actually fits into their lives. Outside of his regular columns, Louis explores emerging tools, reviews products, and experiments with new tech so his readers don’t have to. His steady, friendly approach has made him a reliable voice for anyone trying to keep

Restore the Google Search Bar: Android Widget, iOS Widget, and Chrome Settings

Restore the Google Search Bar: Android Widget, iOS Widget, and Chrome Settings

Did your Google search bar go missing? If you want to restore your Google Search bar after it disappeared, you have come to the right place. In this guide, I will show you how to restore the Google search bar, both on your phone (whether it’s an Android or iOS phone) and on Chrome on desktop. Let’s get into it. Android Home Screen: Add or Customize the Google Search Widget If you want to add the Google Search bar widget to your Android home screen, press and hold on your phone’s home screen and then select “Widgets.” Scroll down until you see the section called “Google.” Then, find the Google search bar widget. Press and hold it and drag it to anywhere on your home screen. On Android phones, the Google app will be installed by default, so you won’t have to download it manually. iPhone or iPad Home Screen: Add the Google Search Widget On an iPhone, the process is pretty similar. However, since the Google app is not installed by default on iPhones, you will need to download it from the App Store first. Then, open the app at least once before proceeding. Finally, you can proceed to add the widget in the same manner as before. Just long-press on the home screen, tap Edit and then Add Widget, find and click on Google, and then select the search bar widget you would like to add. Chrome on Computer: Show the Home button and Set Google for It If you want to make it easier to search for something on Google when using Chrome, make sure to add the Home button to your toolbar at the top of Chrome. To do that, type or paste chrome://settings/appearance in your browser bar and toggle on the “Show Home Button” option, while making sure it’s set to the “New Tap Page” option. This will add a small home button to the left of the search bar at the top of Chrome. Click on it to be taken to a new tab page, which will display the Google search bar. Chrome Default Search Engine (Desktop and Android) .Another thing to consider is which search engine is the default search engine. If you want to use Google to search, you need to make sure that Google is set to be the default search engine and not another search engine like Bing or DuckDuckGo. On Chrome desktop, you can do that by typing or pasting chrome://settings/search in your browser bar and making sure Google is selected as the default search engine. If it’s not, click on “Change” and then select Google. On Chrome mobile, go to Settings > Search Engine and select Google. If the Widget or Google App Isn’t Working on Android If the widget or the Google app is not working properly on Android, try the following fixes: Make Sure Chrome Opens by Default on Android (Optional But Helpful) Another thing worth considering is setting Chrome as your default browser on Android. This will ensure that when you open links on apps like WhatsApp or Instagram, it uses Chrome by default. To do that, go to Settings > Apps > Default Apps > Browser App and select Chrome. Chrome needs to be installed for this to work. Conclusion Personally, I prefer Google and Chrome over other browsers and search engines, so I always keep both as my default options. I like the layout and user experience of both, and if you do too, I hope this guide was helpful! Louis MuganLouis Mugan is a seasoned technology writer with a talent for turning complicated ideas into clear, practical guidance. He focuses on helping everyday readers stay confident in a world where tech moves fast. His style is approachable, steady, and built on real understanding. He has spent years writing for platforms like EasyTechLife, where he covers gadgets, software, digital trends, and everyday tech solutions. His articles focus on clarity, real-world usefulness, and helping people understand how technology actually fits into their lives. Outside of his regular columns, Louis explores emerging tools, reviews products, and experiments with new tech so his readers don’t have to. His steady, friendly approach has made him a reliable voice for anyone trying to keep up with modern technology. get in touch at louismugan@gmail.com

How to Easily Transfer and Back Up Your Google Authenticator on iOS

How to Easily Transfer and Back Up Your Google Authenticator on iOS

Backing up your Google Authenticator account credentials is essential for protecting your data and making sure you never lose access to your accounts. With the iOS version of Google Authenticator, backing up your accounts has never been easier. iCloud makes it possible to back up and restore your accounts easily and securely so that you can keep using the app on different devices without any hassle. To back up your information using iCloud, first open Google Authenticator on your iPhone or iPad. Tap the menu button at the top-right of the app and choose Transfer Accounts. Choose Export Accounts and select which accounts you’d like to transfer to a new phone. Then go to Settings, select Backup, and turn on iCloud backup. Your account credentials are now backed up to your iCloud account. Once this is done, you can restore your iPhone or iPad from iCloud with all of your account information intact. To do this, open Google Authenticator again on your device and tap Transfer Accounts once more. Choose Import Accounts to restore everything from iCloud. This makes it easy to sync all of the accounts that you have saved in Google Authenticator between different iOS devices without having to manually re-enter them each time. Backing up your account credentials with iCloud is a great way to make sure that you never lose access to important accounts due to lost or stolen phones. Whether you’re switching from Android or just getting a new device, this simple process will make it easy for you to keep all of the data associated with Google Authenticator safe and secure in the cloud. Does an iPhone Backup Include Google Authenticator? Yes, if you back up your information using iCloud, you can restore your iPhone or iPad from iCloud and the Google Authenticator app will be available. The iCloud backup will contain the version of the Authenticator app that was used when the backup was created. This means that if you make changes to the Authenticator app after the last backup, those changes won’t be included in the iCloud restore. Backing Up Your iPhone Authenticator App Backing up your iPhone’s Authenticator app is easy. To do so, open the Settings app and tap your Apple ID at the top of the page. Then select iCloud > Backup and turn on iCloud Backup. Once enabled, all of your account credentials will be securely backed up to your iCloud account. It’s important to note that only cloud-based authenticators (like Google Authenticator) can be backed up in this way – local (non-cloud) authenticators will have to be manually re-entered if you ever need to restore them. Does Google Authenticator Backup on iCloud? No, Google Authenticator does not get backed up in iCloud. The iOS version of the app backs up to iCloud, while the Android version uses a different cloud service for syncing. This means that users will need to manually back up and restore their Authenticator data if they switch between iOS and Android devices. Recovering Google Authenticator on a New iPhone Without the Old Phone If you have lost your old phone and are trying to recover Google Authenticator on a new iPhone, unfortunately, there is no way to directly transfer the authentication codes from the old device. You’ll need to disable two-step verification or delete any accounts that require it on the old phone, then re-enable two-step verification on the new device and set up all of your accounts again. To disable two-step verification on the old phone:1. Open Settings on your old phone and select “Passwords & Accounts.”2. Select “Google” from the list of accounts, then tap “Sign Out” at the bottom of the page.3. Tap “Turn Off” when prompted if you want to turn off two-step verification for this account. To enable two-step verification for a new iPhone:1. Install Google Authenticator from the App Store and open it on your new phone.2. Visit https://myaccount.google.com in a web browser, select “Sign in & security”, then select “2-Step Verification” or “Signing in to Google”.3. Follow the prompts to set up two-factor authentication using Google Authenticator app installed on your new device by scanning a QR code or entering a code provided by Google into the app.4. Once complete, you will be able to generate codes using Google Authenticator on your new device as needed when logging into any services that require it. Transferring Google Authenticator to a New iPhone Without the Old Phone To transfer Google Authenticator to a new iPhone without your old phone, you will first need to deactivate the app on your old device. To do this, open the Google Authenticator app on your old device and select ‘Remove Account’ from the Settings menu. Once that is done, you can install the Google Authenticator app on your new iPhone and log in using your Google Account credentials. You will then be presented with a QR code or secret key that you can use to link the account with the new device. If you are presented with a QR code, simply scan it using your new iPhone’s camera; if you are presented with a secret key, enter it manually into the app. Once it is linked, you will be able to use Google Authenticator to generate two-factor authentication codes for your account on both devices. Restoring Google Authenticator to a New Phone If you have access to your old Authenticator, you can easily restore all your accounts to a new device by scanning the QR code with that device. To do this, open the Google Authenticator app on both devices. On the new device, tap the three dots in the top right corner and select ‘Scan Barcode’. Then use your old device’s camera to scan the QR code shown on the new device. This will add all of your accounts to the new phone. If you’ve lost your old phone and don’t have a backup QR code, unfortunately, there is no way to recover Authenticator on a new phone. Make sure

Where Is Browser On My Phone

Where Is Browser On My Phone

If you’re wondering which internet browser you are using on your phone, there are a few ways to find out. One way is to go into your phone’s settings. To do this, go to the Settings app, usually represented by a gear icon. Once you’re in the settings, look for the section called “Applications” or “Apps.” In this section, you may need to tap on “Manage Applications” or “App Manager” to access the list of installed apps on your phone. Scroll through the list of apps until you find your web browser. It may be called “Browser” or “Internet,” depending on the version of Android you have. Once you locate the browser, tap on it to access its settings. Look for an option that says “Set as default” or something similar. If the browser is already set as the default, it means that any actions that involve opening a web page will automatically use this browser. Another way to check which browser you are using is to open the browser itself. Once the browser is open, look for a button or icon at the top of the screen that represents the browser’s menu. This is usually represented by three horizontal lines or dots. Tap on this button to open the browser’s menu. In the menu, look for an option called “Settings” or something similar. Tap on this option to access the browser’s settings. Within the settings, there should be a section that displays information about the browser, including its name and version. This will confirm which browser you are currently using on your phone. It’s important to note that different Android devices and versions may have slightly different steps to find the browser and its settings. However, these general instructions should help you locate the browser and determine if it is set as the default on your phone. Where Is The Browser App On My Phone? To locate the browser app on your phone, follow these steps: 1. Unlock your phone and go to the home screen. 2. Look for an icon that resembles a globe or a compass. This is usually the symbol used to represent a web browser. The icon may vary slightly depending on the make and model of your phone. 3. If you have an Android device, you may find the browser app in the app drawer. Swipe up from the bottom of the screen or tap the app drawer icon (usually a grid of dots or squares) to access all the installed apps on your phone. Scroll through the list of apps and look for an icon that represents a web browser. 4. If you are using an iPhone, the browser app is typically located on the home screen. Look for an icon labeled “Safari,” which is the default web browser for iOS devices. 5. If you still can’t find the browser app, you can use the search feature on your phone. Swipe down on the home screen (on Android) or swipe right from the home screen (on iPhone) to access the search bar. Type in keywords such as “browser” or “internet” to locate the app. Remember, the location of the browser app may vary depending on the specific phone model and the version of the operating system you are using. If you are unable to find the browser app using these instructions, you may need to refer to the user manual or contact the manufacturer for further assistance. Where Is My Browser Settings? To locate your browser settings, follow these steps: 1. Look for the button located at the very top of your web browser.2. Click on the button to open a drop-down menu.3. From the menu, select “Settings.” This action will launch a new tab in your browser, displaying the default browser settings. By following these steps, you will be able to access and modify various settings within your browser. How Do I Find Out What My Browser Is? To manually determine the internet browser you are using, follow these steps: 1. Look at the icon on your desktop or in your taskbar. The icon represents the internet browser you have installed on your computer.2. If you are using a Windows computer, the most common browsers have the following icons:– Google Chrome: A red, green, yellow, and blue circle arranged in a pattern.– Mozilla Firefox: A blue globe with an orange fox wrapped around it.– Microsoft Edge: A blue “e” with a white background.– Internet Explorer: A blue “e” with a gold ring around it.– Safari: A blue compass-like icon with a white background (commonly found on Mac computers).3. On a Mac computer, the icons might be slightly different, but you can still identify the browser by its distinctive logo or name.4. If you have pinned the browser to your taskbar or dock, you can also identify it by looking at the icon there.5. Another way to determine your browser is by opening it and looking at the title bar at the top of the window. The title bar usually displays the name of the browser you are using. By following these steps, you should be able to identify the internet browser you are using based on the icon or title bar of the browser window. How Do I Find My Default Browser On My Phone? To locate the default browser on your phone, follow these steps: 1. Open the Settings on your phone.2. Scroll up or down to find and tap on the “Apps” option.3. In the Apps menu, you may need to scroll further to locate the “Choose default apps” option and tap on it.4. Look for the “Browser app” setting and tap on it. By following these steps, you will be able to identify and change your default browser on your phone. Please note that the exact steps may vary slightly depending on the make and model of your phone and the version of the operating system it is running. Conclusion Determining the default web browser on your phone

How to Keep Your Icons From Moving On Android?

How to Keep Your Icons From Moving On Android?

Android is a popular operating system used in smartphones and tablets. One of the common issues faced by Android users is the icons on their home screen moving around. This can be frustrating, especially if you have set up your home screen in a particular way. In this article, we will discuss how to keep your icons from moving on Android. The first step to prevent your icons from moving on Android is to enable the “Lock Home screen layout” feature. This can be done by opening the Settings app on your Samsung phone or tablet and accessing the “Home screen” section. Alternatively, you can pinch the home screen and tap the cog-shaped settings icon. Once in the Home screen settings menu, toggle on the “Lock Home screen layout” option. This feature will prevent any accidental dragging or rearranging of icons on your home screen. If you have already enabled the “Lock Home screen layout” feature and your icons are still moving around, then you may need to reset your home screen layout. To do this, go to Settings > Applications > Running Services, and then click the “All” tab. Scroll down to TwLauncher and clear the data. This will reset your icons, so make a note of where you have placed them before resetting your home screen. Another way to prevent icons from moving on Android is to use the screen pinning feature. This feature allows you to lock a specific app on your screen, preventing accidental swipes or taps that may move your icons around. To enable screen pinning, go to Settings and select Security or Biometrics and Security> Other security settings. Scroll down to Advanced and select the toggle next to Pin windows. Turn on the Screen pinning toggle switch to enable screen pinning. In addition to these methods, there are other Android security features you can use to protect your home screen layout. For example, you can enable the “Ask for PIN before unpinning” feature, which requires a PIN or password to unpin a pinned app. To enable this feature, go to Settings and tap on “Security & Location.” Tap “Advanced,” then “Screen Pinning.” Toggle Screen Pinning to the “on” position, then toggle “Ask for PIN before unpinning” to “on” as well. There are several ways to keep your icons from moving on Android. Enabling the “Lock Home screen layout” feature, resetting your home screen layout, using screen pinning, and enabling other security features can all help prevent the accidental rearranging of icons on your home screen. By taking these steps, you can ensure that your home screen remains organized and functional. How Do I Lock Android Icons In Place? To lock Android icons in place, you can follow these steps: 1. Open the Settings app on your Android device.2. Scroll down and select “Apps” or “Applications,” depending on your device.3. Tap the three-dot menu icon in the top-right corner of the screen.4. Select “Home Screen Settings” or “Home Screen.”5. Look for an option that says “Lock Home Screen” or “Lock Layout” and toggle it on.6. Once enabled, your icons will be locked in place and can’t be moved unless you turn off the lock feature. Alternatively, you can long-press on an empty area of your home screen, select “Home Screen Settings” or “Settings,” and follow the same steps as above to enable the lock feature. By locking your Android icons in place, you can prevent accidental rearrangement of your home screen and keep your device organized according to your preferences. Why Do My Apps Keep Rearranging Themselves Android? There are a few reasons why your apps may keep rearranging themselves on an Android device. Here are some possible causes: 1. Launcher settings: The launcher on your Android device is responsible for displaying the apps on your home screen. If the launcher settings are not configured properly, it may cause the apps to rearrange themselves. For example, if you have set your launcher to automatically sort apps alphabetically, any new app you install will be added to its respective alphabetical order, which can cause the apps to shift around. 2. App updates: When you update an app, it may change its icon or size, which can cause the app to move to a different location on your home screen. 3. Third-party apps: Some third-party apps may interfere with your launcher settings and cause your apps to rearrange themselves. For example, a battery-saving app may close your launcher in the background, causing it to restart and rearrange the apps. 4. Corrupted data: If the data associated with your launcher or home screen is corrupted, it may cause the apps to rearrange themselves. Clearing the data associated with your launcher or home screen may fix this issue. To prevent your apps from rearranging themselves, you can try the following solutions: – Lock your home screen: Some launchers allow you to lock your home screen, which prevents any accidental changes.– Disable auto-sorting: If your launcher automatically sorts apps, you can disable this feature to prevent any unwanted changes.– Reinstall your launcher: If your launcher is causing the issue, try reinstalling it to see if it fixes the problem.– Clear data: If the issue persists, try clearing the data associated with your launcher or home screen to reset it to its default settings. How Do I Lock Apps Not To Move? To lock apps and prevent them from moving on your Android device, you can use the screen pinning feature. First, open the Settings app on your device and select the Security or Biometrics and Security option. From there, scroll down to the Advanced section and choose the Other security settings option. Next, select the toggle switch next to Pin windows to enable this feature. Once you have enabled pin windows, you can proceed to turn on the Screen pinning toggle switch. This will allow you to pin a specific app to the screen, preventing it from being moved or closed accidentally. To pin an app, simply open it

Where is the Recycle Bin on Your Android Phone?

Where is the Recycle Bin on Your Android Phone?

The Recycle Bin is a useful feature that allows you to recover accidentally deleted files on your Android phone. Whether it’s a photo, video, or document, the Recycle Bin helps prevent permanent loss of important data. In this article, we will explore how to access and use the Recycle Bin on your Android device. To begin, open the Google Photos app on your Android phone. This app serves as your default Gallery and also houses the Recycle Bin. Once opened, tap on the Library icon located at the bottom right corner of the app. This will take you to the Library section, where you can find various folders and options related to your photos and videos. Within the Library section, look for the Trash folder. This is where all your deleted files are temporarily stored. Tap on the Trash folder to open the Recycle Bin on your phone. Here, you will find a list of all the files that you have deleted within the past 30 days. To restore a file from the Recycle Bin, simply select the file you want to recover and tap on the Restore option. This will move the file back to its original location in your Gallery or Google Photos app. It’s important to note that files in the Recycle Bin are automatically deleted after 30 days, so make sure to restore them within this timeframe. It’s worth mentioning that the Recycle Bin is not limited to just photos and videos. If you use Google Drive, you can access the Trash folder within the Google Drive app as well. Open the app, navigate to the file you want to recover, and tap on the Restore option. This will restore the file to its original location within Google Drive. In terms of where the Recycle Bin is located on your Android phone, it is stored in the root directory of the C drive. The root directory is the highest level directory in the file system hierarchy, containing all the files and folders on your device. The Recycle Bin folder is a hidden system folder named “$Recycle.Bin”. The Recycle Bin is a valuable feature that helps protect against accidental file deletion on your Android phone. By following the steps outlined above, you can easily access and restore deleted files from the Recycle Bin within the Gallery or Google Drive app. Remember to act promptly as files in the Recycle Bin are automatically deleted after 30 days. Where Do Deleted Files Go on Android Phone? Deleted files on an Android phone typically go to a designated folder called the Recycle Bin or Recently Deleted folder. This folder is located within the Gallery app, where all the photos and videos are stored. When you delete a file from your Android phone, it is not permanently removed from the device immediately. Instead, it is moved to the Recycle Bin or Recently Deleted folder, where it remains for a certain period of time, usually 30 days. To retrieve deleted files from the Recycle Bin or Recently Deleted folder, follow these steps: 1. Open the Gallery app on your Android phone.2. Look for the option or icon labeled “Recycle Bin” or “Recently Deleted.” It may be located in the menu or settings of the Gallery app.3. Tap on the Recycle Bin or Recently Deleted folder to access its contents.4. Browse through the files in the Recycle Bin or Recently Deleted folder to find the ones you want to recover.5. Select the desired files by tapping on them. You can select multiple files if needed.6. Once you have selected the files, look for an option to restore or recover them. This option may be represented by an icon or a label such as “Restore” or “Recover.”7. Tap on the restore or recover option, and the selected files will be returned to their original location in the Gallery or other designated folders. It’s important to note that the Recycle Bin or Recently Deleted folder acts as a temporary storage for deleted files. After the designated period of time, usually 30 days, the files within this folder are automatically permanently deleted from the device. Therefore, it’s advisable to retrieve any important files from the Recycle Bin or Recently Deleted folder as soon as possible to avoid permanent loss. How Do You Get to the Recycle Bin on Your Phone? To access the Recycle Bin on your Android phone, follow these steps: 1. Open the Google Photos app on your Android phone. It is usually pre-installed on most Android devices. 2. Once the app is open, you will see various options at the bottom of the screen. Tap on the “Library” option, which is located at the bottom right corner of the app. This will take you to the Library section of the app. 3. In the Library section, you will find different categories such as Photos, Albums, and Trash. Tap on the “Trash” option to open the recycle bin on your phone. 4. When you enter the Trash section, you will see all the deleted photos and videos that are currently in the recycle bin. You can browse through the items and select the ones you want to restore or permanently delete. It’s important to note that the Recycle Bin or Trash feature may vary slightly depending on the version of the Google Photos app or the custom Android skin used on your phone. However, the general steps mentioned above should help you access the recycle bin on most Android devices. If you are unable to find the Recycle Bin in the Google Photos app, you can also try checking your phone’s default gallery app, as some Android devices have a separate recycle bin or trash folder within the gallery app. Additionally, some file manager apps may also have a dedicated recycle bin feature where deleted files are temporarily stored. How Do You Recover Deleted Files on Android? To recover deleted files on Android, you can follow these steps: 1. Check the Trash or

How To Transfer Photos From Android To External Hard Drive

How To Transfer Photos From Android To External Hard Drive

Transferring photos from your Android device to an external hard drive can be a convenient way to free up storage space and keep your precious memories safe. In this article, we will guide you through the process of connecting an external hard drive to your Android phone and transferring photos to it. Before we begin, it’s important to check if your Android phone supports USB On-The-Go (OTG) functionality. This feature allows you to connect external devices, like a hard drive, to your phone. Once you’ve confirmed that your phone is OTG compatible, you can proceed with the following steps: Step 1: Select a suitable external hard drive for your phone. Make sure it has enough storage capacity to accommodate your photo collection. Consider factors like portability, durability, and compatibility with your phone’s operating system. Step 2: Ensure that your phone has enough power to support larger capacity external drives. Some phones may require an additional power source, such as a powered USB hub, to connect and power the hard drive. Step 3: Connect the external hard drive to your phone using a USB OTG cable or adapter. Plug one end of the cable into your phone’s charging port, and the other end into the USB port of the external hard drive. Step 4: Once connected, your phone should recognize the external hard drive as a storage device. You can now access the File Manager on your Android device. Navigate to the DCIM folder and locate the Camera folder, where your photos are typically stored. Step 5: Select the desired photos that you want to transfer to the external hard drive. Tap on the Copy button or option available in your File Manager. Step 6: Go back to the File Manager and open the external hard drive. Create a new folder if needed and navigate to it. Paste the copied photos into this folder. Congratulations! You have successfully transferred your photos from your Android device to an external hard drive. This process allows you to create a backup of your photos and free up valuable space on your phone. In addition to manually transferring photos, you can also set up automatic photo backup using various apps. For example, the Seagate Media app allows you to enable auto-upload, which automatically transfers your photos from your Android device to your external hard drive whenever it is connected. To enable auto-upload, open the Seagate Media app on your phone. Tap the menu icon and go to Settings. Locate the Auto Upload option and turn it on. You will have the choice to select whether to upload photos or videos. This feature ensures that your photos are automatically backed up to the external hard drive without manual intervention. Transferring photos from your Android device to an external hard drive is a simple and effective way to free up storage space and safeguard your memories. By following the steps mentioned above and considering auto-upload options, you can easily manage your photo collection and keep it organized across different devices. How To Transfer Photos From Android Phone To External Hard Drive Directly? To transfer photos from your Android phone to an external hard drive directly, follow these steps: 1. Enable USB Debugging:– Go to Settings on your Android device.– Scroll down and tap on About phone (or About device).– Find the Build number and tap on it repeatedly (around 7 times) until you see the message “You are now a developer”.– Go back to the main Settings menu and tap on Developer options.– Scroll down and find USB debugging, then toggle it on. 2. Connect your Android phone to the external hard drive:– Connect your Android phone to the external hard drive using a USB cable or an OTG (On-The-Go) adapter cable. 3. Open the File Manager on your Android device:– Go to your app drawer and find the File Manager app (sometimes called File Explorer or My Files).– Tap to open the app. 4. Navigate to the DCIM folder:– In the File Manager, locate and open the DCIM folder. This folder usually contains your camera photos. 5. Choose the desired photos:– Inside the DCIM folder, you should see a folder named Camera. Tap on it to open it.– Browse through the photos and select the ones you want to transfer to the external hard drive. You can tap and hold to select multiple photos. 6. Copy the selected photos:– Once you have selected the desired photos, look for the Copy button or option (usually represented by two overlapping squares or a menu icon).– Tap on the Copy button to copy the selected photos. 7. Paste the photos to the external hard drive:– Go back to the File Manager and navigate to the external hard drive. It may appear as a separate storage device or under a folder named “Removable Storage” or similar.– Open the desired folder on the external hard drive where you want to transfer the photos.– Tap on the Paste button or option to paste the copied photos from your Android phone to the external hard drive. 8. Wait for the transfer to complete:– The transfer process may take some time, depending on the size of the photos and the speed of the connection between your phone and the external hard drive.– Once the transfer is complete, you can safely disconnect the USB cable or OTG adapter from your Android phone and the external hard drive. By following these steps, you should be able to transfer your photos directly from your Android phone to an external hard drive without the need for a computer or any additional software. How To Transfer Photos From Android To Seagate External Hard Drive? To transfer photos from your Android device to a Seagate external hard drive, you can follow these steps: 1. Connect your Seagate external hard drive to your Android device using a USB cable or an adapter, depending on the type of connection available.2. On your Android device, open the File Manager app or any

How Do You Forward an Entire Text Thread to Email?

How Do You Forward an Entire Text Thread to Email?

Text messaging has become an integral part of our communication, allowing us to send and receive important information quickly and conveniently. However, there may be instances where you need to forward an entire text thread to an email for various reasons. In this article, we will explore the steps to accomplish this task seamlessly. Step 1: Open the messaging app on your iPhone and navigate to the conversation thread that you want to forward to email. It could be a series of messages with a specific contact or a group conversation. Step 2: Once you’ve accessed the desired text thread, do a long press on any message within the conversation. This action will bring up a menu with several options. Step 3: From the options menu, select “More” to access additional choices related to the selected message. This will enable you to perform various actions on the thread. Step 4: In the expanded options menu, locate and tap on the “Forward” message option. This will initiate the process of forwarding the entire text thread to an email. Step 5: A new email composition window will appear, allowing you to enter the recipient’s email address in the “To” field. Ensure that you input the correct email address to ensure the message reaches the intended recipient. Step 6: Before sending the email, you may want to review the forwarded text thread to ensure all the messages are included. Take a moment to scroll through the conversation and verify that nothing important has been missed. Step 7: Once you are satisfied with the forwarded text thread, simply tap on the “Send” button to send the email containing the entire conversation. By following these simple steps, you can efficiently forward an entire text thread to an email from your iPhone. This can be particularly useful in situations where you need to save or document important conversations for future reference or legal purposes. Whether it’s a personal or professional matter, having the ability to forward text threads to email provides a convenient way to store and share information. Forwarding an entire text thread to email is a straightforward process that can be accomplished in a few simple steps. By following the instructions outlined in this article, you can ensure that your important conversations are easily accessible and shareable via email. So the next time you find yourself needing to forward a text thread, you can do so with confidence and ease. How Do You Forward a Text Chain on Your iPhone to Email? To forward a text chain from your iPhone to email, follow these steps: 1. Open the Messages app on your iPhone.2. Locate the text chain that you want to forward to email.3. Tap and hold on the text chain until a menu appears.4. In the menu, select “More” to access additional options.5. The selected text chain will now have a checkmark next to it, and you can tap on other text chains to select multiple ones if needed.6. At the bottom of the screen, you’ll see a forward arrow icon. Tap on it.7. A new message window will open with the selected text chain already inserted. In the “To” field, enter your email address or the recipient’s email address.8. You can add any additional information or comments to the email if desired.9. tap the send button to forward the text chain to the specified email address. By following these steps, you’ll be able to easily forward a text chain from your iPhone to email for easier sharing or archiving purposes. Can You Forward a Whole Text Thread? It is possible to forward an entire text thread on most smartphones. To do so, follow these steps: 1. Open the messaging app on your smartphone.2. Locate the text thread that you want to forward.3. Tap and hold on one of the text messages within that thread.4. A menu will appear with various options. Choose “Forward Message” from the menu.5. Now, you can select all of the text messages you want to forward. Tap on each message one by one to select them.6. As you select each message, you will notice that they are highlighted or marked.7. Once you have selected all the desired messages, look for the forwarding arrow or an option that says “Forward” and tap on it.8. A new message window will open with the selected text messages. Enter the recipient’s name or phone number in the “To” field.9. You can also add any additional comments or context to the forwarded messages, if needed.10. tap on the send button to forward the entire text thread to the chosen recipient. By following these steps, you can easily forward a whole text thread from your smartphone to another person. How Do You Send a Text Thread to an Email? To send an entire text thread to an email, follow these steps: 1. Open the messaging app on your device.2. Locate and open the conversation thread that you want to forward.3. Once you are in the conversation, press and hold on the specific message that you wish to forward. This will bring up additional options.4. Look for the “More” option and tap on it. This will expand the list of available actions.5. From the expanded list, select the “Forward” option. This will open a new window.6. In this new window, you will see a field where you can enter the recipient’s email address. Type in the email address to which you want to send the text thread.7. Double-check the email address to ensure it is entered correctly.8. tap on the “Send” button to forward the entire text thread to the specified email address. By following these steps, you can easily forward an entire text thread to an email address for convenient storage, archiving, or sharing purposes. How Can You Share an Entire Text Thread? To share an entire text thread from your device, follow these steps: 1. Open the messaging app on your device.2. Locate the conversation or text thread that you want to

How Do You Make Phone Calls From Your Android Tablet?

How Do You Make Phone Calls From Your Android Tablet?

In today’s digital age, smartphones have become an essential part of our lives. They not only allow us to stay connected with our loved ones but also serve as a mini-computer in our pockets. However, what if you want to make phone calls from a device that is not specifically designed for that purpose, like an Android tablet? Can you still use it as a phone? The answer is yes, and in this article, we will explore how you can make phone calls from your Android tablet. One of the key requirements for making phone calls on an Android tablet is having a SIM card slot. However, not all tablets come with this feature. But fret not, as there are alternative methods to make phone calls even without a SIM card slot. Let’s delve into some of these methods. Firstly, you can utilize the power of the internet through various communication apps. Apps like Skype, WhatsApp, and Google Voice allow you to make calls over Wi-Fi or cellular data. These apps utilize Voice over Internet Protocol (VoIP) technology to transmit voice signals over the internet, making it possible for you to make phone calls without a traditional SIM card. To use these apps, you’ll need to download and install them from the Google Play Store. Once installed, sign in or create an account, and you’ll be able to make phone calls to other users of the same app or even to regular phone numbers. You may need to purchase credits or a subscription for some services to make calls to non-app users or international numbers. Another option to make phone calls from your Android tablet is by using the “Call & text on other devices” feature. This feature is available on certain Samsung devices and allows you to make and receive calls or send messages on your tablet using your existing phone number. To use this feature, you need to sign into the same Samsung account on both your phone and tablet and activate the “Call & text on other devices” option in the settings. Additionally, if your Android tablet supports Bluetooth connectivity, you can pair it with a Bluetooth-enabled phone and use the tablet as a hands-free device. Once connected, you can make and receive phone calls using your tablet’s microphone and speakers. This method allows you to use your tablet as a phone without the need for any additional apps or services. It’s worth noting that not all Android tablets support these features, so it’s essential to check your tablet’s specifications or contact the manufacturer to confirm its capabilities. Furthermore, depending on your location and service provider, there may be additional charges or limitations when making phone calls through these alternative methods. While Android tablets may not be explicitly designed to make phone calls, there are several ways to utilize them as a phone. Whether it’s through communication apps, the “Call & text on other devices” feature, or Bluetooth connectivity, you can stay connected and make phone calls from your Android tablet. So, go ahead and explore these options to conveniently make phone calls from your tablet, even without a SIM card slot. Can a Samsung Tablet Be Used as a Phone? A Samsung tablet, such as the Galaxy Tab, can indeed be used as a phone. While it is primarily designed and marketed as a tablet, with a larger screen size and more functionality than a traditional smartphone, it is still capable of making calls and sending text messages. To use a Samsung tablet as a phone, you don’t need any additional expensive accessories. Instead, you can simply rely on the built-in features and settings of the device. Here’s how you can do it: 1. Check for cellular capabilities: Before using your Samsung tablet as a phone, make sure it has cellular capabilities. Some models offer both Wi-Fi and cellular connectivity options, while others are limited to Wi-Fi only. If your tablet supports cellular connectivity, you can use it as a phone. 2. Insert a SIM card: If your Samsung tablet has a SIM card slot, you’ll need to insert a SIM card in order to use it as a phone. The SIM card will provide you with a phone number and cellular service, allowing you to make calls and send texts. Ensure that the SIM card is activated and has a data plan if you wish to use mobile data. 3. Set up calling and messaging apps: Once your tablet is equipped with a SIM card, you can start using it as a phone. You can make calls and send texts using the built-in calling and messaging apps on your tablet. These apps typically come pre-installed, but if they are not, you can download them from the Google Play Store. 4. Make calls: To make a call, open the calling app on your tablet and dial the desired phone number. You can either enter the number manually or select it from your contacts. Once the call is connected, you can talk using the tablet’s built-in microphone and speakers, or you can connect a headset or Bluetooth device for better audio quality. 5. Send texts: To send text messages, open the messaging app on your tablet and compose a new message. Enter the recipient’s phone number or select it from your contacts. Type your message and hit send. Your tablet will use the cellular network to send the text message. It’s important to note that using a tablet as a phone may have some limitations compared to using a dedicated smartphone. For example, tablets are usually larger and less portable than phones, making them less convenient for everyday phone calls. Additionally, tablets may not support certain phone-related features like VoLTE (Voice over LTE) or HD Voice. While a Samsung tablet is primarily a tablet, it can still be used as a phone with the right setup. By inserting a SIM card, setting up calling and messaging apps, and using the tablet’s built-in features, you can make

Where Are Text Messages Stored On Android

Where Are Text Messages Stored On Android

Text messages have become an integral part of our daily communication, allowing us to stay connected with friends, family, and colleagues. But have you ever wondered where these text messages are stored on your Android device? In this article, we will explore the fascinating world of text messages and uncover their storage locations on Android phones. By default, all text messages sent and received on Android devices are saved on the phone itself. When you open the Messages app, you will be greeted with a list of contacts or conversations, displaying the history of messages exchanged. This convenient feature allows you to easily access and review your past conversations. However, it’s important to note that if you only have a SIM card, you won’t be able to view the text messages saved on the phone. To save them on the SIM card or SD card, you would need to manually move each message one by one. It’s a time-consuming process but can be useful if you want to keep a backup of your messages on external storage. But what if you accidentally delete a text message? Is it gone forever? The answer is not necessarily. Android devices have a backup system in place that automatically stores your data, including text messages, on Google Drive. This means that even if you delete a message from your device, it may still be recoverable from your backups. To access these backups, you can use the Android app, but unfortunately, you won’t be able to view the contents of the backups directly. However, the backup process can be manually triggered in your phone settings, giving you more control over when and how your messages are backed up. Now, you might be wondering how long these deleted messages stay on your device before they are overwritten. The truth is, there’s no specific time limit. As long as the messages haven’t been overwritten by new data, they can be recovered. So, if you accidentally delete a message, it’s crucial to stop using your device immediately to increase the chances of successful recovery. Text messages on Android devices are stored on the phone itself by default. You can access them through the Messages app, where you will find a list of contacts or conversations. If you want to save messages on external storage, such as a SIM card or SD card, you’ll need to manually move them. Additionally, Android devices have a backup system that stores your data, including text messages, on Google Drive. While you can’t view the contents of the backups directly, they can be a lifesaver if you accidentally delete a message. Remember to stop using your device once you realize you’ve deleted messages to increase the chances of recovery. How Do I Find Text Messages On My Android? To find text messages on your Android device, follow these steps: 1. Open the Messages app on your Android device. This app is usually represented by a messaging icon, which looks like a speech bubble or a conversation box. 2. Once you open the app, you will see a list of individual contacts or conversation threads. These contacts are the ones who have sent you a text or whom you have sent a text to. 3. Scroll through the list to find the specific contact or conversation that contains the text messages you are looking for. 4. Tap on the contact or conversation to open it. This will display the text messages exchanged between you and that contact. 5. You can now view the text messages that you have sent or received within this conversation. The messages will be displayed in chronological order, with the most recent messages appearing at the bottom. 6. If you have a large number of messages in the conversation, you can scroll up to view older messages. That’s it! You have successfully found your text messages on your Android device. You can repeat these steps for other contacts or conversations to view their respective text message history. Please note that the exact steps may vary slightly depending on the make and model of your Android device, as well as the version of the operating system you are using. Are All Text Messages Saved Somewhere? All text messages are saved on Android phones by default. This means that even if you delete a message from your inbox, it is still stored on your phone’s internal memory or storage. However, it is important to note that the exact location of these saved messages may vary depending on the Android device you are using. Here are a few key points to consider: 1. Storage Location: Text messages are typically stored in a database file on the phone’s internal memory. The exact file location may vary depending on the manufacturer and model of the device. 2. Backup Options: Android devices often offer options to back up your text messages to external storage or cloud services. This can be useful in case you accidentally delete a message or switch to a new device. Backup options may include saving messages to a SIM card, SD card, or syncing with services like Google Drive or Dropbox. 3. SIM Card Limitations: If you only have a SIM card and not a phone with internal storage, you may not be able to save text messages directly on the SIM card. SIM cards typically have limited storage capacity and are primarily used for storing contact information rather than messages. 4. Manual Transfer: If you want to save text messages on the SIM card or SD card, you will need to manually move them one by one. This process involves selecting individual messages and choosing the option to move or save them to the desired location. While text messages are saved on Android phones by default, the specific storage location may vary. It is possible to back up messages to external storage or sync them with cloud services for added convenience. However, if you only have a SIM card, you

How to Remove a Google Account from your Devices

How to Remove a Google Account from your Devices

Google accounts can be a necessary part of our lives, but they can also be a nuisance when we want to get rid of them. There are various ways to remove a Google account, depending on what type of device you’re using and which operating system it runs on. In this article, we’ll provide instructions for how to remove a Google account from Android and iPhone devices, as well as from computers running Windows 10 or Chrome OS. We’ll also explain what happens when you delete a Google account and what your options are if you want to keep using Gmail but no longer want the associated Google account. How Do I Remove A Google Account From My Phone? To remove a Google account from your phone, you’ll need to open your phone’s Settings app and tap Accounts. If you don’t see “Accounts,” tap Users & accounts. Next, tap the account you want to remove and then Remove account. If this is the only Google Account on the phone, you’ll need to enter your phone’s pattern, PIN, or password for security. How Do I Remove A Google Account From A Computer? To remove a Google account from a computer, you will need to select the user profile that you want to remove and click on the options icon from the top-right of the user profile. Then, remove the Gmail account from chrome by clicking on “Remove This Person”. You will get a confirmation message, click again on “Remove This Person“. What Happens If You Remove Google Account? Removing a Google account from an Android or iPhone device simply removes access from that particular device, and it can be restored later on. However, any information stored through the account on that device will be lost. That includes things like email, contacts, and settings. Why Can’t I Delete My Gmail Account? A personal Google account can only be deleted by the authenticated owner (i.e. the person signed into it). A company domain Google account (G Suite) can be deleted by the domain administrator. How Do I Delete User Accounts On My Computer? To delete user accounts on your computer, you will need to go to the Accounts section of your Settings. From there, you will be able to select the person’s name or email address and then select Remove. After reading the disclosure, you will need to select Delete account and data in order to complete the process. How Do You Remove A Google Account From Windows 10? Removing a Google account from Windows 10 is a fairly simple process. First, open the Settings app and click on Accounts. Then, click on Email & accounts and select the account that you want to remove. Next, click the Manage button and then click the Delete account from this device option. Finally, click the Delete button and then click the Done button. How Do I Remove A Gmail Account From Chrome? To remove a Gmail account from Chrome, press the settings menu icon in the top-right area of your profile card. In the drop-down menu that appears, press the Remove This Person option. Once pressed, the Chrome profile linked to your Gmail account will be removed. Conclusion Removing a Google account is a fairly simple process, but it’s important to understand what happens when you do. Deleting an account can result in the loss of information stored on that device, so be sure to back up any data you want to keep before removing the account. If you only have one Google account and want to continue using Gmail, your best option may be to create a new Gmail address without the associated Google account. Louis MuganLouis Mugan is a seasoned technology writer with a talent for turning complicated ideas into clear, practical guidance. He focuses on helping everyday readers stay confident in a world where tech moves fast. His style is approachable, steady, and built on real understanding. He has spent years writing for platforms like EasyTechLife, where he covers gadgets, software, digital trends, and everyday tech solutions. His articles focus on clarity, real-world usefulness, and helping people understand how technology actually fits into their lives. Outside of his regular columns, Louis explores emerging tools, reviews products, and experiments with new tech so his readers don’t have to. His steady, friendly approach has made him a reliable voice for anyone trying to keep up with modern technology. get in touch at louismugan@gmail.com

How to Stream TSN Live for Free

How to Stream TSN Live for Free

If you’re a sports fan in Canada, you know that TSN, or The Sports Network, is the place to go for high-quality sports coverage. With over 60 championship events and exclusive coverage of all your favorite leagues, teams, and players, TSN is the go-to source for Canadian sports fans. And now with the TSN app available on both the App Store and Google Play Store, you can live stream even more games and events right from your phone. Now, while the app itself is free to download and use, you may find yourself running into some roadblocks if you’re not located in Canada. That’s because the content available on TSN only works within Canadian borders due to licensing restrictions. But don’t worry – there’s an easy solution to this problem: using a VPN with Canadian servers! By installing a VPN on your router or mobile hotspot device, you can easily connect to a server in Canada and access all of the content available on TSN. It’s quick and easy to set up – all it takes is a few clicks of a button! Once you have your VPN up and running, just head over to either the App Store or Google Play Store and download the official TSN app. Sign in with your account information (or create one if you don’t already have one) and start streaming all of your favorite sports content! Whether it’s live games from major leagues like MLB or NHL, exclusive coverage from top events like March Madness or Wimbledon tennis tournaments, or highlights from smaller leagues around the world – it’s all available on TSN through the app. What makes TSN so great is that they offer both their app and website as free sources for sports content. So no matter where in Canada (or beyond) you are located, you can easily access quality sports programming without having to pay any additional fees. This makes it incredibly convenient for fans who want to stay up-to-date with their favorite teams or catch up on past events they may have missed out on. So if you’re looking for an easy way to watch quality sports coverage without worrying about extra costs – then make sure to check out what TSN has to offer through their live streaming options! Source: getconnectedmedia.com Watching TSN in the USA In order to watch TSN in the US, you will need to use a Virtual Private Network (VPN). A VPN allows you to connect to a server in another country, such as Canada, and access content from that country. To begin, you will need to download and install a VPN with servers located in Canada. Once installed, connect to a server in Canada and connect to your wifi network or mobile hotspot. Then head over to the App Store or Google Play Store to download the TSN app. Once downloaded, sign into the app and start streaming TSN! Streaming TSN Online Yes, you can stream TSN online on TSN.ca and the TSN app. Through these platforms, you can access live coverage of over 60 championship events, as well as exclusive content. Plus, you can enjoy a range of additional sports programs such as highlights, analysis, and even classic games. So whether you’re looking for the latest news in sports or want to relive some of your favorite moments in history, TSN has it all! Is TSN Available on Amazon Prime? Unfortunately, no, TSN is not currently available on Amazon Prime. The TSN app is only available on the Apple App Store and Google Play Store and is not available on the Amazon App Store. However, some content from TSN can be accessed through other channels on Amazon Prime, such as CraveTV. CraveTV offers access to select shows, movies, and sports content from many Canadian networks including TSN. Can You Watch TSN on Roku? Yes, you can get TSN on Roku! To access TSN on the Roku platform, simply add the TSN app to your home screen from the Channel Store. Once added, you can sign in with your existing TSN login credentials or create a new account directly via Roku Pay. With the app, you’ll have access to all of TSN’s content and live-streaming options. Watching TSN on Mobile Devices The official TSN app is the best way to watch Canada’s Sports Leader on your mobile device. It offers a world-class lineup of live sports and over 60 championship events, so you can follow your favorite teams, players, and leagues no matter where you are. Plus, you’ll get access to sports news and highlights, expert analysis, podcasts, and more. With the TSN app, you’ll never miss a minute of the action — so download it today and stay up-to-date on all the latest sports news! Does TSN Work Outside of Canada? No, unfortunately, TSN does not work outside of Canada. TSN stands for The Sports Network, a Canadian English language sports specialty channel owned by CTV Speciality Television Inc. It is available in Canada only and not accessible in other countries. Does YouTube TV Include TSN? Yes, YouTube TV does have TSN as part of its channel list in Canada. TSN (The Sports Network) is one of the leading sports networks in Canada and offers a variety of content, including NHL hockey games, NBA basketball games, MLS soccer matches, NFL football games, and more. With YouTube TV you’ll also get access to exclusive TSN content like original programming and documentaries. Cost of TSN Per Month TSN streaming passes cost $19.99 per month and give you access to hours of sports content on several platforms. This includes desktop and mobile browsers, Android, iOS, Apple TV, Amazon Fire TV, Xbox, and more. With a TSN pass, you’ll have access to exclusive sports programming including live games, original documentaries, and highlights from the biggest leagues in North America. Plus, you’ll get access to the latest news and analysis from top experts in the industry. So for just $19.99 a month, you can stay connected

How to Enable Camera Access on Your iPhone?

How to Enable Camera Access on Your iPhone?

Enabling the camera on your iPhone is an essential step to take if you want to capture precious moments, take stunning photos, or engage in video calls with your loved ones. In this article, we will guide you through the process of enabling camera access on your iPhone, ensuring that you can make the most out of your device’s camera capabilities. To start, open your iPhone’s Settings app. It is usually represented by a gear icon and can be found on your home screen. Once you’ve located it, tap on it to open the Settings menu. Within the Settings menu, scroll down until you find the “Privacy” option. It is usually represented by a hand-shaped icon, and it contains various privacy-related settings for your device. Tap on “Privacy” to proceed. After entering the Privacy menu, you will see a list of different categories, such as Location Services, Contacts, and Camera. Tap on the “Camera” option to access the camera settings. Inside the Camera settings, you will find a list of apps that have requested access to your iPhone’s camera. Apps that have already been granted access will have a checkmark next to them, while apps that have not been granted access will not. To enable camera access for a specific app, simply tap on the switch next to it. This will turn the switch green and allow the app to use your iPhone’s camera. If you want to disable camera access for an app, simply tap on the switch again to turn it off. It’s important to note that some apps may require camera access to function properly, while others may request it for specific features or functionalities. Therefore, it’s always a good idea to carefully consider the permissions you grant to each app and ensure that it aligns with your privacy preferences. Furthermore, it’s worth mentioning that enabling camera access for an app does not automatically grant access to the microphone. If an app also requires microphone access, you will need to grant that separately in the Privacy settings. By following these steps, you can easily enable camera access for your desired apps on your iPhone. This will allow you to capture memorable photos, record videos, and enjoy video calls without any hassle. Remember, it’s crucial to regularly review and manage the permissions you grant to your apps to protect your privacy and ensure a safe digital experience. Steps to Enable Camera Access on Your iPhone To enable camera access on your iPhone, follow these steps: 1. Open the Settings app on your iPhone. It has a gray gear icon and can be found on your home screen. 2. Scroll down and tap on “Privacy.” 3. In the Privacy settings, select “Camera.” It should be listed under the “Permissions” section. 4. You will see a list of apps that have requested camera access. If the app you want to enable camera access for is not listed, it means it hasn’t requested permission yet. You can try opening the app and it should prompt you to allow camera access. 5. If the app is listed, make sure the toggle switch next to it is turned on to allow camera access. When the switch is green, it means camera access is enabled for that app. That’s it! You have successfully enabled camera access for the app on your iPhone. You can now use the camera within the app. Note: Some apps may also have additional settings within their own app settings where you can enable or disable camera access. If you don’t see the camera access option in the Privacy settings, check the app’s settings for any camera-related settings. – If you want to enable camera access for multiple apps, you can simply repeat steps 4 and 5 for each app. – If you want to disable camera access for an app, simply turn off the toggle switch next to it in the Privacy settings. – Keep in mind that enabling camera access for an app means it can use your iPhone’s camera to capture photos or videos. Make sure to only allow camera access to trusted apps and be mindful of your privacy and security. How Do You Enable and Disable Your iPhone Camera? To enable or disable the camera on your iPhone, follow these steps: 1. Open the Settings app on your iPhone.2. Scroll down and tap on “Screen Time.”3. If you haven’t set up Screen Time before, you may need to enable it for yourself. Follow the prompts to enable it for your own device.4. Once in the Screen Time settings, tap on “Content & Privacy Restrictions.”5. Enable Content & Privacy Restrictions if it’s not already enabled.6. Tap on “Allowed Apps.”7. Scroll down and find the “Camera” option. Toggle the switch to enable or disable the camera on your device. If you disable the camera, the Camera app will no longer appear on your home screen, and you won’t be able to access it. This can be useful if you want to restrict camera usage on your iPhone. Remember, enabling or disabling the camera using Screen Time will affect all apps that use the camera. So, if you disable the camera, it won’t be accessible in any app, including third-party camera apps or apps that use the camera for certain features. Keep in mind that these steps may differ slightly depending on the version of iOS you are using. It’s always a good idea to check for any updates and refer to the appropriate documentation for your specific iPhone model and iOS version. Conclusion Enabling camera access on an iPhone is a simple process that can be done through the device’s settings. By following a few steps, you can grant camera access to any app that requires it. First, navigate to the Settings app on your iPhone. From there, scroll down and select “Privacy.” Next, tap on “Camera” to access the camera permissions settings. Here, you will see a list of all the apps that have requested

How to Unlink School Logins from Your Browser

How to Unlink School Logins from Your Browser

Welcome to our blog post about school login and Google keeps redirecting you back to the school login page. This can be a very frustrating issue, but we are here to help. First, let’s start off by explaining what is happening when this phenomenon occurs. When you attempt to access your Google account, it will redirect you back to your school login page. This is because when your school or institution sets up a Google account for you, they link it with their own authentication system. This means that whenever you go to log in with your Google account, it will automatically detect that you are part of the school or institution and redirect you back to their authentication system. So how can we prevent this from happening? The first thing we suggest is that you clear all of the cookies related to your school or institution from your browser. This will allow you to unlink your Google account from their authentication system and should stop the redirection loop from occurring. Additionally, if thre are any other accounts associated with the same school or institution that have been linked with your Google account (such as an email address), then we recommend unlinking those accounts as well. Finally, if the problem persists after clearing all related cookies and unlinking any linked accounts, then we suggest contacting either the IT department of your institution or the support team of whichever service provider (Google, Microsoft etc.) was used for setting up the account initially. They should be able to provide more detailed assistance in resolving this issue for you. We hope that this blog post has been helpful in providing some insight into why Google keps redirecting back to school login pages and how one can prevent it from happening again in future. If there are any further questions regarding this topic or other related topics, please do not hesitate to contact us at [insert contact information]. Thank You! Stopping Gmail from Redirecting to School Login To stop Gmail from redirecting to your school login page, you will need to clear all cookies or any Google-related cookies from your browser. To do this, locate the settings in your browser and select the option to delete cookies. Once deleted, try accessing Gmail again; if the problem persists, you may need to reset your browser’s cache as well. Additionally, make sure that any third-party applications that have access to your Google account are logged out of as well. Removing School Login from Google To remove your school login from Google, you’ll need to access your Google Profile. On your computer, open Chrome and click the profile icon in the top right corner. Select Manage Profiles and then point to the profile associated with your school login that you want to remove. At the top right of the profile, click More and then select Delete. To confirm, click Delete again and that should be it! Your school login will now be removed from Google. Unlinking a School Email from Google To unlink your school email from Google, you will need to open the Gmail app on your Android phone or tablet. In the top left, tap the Menu and scroll down to Settings. Then, select the Gmail account that is linked with your school email address. In the “Linked Account” section, tap Unlink account. You will then be asked if you want to keep copies of emails from that account – make sure to choose an option that best suits your needs. Once this is done, your school email sould be successfully unlinked from Google. Stopping Google from Auto Redirecting In order to stop Google from auto redirecting, you will need to adjust your browser settings. For example, if you are uing Google Chrome on an Android device, follow these steps:1. Open the Google Chrome app on your Android device.2. Tap the three dots at the top-right corner and select “Settings.”3. Scroll down to “Advanced” and press “Site settings.”4. Tap “Pop-ups and redirects” and switch the toggle button off. If you are using a different browser, such as Mozilla Firefox or Safari, you may need to adjust similar settings in order to stop auto redirects from Google. Additionally, some browsers may offer additional features that can help limit pop-ups or auto redirects from crtain websites or sources. You can also install extensions or add-ons that are designed specifically for blocking pop-ups and redirects in your browser of choice. Removing a School or Work Account from a Computer To remove a school or work account from your computer, start by opening the Settings menu. Go to the Accounts tab, then select Access work or school. Choose the account you wish to remove, then click Disconnect. A confirmation window will appear; click Yes to confirm and complete the process. Please note that this will not delete the account entirely, but it will only remove access from your PC. Removing a School Account from a Computer To remove a school account from your computer, follow these steps:1. Go to Settings > Accounts > Access work or school.2. Select your account and then click Disconnect.3. Confirm that you want to remove the account by clicking on Disconnect again.4. Once the account has been disconnected, it will no longer be connected to your computer and all data asociated with the account will be removed. Unlinking a School Email from Windows To unlink your school email from Windows, start by navigating to the Start menu and selecting the Settings icon. Then select Accounts, followed by Email & app accounts. On the right-pane, select the account you want to remove and then click Manage. From there, select Delete account and then confirm your choice when prompted. That shuld unlink your school email from Windows successfully. Louis MuganLouis Mugan is a seasoned technology writer with a talent for turning complicated ideas into clear, practical guidance. He focuses on helping everyday readers stay confident in a world where tech moves fast. His style is

How to Troubleshoot When Callers Can’t Hear You on Android Phone?

How to Troubleshoot When Callers Can’t Hear You on Android Phone?

Are you experiencing issues with callers not being able to hear you on your Android phone? Don’t worry, you’re not alone. This can be a frustrating problem, but there are several potential solutions that may help resolve the issue. Start with Basic Troubleshooting (Restart, Updates & Network) Restarting your phone is often a simple yet effective way to fix many software-related problems. It can help refresh the system and resolve any temporary glitches that may be causing the issue. Additionally, ensure that you have a stable network connection, as poor network coverage can sometimes lead to call quality problems. Regardless of whether you are on Android 11, 12, 13, or 14, always check for the latest software updates. Both Google and manufacturers like Samsung, OnePlus, and Xiaomi release periodic bug fixes that address call quality and microphone issues (Google Support – Update your Android version). Check in Safe Mode for Third-Party App Conflicts If restarting your phone doesn’t solve the problem, you can try entering Safe mode. This mode allows you to identify and uninstall any third-party apps that may be interfering with your calls. Sometimes, certain apps can affect the microphone or speaker functionality, so removing them might resolve the issue. Apps with “call recording,” “AI noise cancellation,” or “voice filter” features are the most common culprits. If you recently installed such apps, disable or remove them to see if the issue improves (Google Help – Use safe mode to fix problems). Fix Call Audio by Resetting Network or VoLTE Settings Another potential solution is to disable Voice over LTE (VoLTE) in your phone’s settings. VoLTE is a feature that allows calls to be made over 4G or 5G networks, but it can sometimes cause audio problems. By turning it off, you can switch back to regular voice calls, which might improve the audio quality. However, some carriers require VoLTE for all calls. In such cases, instead of turning it off completely, reset your network settings (Settings > System > Reset Options > Reset Wi-Fi, Mobile & Bluetooth). This action refreshes carrier connectivity and often clears up audio routing issues (Samsung Support – Reset network settings). Check for Physical Blockages in Microphone or Speaker It’s also important to check if there’s anything physically obstructing your phone’s speaker or microphone. Sometimes, a poorly placed screen protector or case can cover these components and result in distorted sound during calls. Take a moment to ensure that nothing is blocking them. Dust, lint, or even pocket debris often clog the tiny microphone holes. Use a soft brush or compressed air to clean them. Avoid using sharp tools, which can damage the microphone mesh. Confirm Call Volume Settings Are Correct If the issue persists, you might want to consider adjusting the volume settings on your phone. Increasing the volume can help both you and the caller hear each other better. Similarly, ask the person on the other end to check their volume settings as well. Note: Call volume is separate from media volume. Be sure you are adjusting the “Call Volume” slider while on an active call, not just the ringtone or media sliders. Verify Microphone Permissions for the Phone App In some cases, microphone issues can be caused by software configurations. Go to Settings > Privacy > Permission Manager > Microphone (path may vary by brand) and confirm that the Phone app has permission to use the microphone. If microphone access is off, callers won’t be able to hear you even if the hardware is fine (Google Help – Manage app permissions). Rule Out Hardware Faults and Headset Issues If you use wired or Bluetooth headsets, test calls without them. Faulty headphone jacks or unstable Bluetooth profiles can redirect your audio incorrectly. Unpairing and reconnecting devices or trying a call without accessories can help isolate the problem. If none of the above solutions work, it may be worth seeking assistance from a technician. They can diagnose and address any underlying hardware problems that may be causing the issue. Update Your Android OS and Carrier Settings Outdated system software or missing carrier updates can directly cause call audio problems. Keeping both up to date ensures compatibility with network features and microphone handling. Check for System Updates Go to Settings > System > Software Update (path may vary). Tap Check for updates and install if available (Google Support – Check & update Android version). Install Carrier Settings Updates On Android phones, carrier updates are often delivered automatically or bundled with system updates. To check and install: Enable Auto-Updates In Settings > Security & Privacy > Updates, make sure Google Play system updates are set to automatic. If Updates Aren’t Available If your device no longer receives updates, you may experience recurring call issues. Options include: Why Callers Can’t Hear You on Android Causes include: Why You Can’t Hear the Other Person During Calls Common reasons: Tip: Record a short voice memo or video. If playback is silent, the microphone itself is faulty. If playback works but callers can’t hear you, the issue is more likely software or network related. How Do You Fix Your Microphone on Android? Steps include: Conclusion: Solving Microphone & Call Audio Problems on Android If callers can’t hear you on your Android phone, the cause may range from simple fixes like clearing the microphone port or adjusting call volume, to more advanced steps like resetting network settings or updating your device software. Always start with the easy checks restart your phone, inspect for obstructions, and confirm permissions. If the issue continues despite these steps, it likely points to a hardware problem, and professional service is recommended. By keeping your device clean, updated, and free of conflicting apps, you can minimize the chances of this frustrating problem happening again. Louis MuganLouis Mugan is a seasoned technology writer with a talent for turning complicated ideas into clear, practical guidance. He focuses on helping everyday readers stay confident in a world where tech moves fast. His style is approachable, steady, and built

How to Connect Logitech K540 Keyboard to Your Computer

How to Connect Logitech K540 Keyboard to Your Computer

Introduction Are you looking for a reliable, comfortable, and easy to use keyboard? Look no further than the Logitech K540 Wireless keyboard. This keyboard is perfect for those who want to stay productive in the office or at home. With this keyboard, you can easily connect to your computer via a USB receiver or Bluetooth connection. The Logitech K540 wireless keyboard has a sleek and modern design with an ergonomic shape that fits comfortably in your hands. The keys are well-spaced and have a soft touch that is easy on your fingertips. The key action is responsive, and the backlighting helps you stay productive even in low-light environments. The Logitech K540 has all the features you need to help you stay productive with its multi-device connectivity, media keys, and customizable function keys. This allows you to quickly switch between multiple devices and applications while still having access to all of your shortcuts and settings.  Functionality and Review of the Logitech Logitech K540 The media keys give you quick access to media, while the customizable function keys allow you to quickly launch certain functions, such as the calculator, with just one press of a button. The fn keys can also be personalized.  For added convenience, the Logitech K540 comes with a Unifying receiver that allows for easy Logitech K540 keyboard pairing between your mouse, keyboard, and computer, so everything is always just one click away! The battery life on this keyboard is also very good; it lasts up to 36 months on batteries so you don’t have to worry about constantly replacing them. Overall, the Logitech K540 Wireless Keyboard is an excellent choice for those who are looking for a reliable and comfortable wireless keyboard that can handle their daily tasks with ease. Its ergonomic design ensures comfort while its multiple-device connectivity makes sure that everything is always just one click away! To connect the Logitech K450 keyboard, you’ll need to activate the Logitech K540 pairing mode. Read on to learn how to do it.  Where to Buy A Logitech Logitech K540 Keyboard The Amazon Marketplace is the best place to purchase A Logitech Logitech K540 Keyboard. Although, I may be bias seeing as I purchase everything on Amazon, and the odds are so do you haha! If you would like to purchase the Logitech K540 Keyboard check it out on Amazon below! Logitech MK540 Advanced Wireless Keyboard and Mouse Combo With Bluetooth Connecting a Logitech Wireless Keyboard To connect your Logitech wireless keyboard, start by making sure the device is on. Check for a switch at the top right corner of the keyboard and push it to turn on the keyboard. The LED should be blinking quickly, indicating that you are ready to connect the Logitech K450 keyboard with your computer.  Next, open your computer’s Bluetooth settings and select “Add New Device” or “Pair a Device”. Your computer should then search for nearby Bluetooth devices; when it finds your Logitech wireless keyboard, click on it and follow any additional instructions on the screen to complete the pairing process.  Your computer might give you a Bluetooth pairing code. Enter it on your keyboard to pair the Logitech K450 keyboard with your computer.  After a few moments, you should be able to type on the keyboard and use it with your computer! Does the Logitech K540 Have Bluetooth Capabilities? Yes, the Logitech K540 supports Bluetooth.  However, in addition to Logitech K540 Bluetooth pairing, you can also pair the Logitech keyboard to your computer using the Logitech K450 USB receiver. The receiver plugs into your computer’s USB port, allowing you to use the keyboard and mouse wirelessly. Here are the steps to take to use your Logitech K450 with the wireless receiver:  You might want to use the receiver if you are having trouble with your Bluetooth connection. This can happen on certain macOS versions if you have FileVault enabled.  Resetting a Logitech K540 Keyboard If you are experiencing Logitech K450 pairing issues, you can try to reset your wireless keyboard.  To reset your Logitech K540 keyboard, you will need to follow the steps below: 1. Turn on the keyboard by pressing the power switch. 2. Once the keyboard is turned on, press the following key combination: ESC + O + ESC + O + ESC + B. For example, press the ESC key, then the O key, then the ESC key, and so on.  3. You should see a brief flash of light indicating that the reset was successful. If you are still experiencing Logitech pairing issues, try using the receiver. If your computer hardware doesn’t support Bluetooth Low Energy, a type of Bluetooth technology, you might have difficulty pairing it with your keyboard.  You can also contact Logitech support for help.  Understand how to effortlessly switch between paired devices on Logitech K850. Conclusion The Logitech K540 Wireless Keyboard is a great choice for anyone looking for a wireless keyboard with reliable performance.  With its USB receiver and Bluetooth Logitech k540 keyboard pairing, the K540 provides an easy and secure connection to your computer, allowing you to type and move around without having to worry about wires getting in the way.  It also has an adjustable height for the perfect typing angle, so you can find the most comfortable position for hours of uninterrupted typing. Furthermore, it features an intuitive design that makes it easy to use and customize with various settings. The Logitech K540 is a great option for anyone looking for a reliable wireless keyboard and mouse combination, and it is easy to connect the Logitech keyboard to your computer with the USB receiver or a Bluetooth connection. Louis MuganLouis Mugan is a seasoned technology writer with a talent for turning complicated ideas into clear, practical guidance. He focuses on helping everyday readers stay confident in a world where tech moves fast. His style is approachable, steady, and built on real understanding. He has spent years writing for platforms like EasyTechLife, where he covers gadgets, software, digital trends, and everyday tech solutions.

How to Pair Your Logitech K850 Keyboard with a Bluetooth Device?

How to Pair Your Logitech K850 Keyboard with a Bluetooth Device?

Are you looking to pair your Logitech K850 Keyboard with a Bluetooth device? Look no further! With a few easy steps, you can have your keyboard connected in no time. First, press and hold the Easy-Switch™ key on the keyboard for three seconds. When the key begins blinking, it is ready to be paired. Then, open up Bluetooth preferences on your device and add a new peripheral by selecting “Logi K580 Keyboard”. A code will appear onscreen. Type this code onto your keyboard and it will be ready to use. The Logitech K850 Keyboard is incredibly versatile as it allows you to easily switch between multiple devices with just one press of the Easy-Switch™ key. It is also equipped with a full-size layout and advanced features such as adjustable tilt legs and media keys that let you access music, videos, and other content quickly. Plus, its slim design makes it easy to store away when not in use. Overall, the Logitech K850 Keyboard is an excellent choice if you are looking for a reliable Bluetooth keyboard that gives you fast access and convenience when switching between devices. With its sleek design and user-friendly features, connecting your Logitech K850 Keyboard via Bluetooth has never been easier! Pairing Logitech Bluetooth Keyboard To put your Logitech Bluetooth keyboard in pairing mode, press and hold the Easy-Switch™ key on the keyboard for 3 seconds. When the key starts blinking, it indicates that the keyboard is ready to pair with your computer. You can then select the Logitech Bluetooth Keyboard from the list of available devices in the Bluetooth settings of your computer. Connecting a Logitech K580 Bluetooth Device To connect your Logitech K580 Bluetooth keyboard, begin by opening the Bluetooth preferences on your device. Next, select ‘Add a new peripheral’ and look for the option to add the ‘Logi K580 Keyboard.’ A code will appear onscreen. Type this code into your keyboard and it will be ready to use. If you need further assistance, you can refer to the instructions in the user manual or reach out to Logitech customer support for additional help. Troubleshooting Logitech Keyboard Bluetooth Connection Issues It is possible that your Logitech keyboard is not showing up in Bluetooth because it is not compatible with the system you are using, or it could be that you need to update your Bluetooth drivers. Additionally, if the keyboard needs to be paired with a device, make sure the device is in pairing mode and the passkey or PIN code is correct. If you are still having trouble connecting your Logitech keyboard via Bluetooth, try resetting both the keyboard and USB receiver by pressing their respective reset buttons. Making Logitech Bluetooth Devices Discoverable To make your Logitech Bluetooth discoverable, you will need to switch the device off and then back on again. Once it has powered off, slide the switch into the off position for 5 seconds and then back to Bluetooth mode. After that, press and hold down both the Volume Up and Track Forward buttons until the connection LED blinks rapidly. Once this is done, your headset should now appear in available Bluetooth devices. Connecting a Bluetooth Keyboard To connect a Bluetooth keyboard to your computer, start by selecting the Start button on the lower left corner of your screen. Next, select Settings > Devices > Bluetooth & other devices, and then click Add Bluetooth or another device. In the list that appears, select Bluetooth and then select your keyboard from the list of available devices. Once it’s been detected by your computer, click Done to finish connecting it. And that’s it! Your Bluetooth keyboard is now connected and ready to use. Source: logitech.com Conclusion The Logitech K850 is an excellent choice for a wireless keyboard, as it is easy to pair with any device via Bluetooth. All you need to do is press and hold the Easy-Switch™ key on the keyboard for 3 seconds, and then open the Bluetooth preferences on your device. Add a new peripheral by selecting “Logi K580 Keyboard”, and then type in the code provided to complete the pairing process. With this simple process, you can enjoy all of the benefits of using a wireless keyboard without having to worry about any complicated setup or configuration.   Louis MuganLouis Mugan is a seasoned technology writer with a talent for turning complicated ideas into clear, practical guidance. He focuses on helping everyday readers stay confident in a world where tech moves fast. His style is approachable, steady, and built on real understanding. He has spent years writing for platforms like EasyTechLife, where he covers gadgets, software, digital trends, and everyday tech solutions. His articles focus on clarity, real-world usefulness, and helping people understand how technology actually fits into their lives. Outside of his regular columns, Louis explores emerging tools, reviews products, and experiments with new tech so his readers don’t have to. His steady, friendly approach has made him a reliable voice for anyone trying to keep up with modern technology. get in touch at louismugan@gmail.com

Where Are Screenshots Saved Android

Where Are Screenshots Saved Android

Screenshots have become a common way to capture and share moments on our smartphones. Whether it’s a funny meme, an important message, or a beautiful scenery, taking a screenshot allows us to save and share what we see on our screens. But have you ever wondered where these screenshots are saved on your Android device? Let’s explore! By default, most Android devices save screenshots in a designated folder called “Screenshots.” To access this folder, open your phone’s gallery app and look for the screenshot folder. It’s usually located in the Pictures or DCIM folder, depending on your device. To change the screenshot folder on Samsung smartphones, follow these steps: 1. Open the settings on your Samsung device.2. Go to “Advanced features.”3. Click on “Screenshots and screen recorder.”4. Choose the option “Save screenshots in” and navigate to the DCIM folder on your device.5. Tap the plus icon to create a new folder named “Screenshots” or any name of your preference. Now, whenever you take a screenshot, it will be automatically saved in the newly created “Screenshots” folder within the DCIM directory. On the other hand, if you’re using a Windows computer, the process is slightly different. When you press the Windows key + Print Screen key, your entire screen will be captured, and the screenshot will be saved as a PNG file in the Pictures > Screenshots folder on your computer. This folder is usually located at C:Users[User Name]PicturesScreenshots. It’s worth noting that the exact location of the screenshot folder may vary depending on the device and operating system version. However, the default folders mentioned above are commonly used across different Android devices. Now that you know where screenshots are saved on Android devices, you can easily locate and manage your captured moments. Whether you want to revisit a funny conversation or share a stunning image with your friends, accessing your screenshots folder will be a breeze. Remember, capturing screenshots is a handy feature that allows you to preserve and share important information or memorable moments. So, go ahead and capture those amazing shots, and now you know exactly where to find them! Where Do I Find My Screenshots On Android? To locate your screenshots on an Android device, follow these steps: 1. Open the Gallery app on your Android device.2. Look for the hamburger menu icon, which consists of three horizontal lines, typically located at the top left or right corner of the screen.3. Tap on the hamburger menu icon to expand the menu options.4. From the menu, select the “Albums” option. This will take you to a list of different albums or folders within your Gallery app.5. Scroll through the albums until you find the one labeled “Screenshots” or “Screenshot”. This folder is specifically dedicated to storing all the screenshots you have taken on your device.6. Tap on the “Screenshots” album to open it.7. Here, you will find all your captured screenshots displayed in chronological order, with the most recent ones appearing at the top. If you frequently take screenshots, it is advisable to organize them into a separate folder for easy access. This ensures that you can quickly locate and review your screenshots whenever needed. To summarize the steps: 1. Open the Gallery app.2. Tap on the hamburger menu icon.3. Select “Albums” from the menu.4. Find and open the “Screenshots” album.5. Browse through your screenshots in chronological order. By following these steps, you will be able to easily find and access your screenshots on your Android device. Where Are Screenshots Automatically Saved? Screenshots are automatically saved in the Pictures > Screenshots folder on your device. To capture a screenshot of your entire screen and have it saved automatically, you can use the Windows key + Print Screen key combination. When you press these keys, your screen will momentarily dim to indicate that a screenshot has been taken, and the screenshot will be stored in the Pictures > Screenshots folder. Where Is Screenshot Folder In Samsung Android? To locate the screenshot folder on Samsung Android smartphones, follow these steps: 1. Open the Settings app on your Samsung Android device.2. Scroll down and tap on the “Advanced features” option.3. In the Advanced features menu, find and select “Screenshots and screen recorder.”4. Within the Screenshots and screen recorder settings, you will see the option “Save screenshots in.”5. Tap on this option to choose the desired location for your screenshots.6. From the available choices, select the “DCIM” folder on your device.7. To create a separate folder specifically for storing your screenshots, tap on the plus icon (+) usually found in the top right corner of the screen.8. Enter a name for the new folder, such as “Screenshots” or any other preferred name.9. Once you have created the folder, it will now be selected as the default location for saving your screenshots. The screenshot folder on Samsung Android smartphones can be accessed and customized by navigating to Settings > Advanced features > Screenshots and screen recorder > Save screenshots in > DCIM folder > Create a new folder (e.g., “Screenshots”). How Do I Find Where My Screenshots Are? To locate the folder where your screenshots are stored, you can follow these steps: 1. Open the File Explorer by clicking on the folder icon in the taskbar or by pressing the Windows key + E on your keyboard. 2. In the File Explorer, navigate to your user folder. This folder usually has the same name as your user account and is located under “This PC” or “My Computer”. 3. Open the user folder and then navigate to the “Pictures” folder. 4. Within the “Pictures” folder, you should see a subfolder named “Screenshots”. This is where Windows automatically saves your screenshots. Alternatively, you can use the search function in the File Explorer to quickly locate the folder. Simply type “Screenshots” in the search bar located in the top-right corner of the File Explorer window, and it should display the “Screenshots” folder as a search result. Once you have located the “Screenshots” folder, you can

Troubleshooting: How to Recover a Disappeared Clock App on Your Phone
Troubleshooting: How to Recover a Disappeared Clock App on Your Phone

Have you noticed that the clock app on your Android device has mysteriously disappeared from your home screen? Don’t worry, you’re not alone. Many users have encountered this issue, but luckily, there’s a simple solution to get your clock app back where it belongs. If you’re using an Android device running Android 12 or newer, such as Google’s Pixel phones, you’ll find that the clock app is usually displayed on the home screen by default. However, if you’re using an older version of Android, like Android 11 or earlier, the clock app may not be visible on your home screen. To add the date and time back to your home screen, follow these steps: 1. Ensure that your phone is on and you’re on the home page.2. Press and hold down on the screen (not on an app) for about 2 seconds.3. A menu will appear, and you’ll need to select the “Widgets” option.4. Scroll down until you find the “Clock” widget. Tap on it.5. You’ll see different versions of the clock widget available. Touch and hold the desired clock version for at least a second.6. Now, you can move the clock widget to the desired location on your home screen by dragging it with your finger. That’s it! You’ve successfully added the date and time back to your home screen. You can now tap on the clock widget to launch the Clock app and access all its features. It’s a convenient way to always have the time and date at your fingertips. Keep in mind that these instructions may vary slightly depending on the make and model of your Android device or the version of Android you’re running. However, the general steps should be similar across most devices. So, if you find that your clock app has disappeared from your Android home screen, don’t panic. Follow the steps outlined above, and you’ll have it back in no time. Stay punctual and never miss a beat with your trusty clock app right on your home screen. How Do I Get My Clock Icon Back On My Phone? To get the clock icon back on your phone, you can follow these steps: 1. Unlock your phone and go to the home screen.2. Tap and hold on an empty space on the home screen. This will bring up the customization options.3. Look for the “Widgets” or “Add Widgets” option and tap on it.4. Scroll through the list of available widgets until you find the one labeled “Clock” or “Digital Clock”.5. Tap and hold on the clock widget, then drag it to the desired location on your home screen.6. Release your finger to place the clock widget on the home screen. Alternatively, you can try the following steps if the clock widget is not available in the widget list: 1. Unlock your phone and go to the app drawer.2. Look for the “Clock” app among your installed apps. It is usually pre-installed on most Android devices.3. Tap and hold on the Clock app icon.4. Drag the Clock app icon to the home screen and release your finger to place it. If you’re unable to find the Clock app in your app drawer, it may be hidden or disabled. In that case, you can try the following steps: 1. Go to the “Settings” app on your phone.2. Look for the “Apps” or “Applications” option and tap on it.3. Depending on your device, you may need to tap on “App Manager” or “Manage Apps” to access the list of installed apps.4. Scroll through the list of apps and look for the Clock app.5. If you find the Clock app, tap on it and select “Enable” or “Show” to make it visible on your home screen or app drawer. By following these steps, you should be able to get the clock icon back on your phone’s home screen. How Do I Get The Clock App On My Home Screen? To add the Clock app to your Android home screen, follow these steps: 1. Start by locating an empty space on your home screen. Long tap (press and hold) on the screen until options appear.2. Look for the “Widgets” or “Add Widgets” option in the menu that appears. Tap on it.3. Scroll through the list of available widgets until you find the Clock widget. It may be located under the “Widgets” or “System” section.4. Once you find the Clock widget, long tap on it and hold it.5. Drag the Clock widget to the desired location on your home screen. Release your finger to place it there.6. You can resize the widget by tapping and holding on the edges of the widget until resizing options appear. Drag the edges to adjust the size according to your preference.7. Once the Clock widget is in place, you can tap on it to launch the Clock app directly from your home screen. That’s it! You have successfully added the Clock app widget to your Android home screen, allowing easy access to the Clock app with a single tap. How Do I Get My Clock Back On My Front Page? To add the date and time back to your home screen, follow these steps: 1. Ensure that your phone is turned on and you are on the home screen.2. Press and hold your finger on an empty area of the screen (not on an app or widget) for about 2 seconds.3. A menu will appear, showing options such as wallpapers, themes, and widgets. Select the “Widgets” option.4. You will be taken to the widgets menu, where you can see various widgets available for your device.5. Scroll down or swipe left until you find the “Clock” widget. Tap on it to access the available clock options.6. Depending on your device and launcher, you may see different clock styles or sizes. Touch and hold the desired clock version for at least a second.7. Once you have selected the clock widget, you can move it to the desired location by dragging it across the
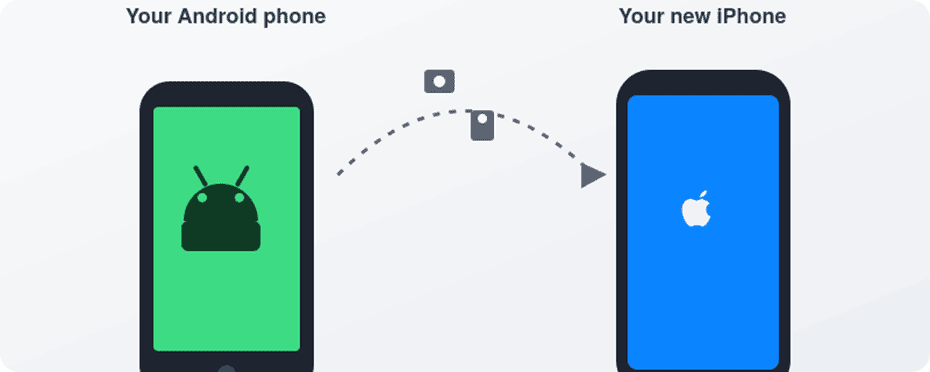

How To Change Outlook Password on Your iPhone

How To Change Outlook Password on Your iPhone

Are you having trouble updating your Outlook password on your iPhone? You’re not alone! Many users struggle to keep their passwords up-to-date, especially when it comes to Outlook. But don’t worry – changing your Outlook password on your iPhone is easy once you know how. Here’s a step-by-step guide to help you update your Outlook password on your iPhone: 1. Open the Outlook app and tap Sign In at the bottom of the screen. If the sign in prompt doesn’t appear, try agin later. 2. Enter your updated password and tap Sign In. 3. To find saved passwords and passkeys on your iPhone, open Settings and select Passwords (or Passwords & Accounts for iOS 13 or earlier). Then use Face ID or Touch ID when prompted, or enter your passcode. Select a website or app to view its associated password or passkey. 4. To change your password, open Microsoft account security and select Password security. As a security measure, you may be required to verify your identity with a security code first. 5. Once verified, enter your current password and then enter your new password twice for confirmation purposes. For additional security, you can also check the box which prompts you to update your password every 72 days before selecting Save at the bottom of the page. And there you have it – now you’re all set! With these simple steps, you can easily update or change your Outlook password on any iPhone device running iOS 12 or later versions of iOS software. Source: youtube.com Changing Outlook Password on a Phone Changing your Outlook password on your phone is easy! First, tap on the Outlook app on your device. Then, tap Sign In at the bottom of the screen. If you don’t see the sign-in prompt, try aain later. Once you do see it, enter your updated password and tap Sign In. That’s it! Your new password will now be active on your device. Retrieving Outlook Password on an iPhone To find your Outlook password on your iPhone, you will need to tap on the Settings app and select Passwords. If you are uing iOS 13 or earlier, select Passwords & Accounts and then tap Website & App Passwords. You will be prompted to use Face ID or Touch ID, or enter your passcode. Once you have done that, select Outlook and then view the password associated with it. Changing an Outlook Account Password Changing your Outlook account password is easy and secure! First, go to Microsoft account security and select Password security. You might be asked to verify your identity with a security code, so have your phone or other device ready. Once you’re authenticated, enter your current password and then enter the new password you would like to use. Finally, select Save to complete the process. It’s that simple! Your new password will take effect immediately and will be used for all Outlook services such as email, calendar, contacts, OneDrive, Office applications, etc. Finding Outlook Password on a Phone To find your Outlook password on your phone, start by opening the mail app. Tap Menu, and then tap Settings. Tap your Microsoft account, and then tap Incoming settings (under Server settings). Here you’ll see the current password for your Outlook account. If you need to change it, simply replace it with a new app password and then tap Done. Accessing Outlook Settings on an iPhone In order to access Outlook settings on an iPhone, you will need to open the Outlook app and select Settings from the main menu. From there, you can choose account specific settings such as email accounts, calendars, tasks and contacts. Additionally, in this section you can manage notification settings, signature settings, sync settings and more. Changing Outlook Password on iPhone with iOS 12 If you’re looking to change your Outlook password on an iPhone running iOS 12, here are the steps you’ll need to take: 1. Open your iPhone’s Settings and select Accounts & Passwords.2. Tap on the Outlook account that you want to update.3. Select the Account field and enter your new password.4. Tap Done in the upper right-hand corner of the screen to save your changes.5. Return to Accounts & Passwords and toggle Mail off then back on again to apply the new password. And that’s it! Your Outlook password will now be updated on your iOS 12 device. Changing Outlook Password on iPad Changing your Outlook password on an iPad is easy and can be done in just a few steps. First, locate and press the Settings icon. Then, select Mail, Contacts, Calendars from the left menu. Next, choose the Outlook account for which you want to change the password. After that, select the Outlook account and enter your new password in the Password field. Finally, hit Done at the top-right corner of the screen to save your changes. Your Outlook password should now be changed on your iPad. Conclusion In conclusion, Outlook Password is important to ensure the security of your Outlook account. It is important to update your password regularly and use unique passwords for each account. You can easily update your Outlook password using the Outlook app on Apple iOS or Android devices. Additionally, you can find saved passwords and passkeys on your iPhone by accessing the Passwords section of Settings. Finally, you can also change your Outlook password in Outlook.com by visiting Microsoft account security and selecting Password Security. By followng these steps, you can ensure that your Outlook account is secure and protected from unauthorized access. Louis MuganLouis Mugan is a seasoned technology writer with a talent for turning complicated ideas into clear, practical guidance. He focuses on helping everyday readers stay confident in a world where tech moves fast. His style is approachable, steady, and built on real understanding. He has spent years writing for platforms like EasyTechLife, where he covers gadgets, software, digital trends, and everyday tech solutions. His articles focus on clarity, real-world usefulness, and helping people understand how technology actually

5 Easy Ways to Stop Unwanted Music Playback on Android

5 Easy Ways to Stop Unwanted Music Playback on Android

Music Player on Android: How to Turn Off and Stop Autoplay Music players on Android devices are a great way to listen to your favorite tunes on the go. However, sometimes the music player can start playing without your intention, especially when connected to Bluetooth devices. This can be quite annoying, but don’t worry, there are ways to stop it. One common reason for music playback starting on its own is background apps or notifications. These can trigger sounds or music playback unintentionally. To check if any app on your phone is running in the background and causing the music to play, follow these steps: 1. Go to your device’s Settings.2. Look for the Applications or Apps section and tap on it.3. Find the Application Manager or Manage Applications option and tap on it.4. Scroll through the list of apps until you find the music player that is starting automatically (e.g., Samsung Music).5. Tap on the app to open its settings.6. Look for the option called Modify System Settings and switch the toggle to OFF. By disabling the Modify System Settings option for the music player, you prevent it from starting automatically when connected to Bluetooth devices or any other trigger. If the above method doesn’t work, there is another workaround you can try. If your Android phone always uses the same music player to autoplay when Bluetooth is connected, you can modify the settings of the music player itself. Here’s how: 1. Open your music player app (e.g., Samsung Music).2. Look for the More or Settings option and tap on it.3. In the settings menu, find the option related to autoplay or autoplay on Bluetooth connection.4. Disable this option to prevent the music player from starting automatically. By following these steps, you should be able to stop the music player from playing automatically on your Android device. However, keep in mind that the exact steps may vary depending on the music player app you are using. Dealing with autoplaying music on Android devices can be frustrating, but with the right settings adjustments, you can regain control over your music player. Remember to check for background apps or notifications that may be triggering the music playback and modify the system settings or the music player settings accordingly. Why Is Music Playing On My Phone By Itself? There can be several reasons why music is playing on your phone by itself. Here are some possible explanations: 1. Background Apps: Sometimes, certain apps on your phone may continue to run in the background, even when you’re not actively using them. These apps may have auto-play features or notifications that trigger music playback. Check if any app on your phone is running in the background and causing the music to play. 2. Notifications: Some apps send push notifications that include sounds or music. If you have enabled notifications for any app that plays music, you may hear it unexpectedly. Review your app notification settings to see if any app is causing this. 3. Media Playback Controls: If you have media playback controls on your phone’s lock screen or notification panel, accidental touches or swipes can start playing music. Ensure that you are not inadvertently triggering the playback controls. 4. Malware or Adware: In rare cases, your phone may be infected with malware or adware that plays music as a way to grab your attention or generate revenue for the malicious app developer. Run a security scan on your phone using reputable antivirus software to check for any potential threats. 5. Bluetooth or Other Connected Devices: If your phone is connected to a Bluetooth speaker, car audio system, or any other external device, it may automatically start playing music when the connection is established. Verify if any connected devices are the source of the music. To troubleshoot the issue, consider the following steps: – Close all unnecessary apps running in the background.– Disable notifications for apps that play music.– Remove any media playback controls from your lock screen or notification panel.– Scan your phone for malware or adware.– Disconnect any external devices and observe if the music still plays. If the issue persists, it might be helpful to contact your phone’s manufacturer or seek assistance from a technical support professional to further diagnose and resolve the problem. How Do I Stop My Samsung From Automatically Playing Music? To stop your Samsung device from automatically playing music, you can follow these steps: 1. Open the Settings app on your Samsung device. 2. Scroll down and tap on “Applications”. 3. In the Applications menu, tap on “Application Manager”. 4. Here, you will find a list of all the apps installed on your device. Swipe left or right to navigate through the apps until you find the music player app that is automatically playing music. 5. Once you locate the music player app, tap on it to open its settings. 6. In the app settings, look for an option called “Modify System Settings” or similar. This option allows the app to have control over certain system settings, including autoplaying music. 7. Tap on the “Modify System Settings” option to access its settings. 8. You will see a toggle switch next to the music player app. Make sure the toggle switch is set to “OFF”. This will prevent the app from automatically playing music when connected to Bluetooth devices or other triggers. 9. Exit the settings and test if the music player app still automatically plays music when connected to Bluetooth. It should no longer do so. If the above method doesn’t work or if your Samsung device always uses the same music player to autoplay when Bluetooth is connected, you can try the following workaround: 1. Connect your Samsung device to Bluetooth. 2. Open the music player app that is automatically playing music. 3. In the app settings, look for an option related to Bluetooth or autoplay settings. 4. Disable any option that allows the app to autoplay music when connected to Bluetooth devices or other

Force Stop: What Does it Mean and When Should You Use It?

Force Stop: What Does it Mean and When Should You Use It?

As a user of an Android device, you may have come across the term “Force Stop” when dealing with misbehaving apps. But what does it actually mean? In this article, we will dive into the details of Force Stop and when it should be used. Firstly, Force Stop is an option that can be found in the App Info section of an app. It is used to completely stop a running app and prevent it from running in the background. When you Force Stop an app, it means that the app’s current state is completely cleared from memory and all its background processes are terminated. So, when should you use Force Stop? Well, the most common reason is when an app is misbehaving or has become unresponsive. In such cases, Force Stop can be used to close the app and restart it, which often fixes the problem. This is because Force Stop kills the app’s current instance and clears its cache, which can sometimes become corrupted and cause issues. Another reason to use Force Stop is when you want to conserve battery life or data usage. Some apps continue to run in the background even after you have closed them, which can drain your battery and use up your data. Force Stopping these apps can prevent them from running in the background and save you precious battery life and data. However, it’s important to note that Force Stop should only be used as a last resort. This is because Force Stopping an app can sometimes cause it to lose unsaved data, so if you have important information in the app, it’s best to save it before using Force Stop. In addition, Force Stopping an app can also cause it to take longer to start up the next time you open it. This is because the app has to start from scratch and rebuild its cache and other data. Force Stop is a useful option to have when dealing with misbehaving apps or trying to conserve battery life and data usage. However, it should only be used as a last resort and with caution, as it can cause the app to lose unsaved data and take longer to start up. It’s always best to save your data before using Force Stop and only use it when necessary. Is It OK To Force Stop An App? Force-stopping an app is generally considered safe and can be useful in some situations. When you force-stop an app, you are essentially closing it down immediately and preventing it from running in the background. This can be helpful if an app is misbehaving or causing your device to slow down. However, it’s important to keep in mind that force-stopping an app can also have some negative consequences. For example, if you force-stop an app while it’s in the middle of saving data, you may lose any unsaved changes. Additionally, some apps rely on running in the background to provide notifications and other important features. So, while force-stopping an app can be a useful tool, it’s important to weigh the potential benefits and drawbacks before doing so. What Happens If I Force Stop? When you force-stop an app, you are essentially closing it forcibly and abruptly. This means that any ongoing processes or tasks within the app will be immediately terminated. Additionally, the app will no longer be able to access any of its cache files or data until the next time it is launched. It’s important to note that force-stopping an app should generally only be done as a last resort when an app is misbehaving or causing issues on your device. Force-stopping an app too frequently can actually have negative effects on your device’s performance, as it may cause the app to behave unpredictably or not function properly the next time it is launched. Force-stopping an app is a way to immediately terminate any ongoing processes or tasks within the app and prevent it from accessing its cache files or data until the next time it is launched. However, it should only be done sparingly and as a troubleshooting measure when an app is misbehaving or causing issues. Is Force Stop the Same As Delete? Force-stopping an app is not the same as deleting it. When you force stop an app, you are simply telling the operating system to stop all of the app’s ongoing processes and clear it from the memory, but the app itself remains installed on your device and all of its data is still there. On the other hand, deleting an app from your device will completely remove it, including any data that has been saved to your device. It’s important to note that force-stopping an app should be used as a last resort, as it can cause unexpected behavior and should only be used if an app is not responding or causing problems. How Do I Restart An App After Force Stop? To restart an app after force stop on an Android device, you can follow these steps: 1. Tap on the “Settings” icon on your device’s home screen.2. Scroll down and tap on “Apps”.3. You will see a list of all the apps installed on your device. Find the app you want to restart and tap on it.4. Tap on the “Force stop” button to stop the app from running.5. Once the app has been stopped, tap on the “Open” button to restart it. Alternatively, you can also restart an app by simply tapping on its icon on your device’s home screen or app drawer. This will launch the app and start it from scratch, without any background processes or data that may have been cached from the previous session. Conclusion Using Force Stop can be a useful tool when trying to fix a misbehaving app on your Android device. However, it’s important to keep in mind that force-stopping an app means that you will likely lose any unsaved data within the app. It’s important to weigh the

How to Access Your Phone Without a Screen?

How to Access Your Phone Without a Screen?

In today’s world, smartphones have become an integral part of our lives. We rely on them for communication, entertainment, and daily tasks. However, what happens when your phone’s screen gets damaged or becomes unresponsive? A phone without a screen can be a frustrating and challenging situation to deal with. In this article, we will explore some ways to access and use your phone without a screen. The first option to consider is using an OTG adapter. An OTG adapter is a small device that allows you to connect a USB mouse or keyboard to your phone. Once connected, you can use the mouse to navigate your phone’s interface and access your apps and files. This solution is ideal for those who have a broken or damaged screen but can still see the display. Another option to consider is using an accessibility button. Most Android smartphones come with an accessibility button that allows you to access essential features of your phone without touching the screen. To enable this feature, go to Settings > Accessibility > Accessibility Menu. Turn on the User Service and click Allow. You can now use the accessibility button to perform tasks such as making calls, sending texts, and accessing your apps. If your phone’s screen is completely unresponsive, you can still access your phone by connecting it to your computer. Connect your phone to your computer using a USB cable and select File Transfer mode. You can now access your phone’s files and data from your computer. Another option to consider is using an Android control tool. An Android control tool allows you to control your phone from your computer remotely. You can access your phone’s screen, use your keyboard and mouse to navigate, and even make calls and send texts. If you have a Samsung phone, you can use the Samsung Find My Mobile feature to access and control your phone remotely. Similarly, Google Find My Device is available for all Android phones and allows you to locate and control your phone remotely. Having a phone without a screen can be a challenging situation to deal with. However, there are several solutions available to help you access and use your phone without a screen. From using an OTG adapter to accessing your phone remotely, these solutions can help you stay connected and productive even with a broken or damaged screen. Can A Phone Work Without A Screen? A phone can work without a screen, but it will require some additional tools and techniques. One way to use a phone without a screen is by using a USB OTG adapter and a mouse. This adapter allows you to connect a mouse to your phone, which can be used to navigate and interact with your device. Additionally, some phones have accessibility features that allow users to control their phones without a screen, such as voice commands or screen readers. Another option is to connect your phone to an external display, such as a TV or computer monitor, to use it without a screen. However, it is important to note that certain functions, such as making calls or sending messages, may be difficult or impossible without a screen. How Can I Use My Phone Without Touch Screen? If you have a phone with a broken touch screen or just prefer to use your phone without a touch screen, there are several options available to you. 1. Use voice commands: Many smartphones have built-in voice assistant software that allows you to use your phone without having to touch the screen. You can use voice commands to make calls, send texts, and even browse the web. 2. Use a physical keyboard: If your phone has a physical keyboard, you can use this to navigate your phone without having to touch the screen. You can use the arrow keys to move between different options and the enter key to select them. 3. Use a mouse: If your phone supports USB OTG (On-The-Go), you can connect a mouse to your phone using a USB adapter. This will allow you to control your phone like you would a computer. 4. Use a stylus: If your phone still responds to touch, but the touch screen is cracked or damaged, you can use a stylus to navigate your phone. A stylus will allow you to tap and swipe on your phone without having to touch the screen directly. 5. Use a remote control app: There are several remote control apps available that allow you to control your phone using another device. You can use this to navigate your phone without having to touch the screen directly. How Can I Access My Phone Data With A Broken Screen? To access your phone data with a broken screen, you can connect your phone to a computer using a USB cable. Once connected, select the File Transfer mode on your phone and access all your files and data on your computer. To do this, follow these steps: 1. Unlock your phone using your preferred methods, such as your PIN or fingerprint.2. Connect your phone to your computer using a USB cable.3. On your phone, select the File Transfer mode by tapping on it.4. Once your phone is connected and in File Transfer mode, you can access all your files and data on your computer.5. You can copy and transfer your files from your phone to your computer, or vice versa, as needed. If your phone has a password or pattern lock that prevents you from unlocking it, you may need to use a software tool to bypass the lock screen. However, this is not recommended as it can potentially damage your phone or cause data loss. It is best to seek professional help or contact your phone manufacturer for assistance in such cases. How Can I Open My Android Without Screen? There are several ways to unlock an Android phone with a broken screen. Here are some of the most effective methods: 1. Use an Android control tool:

How to Access Your Cash App Account on Your Computer?

How to Access Your Cash App Account on Your Computer?

Cash App is a popular mobile payment service that allows users to send and receive money from their friends, family, or even businesses. But did you know that you can also access your Cash App account on your computer? That’s right, Cash App provides a convenient way for you to view your account information right from the comfort of your own desktop. To log into your Cash App account on your computer, simply follow these steps: 1. Open your preferred web browser and go to cash.app/account.2. Once on the website, you’ll see a login page where you can enter your email address or phone number associated with your Cash App account.3. After entering your login information, click on the “Next” button.4. If you’re logging in from a trusted device, Cash App may send you a verification code via email or SMS. Enter the code to proceed.5. Once you’ve successfully entered the verification code, you’ll be redirected to your Cash App account dashboard. From your Cash App account on your computer, you’ll be able to access various features and view your account information. You can see your current balance, review your transaction history, add or update your linked bank accounts, and even send or request money from other Cash App users. Logging into your Cash App account on your computer provides a convenient way to manage your finances without having to rely solely on your mobile device. It allows for a larger screen view, making it easier to navigate and review your account details. Whether you’re at home, at work, or anywhere with access to a computer, logging into your Cash App account on your computer gives you the flexibility to stay on top of your financial transactions and keep track of your money. So, if you’re wondering whether you can log into Cash App on your computer, the answer is yes! With just a few simple steps, you can access your Cash App account and enjoy the convenience of managing your finances from your desktop. Give it a try and see how easy it is to stay connected to your money with Cash App. Can You Check Your Cash App Account on a Computer? You can check your Cash App account on a computer. To do so, follow these steps: 1. Open a web browser on your computer (such as Google Chrome, Mozilla Firefox, or Safari).2. Go to the official Cash App website by typing “cash.app” in the address bar.3. Once on the website, locate and click on the “Sign In” button. This will take you to the login page.4. Enter the email address or phone number associated with your Cash App account and click on the “Continue” button.5. On the next page, enter the password for your Cash App account and click on the “Sign In” button.6. After successfully logging in, you will be directed to your Cash App account dashboard, where you can view your account information. It’s important to note that the Cash App website is designed to be responsive and user-friendly on both mobile devices and computers. This allows you to access and manage your account conveniently from any device with internet access. If you encounter any issues or have trouble accessing your account on a computer, you can reach out to Cash App customer support for further assistance. Can You Use Cash App On The Web? Cash App can be used on the web. Customers have the convenience of using Cash App for faster checkout on both web and mobile platforms. Whether on a desktop or a mobile device, users can make payments using their Cash App balance or debit card. On the web, customers can utilize Cash App Pay to complete their transactions seamlessly. This feature allows them to pay at their favorite brands by simply scanning a QR code displayed on the desktop website. By scanning the code, customers can easily access their Cash App account and choose to pay with their available balance or debit card. In addition to scanning QR codes, Cash App also provides a redirect option for mobile users. When customers are on a mobile website and choose to pay with Cash App, they can be redirected to the Cash App mobile app to complete the transaction. This ensures a smooth and efficient checkout process for mobile users. Cash App offers a convenient and efficient payment experience, whether users are on the web or using a mobile device. With the ability to pay using their Cash App balance or debit card, customers can enjoy faster checkout at their favorite brands. Conclusion Cash App is a convenient and secure platform that allows users to easily manage their finances, send and receive money, and make purchases at their favorite brands. With its user-friendly interface and fast transaction processing, Cash App provides a seamless experience for individuals looking for a modern and efficient way to handle their money. Whether you want to view your account information, send money to friends or family, or make a purchase at a store, Cash App offers a range of features that cater to your financial needs. So, if you’re looking for a hassle-free way to manage your money, Cash App is definitely worth considering. Louis MuganLouis Mugan is a seasoned technology writer with a talent for turning complicated ideas into clear, practical guidance. He focuses on helping everyday readers stay confident in a world where tech moves fast. His style is approachable, steady, and built on real understanding. He has spent years writing for platforms like EasyTechLife, where he covers gadgets, software, digital trends, and everyday tech solutions. His articles focus on clarity, real-world usefulness, and helping people understand how technology actually fits into their lives. Outside of his regular columns, Louis explores emerging tools, reviews products, and experiments with new tech so his readers don’t have to. His steady, friendly approach has made him a reliable voice for anyone trying to keep up with modern technology. get in touch at louismugan@gmail.com

How to Enable WSD On Your Devices?

How to Enable WSD On Your Devices?

By enabling WSD on your printer, you are allowing your Windows computer to discover it over the network.  WSD (Web Services for Devices) allows printers and other devices to be discovered by computers over the network, allowing for features such as wireless printing. In this guide, I will show you how to enable WSD on your printer and allow your Windows 10 or 11 device to discover your printer and print to it via network scanning. Let’s get into it!  Prerequisites: Same Network and Access First, for WSD to work, both devices need to be connected to the same LAN (Local Area Network). This is easily achieved by connecting both to the same Wi-Fi network.  Another option is using Ethernet cables. For example, connect both devices to the LAN ports on your router using Ethernet cables.  You will also need to be able to access the printer’s network administration or web UI page and have admin access to it. This is typically achieved by logging into the printer’s IP address by entering the IP address into your browser, as long as both are connected to the same LAN.  You will need to know your device’s IP address and may need a username and password to log in. The printer’s IP address and admin login details should be printed on a sticker somewhere on the printer, but they may also be in your printer’s user manual.  Enable WSD on the Printer/Scanner Some printers may have a touchscreen interface where you can enable WSD. Most printers allow you to enable WSD via a web interface. To connect to the printer, you will need to enable WSD on your printer. To do that, access the printer’s web UI via its IP address and log in.  Next, find the WSD setting, which is usually under the Network or Connectivity settings. For example, you may be able to find it by navigating to Properties > Connectivity > Protocols or to Network > Services. If you can’t find it, refer to your printer’s user manual for instructions, or look for instructions online for your model. The exact steps may vary slightly from one printer to another.  Once you have found the WSD setting, enable it. You may need to enable WSD separately for both printing and scanning. Once it’s enabled, save your changes and reboot your printer by unplugging it and plugging it back in again.  Add the Printer Device in Windows Settings Add the printer from the Bluetooth & Devices > Printers & Scanners settings.  The next step is to add the printer by allowing your Windows device to scan for it. Go to Settings > Bluetooth & Devices > Printers & Scanners and click on Add Device. It will start searching for your WSD printer. Once it finds it, click on Add Device to connect to the printer.  If it can’t find the printer, click on the downwards arrow that appears and then on “Add a new device manually.” There, you can select from several options, such as entering the printer’s IP address, adding a local printer manually by configuring its port, connecting to a printer via Bluetooth (instead of using WSD), and searching for older printers that may not be discoverable immediately.  Verify Print and Scan To ensure that the printer has been connected properly, run a test print job by printing a PDF. Try printing a PDF and select the printer as the destination device. Similarly, you can run a test scan to ensure that the printer was connected for scanning as well.  Troubleshoot Discovery Issues You can add a printer manually if your computer doesn’t discover it automatically.  If you can’t find the printer in your settings, and you have already verified that WSD is enabled on your printer and it’s connected to the same network as your laptop, try adding the printer manually, as explained earlier. For example, if your printer is older, you may need to search for it using the “My printer is a little older. Help me find it” option.  If that doesn’t work, try the following quick fixes:  You should also make sure the required Windows services are running. Click on the Windows key and then search for and open Services. In the Services tab, search for the following services and make sure they are all running:  If they are not running, start them manually. You may also want to set them to Automatic instead of Manual to make sure they start automatically. You can set them to Automatic by selecting them and then clicking on the Properties button in the upper-left corner of the Services window.  Another thing you can do is run the Windows printer troubleshooting tool by clicking here and clicking on “Open in Get Help.” This will search for possible problems preventing you from connecting to your printer and fix them.  You can use the manufacturer’s software, such as HP Smart, to detect and connect to the printer.  If all of that doesn’t work, try using the printer manufacturer’s proprietary installer or app to detect the printer. For example, you can use the HP Smart application to connect to HP printers.  Conclusion Once the WSD setup is complete on your printer, you can typically find the printer easily in your Windows settings. You just need to scan for it. The hardest part is turning on WSD, as that is a bit different on every printer.  However, there are some rare cases in which you will need to tweak your Windows discovery settings a bit, such as by entering the printer’s IP address manually or setting certain Windows Services to automatic.  Louis MuganLouis Mugan is a seasoned technology writer with a talent for turning complicated ideas into clear, practical guidance. He focuses on helping everyday readers stay confident in a world where tech moves fast. His style is approachable, steady, and built on real understanding. He has spent years writing for platforms like EasyTechLife, where he covers gadgets, software, digital trends, and everyday tech solutions. His

How to Arrange Apps Alphabetically on Your Android Device?

How to Arrange Apps Alphabetically on Your Android Device?

Are you tired of scrolling through endless pages of apps on your Android device? Do you find it frustrating to locate the app you need amidst the clutter? Well, fret no more! In this article, we will guide you on how to arrange your apps alphabetically on Android, making it easier for you to find and access them. The first step is to open the Apps screen on your Android device. This can usually be done by tapping on the square or circle icon at the bottom of your home screen. Once you’re on the Apps screen, look for the ellipsis icon, which is usually represented by three dots arranged vertically. Tap on this icon to open a menu of options. In the menu, you should see an option called “Display layout.” Tap on this option to proceed. Within the Display layout menu, you will find different options to organize your apps. Look for the one that says “Alphabetical list” and tap on it. By selecting the Alphabetical list option, your apps will now be arranged in alphabetical order, making it easier for you to find them. You no longer have to scroll through multiple pages or remember where you placed a specific app. Simply swipe up or down to navigate through the list and locate the app you need. But what if you have a lot of apps and want to further organize them into categories? Well, Android allows you to create folders to group similar apps together. To create a folder, simply long-press on an app icon until it becomes draggable. Then, drag and drop the app onto another app that you want to include in the same folder. Android will automatically create a folder with both apps inside. To rename the folder, simply tap on the folder and look for the option to rename it. This will allow you to give the folder a name that reflects the category of apps it contains. For example, you can create a folder called “Social Media” and place apps like Facebook, Instagram, and Twitter inside. You can also add or remove apps from a folder at any time. To do this, simply long-press on an app icon within the folder and drag it out or into another folder. This gives you the flexibility to customize your app organization as needed. Once you have created folders and arranged your apps, you can move the folders around your home screen. Simply long-press on a folder and drag it to the desired location. This allows you to prioritize certain categories of apps or place them in a convenient spot for easy access. Now that you know how to arrange your apps alphabetically and create folders, you can enjoy a cleaner and more organized home screen on your Android device. No more wasting time searching for apps or dealing with cluttered screens. With just a few simple steps, you can have a streamlined and efficient app organization system. So go ahead and give it a try! Take control of your app organization and make your Android experience even better. Happy organizing! How Do You Put Your Apps in Alphabetical Order on Android? To arrange your Android apps in alphabetical order, follow these steps: 1. Open the Apps screen on your Android device. This can typically be done by tapping on the “Apps” icon, which is usually a grid of small squares or dots, on your device’s home screen. 2. Once the Apps screen is open, look for an icon that resembles three vertical dots or lines. This is often referred to as the ellipsis icon or menu icon. 3. Tap on the ellipsis icon to open the menu options for organizing your apps. 4. In the menu options, look for an option called “Display layout” or something similar. This option allows you to customize how your apps are displayed on the screen. 5. Tap on the “Display layout” option to open the available layout choices. 6. Among the layout options, you should see one labeled “Alphabetical list” or something similar. This layout will arrange your apps in alphabetical order. 7. Select the “Alphabetical list” option by tapping on it. Your apps will now be automatically rearranged in alphabetical order. By following these steps, you can easily organize your Android apps in alphabetical order, making it easier for you to find and access specific apps on your device. How Do You Organize Apps on Your Android Home Screen? To organize your apps on your Android home screen, follow these steps: 1. Long press on any app icon on your home screen. This will activate the app editing mode. 2. Once in editing mode, you can drag and drop app icons to rearrange them on your home screen. You can move them to different pages or positions to suit your preference. 3. To create a folder, drag an app icon on top of another app icon. This will automatically create a folder grouping both apps together. 4. You can then customize the folder by giving it a name. Simply tap on the folder and enter a name of your choice. 5. To add more apps to a folder, simply drag and drop them onto the folder icon. 6. If you want to remove an app from a folder, open the folder and long press on the app icon. Then, drag it out of the folder and onto the home screen. 7. To delete a folder, open the folder and remove all the apps from it. The folder will automatically disappear once it’s empty. 8. Additionally, you can also move entire folders around your home screen. Just long press on the folder and drag it to a new position. By following these steps, you can efficiently organize your apps into folders, making your Android home screen cleaner and more organized. Conclusion Arranging apps alphabetically on your Android device can help you stay organized and easily find the apps you need. By following a simple process of

How to Find Consumer Cellular at Walmart?

How to Find Consumer Cellular at Walmart?

Consumer Cellular is a well-known provider of affordable and reliable mobile phone services. The company has been in operation for almost three decades and has gained a reputation for offering high-quality services at reasonable prices with its affordable plans. Consumer Cellular works on the AT&T network (it has also used T-Mobile in the past).  Fortunately, it’s easy to buy a Consumer Cellular SIM card, as Consumer Cellular is available at Walmart and Target locations nationwide. Consumer Cellular at Walmart Locations Consumer Cellular is available at select Walmart retail locations nationwide. Use the store locator on this page to find Consumer Cellular’s Walmart locations near you. Simply enter your zip code, and the tool will show you which Walmarts in the area of your city and state offer Consumer Cellular. Choosing Between AT&T and T-Mobile Networks Consumer Cellular has reportedly switched from using the T-Mobile network to using the AT&T network exclusively as its mobile service provider. Therefore, dual-network options may no longer be available. You can check the network coverage map to confirm network availability in your area.  Using Your Existing Phone with Consumer Cellular You can use your existing phone with Consumer Cellular as long as it meets existing phone compatibility criteria. Firstly, your phone must be unlocked by your previous carrier, which means that it can be used with other carriers. If you don’t have an unlocked phone, contact your carrier to get it unlocked. Secondly, your phone must be compatible with GSM network technology, which is the type of network technology used by Consumer Cellular. Use this Consumer Cellular compatibility checker guide to see if your model is supported. You can also call customer service assistance at (888) 345-5509 to check if your model is supported.  Consumer Cellular’s Independence from AT&T It’s important to stress Consumer Cellular’s independence from AT&T. Consumer Cellular is an independent entity and is not owned by AT&T. It is an independent mobile service provider that leases AT&T’s network to offer its services to customers, offering better plan customization for those on a budget. While AT&T is a major carrier, Consumer Cellular creates its own plans and packages and operates as a separate entity.  However, both companies are linked in that Consumer Cellular uses AT&T’s network to provide coverage, so if your area doesn’t get AT&T coverage, it won’t get Consumer Cellular coverage either.  Comparison with Other Retail Options Target vs. Walmart: Which is better for Consumer Cellular?  When making a retail comparison, it’s worth noting that Walmart has around 4,600 locations in the United States, while Target has around 2,000. So, in terms of Consumer Cellular availability, Walmart comes out as a winner. However, that varies based on location; in some places, Target may be more accessible.  Both offer online purchasing options. You can purchase Consumer Cellular phones and a sim card from Walmart online on this page.  Customer Experience and Reviews Consumer Cellular service reviews are generally positive. US News gave it a 4.1-star rating, with pros such as affordable plans and flexibility in changing plans.  The Walmart customer experience is generally positive as well. Customer reviews and satisfaction ratings are high due to Walmart’s accessibility, hassle-free delivery and pickup options, and excellent customer service.  Conclusion Consumer Cellular’s advantages include flexible and affordable mobile phone plans. With BYOD (Bring Your Own Device), you can port an existing phone to Consumer Cellular, offering options to former AT&T and T-Mobile customers. With Walmart’s convenient online and in-store Consumer Cellular options, signing up for Consumer Cellular has never been easier.   Louis MuganLouis Mugan is a seasoned technology writer with a talent for turning complicated ideas into clear, practical guidance. He focuses on helping everyday readers stay confident in a world where tech moves fast. His style is approachable, steady, and built on real understanding. He has spent years writing for platforms like EasyTechLife, where he covers gadgets, software, digital trends, and everyday tech solutions. His articles focus on clarity, real-world usefulness, and helping people understand how technology actually fits into their lives. Outside of his regular columns, Louis explores emerging tools, reviews products, and experiments with new tech so his readers don’t have to. His steady, friendly approach has made him a reliable voice for anyone trying to keep up with modern technology. get in touch at louismugan@gmail.com

How to Turn Off Music On Your iPhone

How to Turn Off Music On Your iPhone

Are you having trouble with your iPhone playing music on its own? This is a common issue that many iPhone users deal with and can be qite frustrating. Fortunately, there are a few simple steps you can take to turn off the automatic music playing on your iPhone. First, check to see if the Music app is running in the background. If it is, you will need to close it manually by goig into your Settings app, tapping Apps, and then Force stop. This should stop the music from playing automatically. If you’re using a third-party music app, such as Spotify or Apple Music, you may need to close the app. To do this, simply double tap the Home button on your iPhone and swipe up on the app to close it. If neiter of these methods work for stopping your iPhone from playing music automatically, you can also try turning off auto-play in the Music settings menu. To do this, open Settings > Music > and toggle Auto-play off. Finally, if none of tese methods work for you then another option would be to disable Cellular Data for Music apps in your Phone’s settings menu. Open Settings > Cellular > scroll down and toggle off ‘Cellular Data’ for any Music apps listed in this menu. This should stop all music apps from using data when not connected to Wi-Fi and therefore prevent them from playing automatically. By following these easy steps you should be able to successfully turn off automatic music playing on your iPhone and get back to enjoying your phone without any unwanted interruptions! Stopping Music Playing on an iPhone To stop playing music on your iPhone, you can use the pause button at the bottom of the screen, or access the Control Center by swiping up from the bottom of your screen. In the Control Center, tap on the play/pause button to stop music. You can also stop playing music by closing the Music app on your iPhone. To do this, press and hold down on any app icon unil all of them start shaking, then tap the “X” in the corner of the Music app to close it. Once you have done this, no music will be playing on your device. Turning Off Music App on a Phone To turn off a music app on your phone, open the Settings app and tap Apps. Then, find and tap on the music app you wish to close. On the next page, tap the Force Stop button to completely close the app. Troubleshooting iPhone Music Playback Issues The Music app on your iPhone is set to run in the background by default, which is why it may seem like your iPhone is playing music on its own. To stop this from happening, you’ll need to close the app manually. Additionally, if you’re using a third-party music app, you’ll need to make sure that it’s not running in the background either. To do this, double tap the Home button and swipe up any music apps you have open. Turning Off Apple Music Automatically To turn off Apple Music automatically, you’ll need to use the free Shortcuts app on your iPhone. First, open the Shortcuts app and select the Automation tab at the bottom. If you’ve never created an automation on your iPhone before, tap the blue button labeled Create Personal Automation. This will bring up a list of triggers – choose Time of Day from this list. Then you can select when you’d like Apple Music to be paused automatically – for example, if you wanted it to pause at 10 PM evry night, you’d select 10 PM as the time and then toggle on the Repeat option. Finally, tap Next and then choose Stop Apple Music from the list of actions. Tap Done and your automation should now be set up! Stopping Music App from Automatically Playing To stop your music app from automatically playing, you will need to disable the Autoplay feature. To do this, tap the mini-player along the bottom when a song is playing and then tap the ‘Up Next’ icon in the lower-right corner. If Autoplay is activated, you will be able to see a playlist of queued songs. Tap the ‘Autoplay’ icon to disable it and your music app will no longer continue playing automatically afer each song. Unexplained Music Playing on iPhone 13 If your iPhone 13 is playing music by itself, it could be bcause Autoplay is turned on. Autoplay is a feature that automatically plays music when you open the Music app. To turn Autoplay on or off, tap the Autoplay button in the top right-hand corner of your screen. If you turn off Autoplay on one of your devices, then Autoplay is turned off on any device that’s signed in with your Apple ID. This could be why music is playing without you selecting it. Conclusion In conclusion, the iPhone is an incredibly powerful device that is capable of much more than just playing music. It can be used for a variety of tasks, from making calls and sending texts, to streaming videos and playing games. With its intuitive interface and a wide range of apps aailable in the App Store, it’s easy to customize the iPhone to meet your needs. However, if you’re having issues with your iPhone playing music on its own, you can simply close the Music app or use the Control Center to pause or stop playback. With a few simple steps, you can control your music playback easily and enjoy all that your iPhone has to offer.   Louis MuganLouis Mugan is a seasoned technology writer with a talent for turning complicated ideas into clear, practical guidance. He focuses on helping everyday readers stay confident in a world where tech moves fast. His style is approachable, steady, and built on real understanding. He has spent years writing for platforms like EasyTechLife, where he covers gadgets, software, digital trends, and everyday tech solutions.

How Do You Get Color Back on Your Phone?

How Do You Get Color Back on Your Phone?

Color plays a significant role in our lives. It adds vibrancy, depth, and beauty to the world around us. We rely on color to enhance our experiences, whether it’s through the clothes we wear, the art we admire, or the images we capture on our smartphones. However, there may be instances when we encounter issues with the color display on our phones, and getting the color back becomes a priority. One common problem that may occur is the grayscale or black and white screen issue. This can be particularly frustrating as it takes away the vibrant color experience we are accustomed to. Thankfully, there are a few simple steps you can take to resolve this issue. If you have an Android device running on Android 9 and higher, there is a bedtime mode feature that can unintentionally enable grayscale. To turn off grayscale, follow these steps: 1. Go to the Settings app on your Android device.2. Look for “Digital Wellbeing & parental controls” and tap on it.3. Within the Digital Wellbeing settings, find the option for grayscale and disable it. Sometimes, the grayscale issue can be related to a low battery. Try charging your phone for several hours and check if the screen returns to color once it has sufficient power. If the screen still appears discolored, it could be due to stuck pixels. You can try a simple fix by lightly rubbing the affected area with a pen cap. Applying mild pressure might help resolve the issue. In some cases, color-related problems can be addressed through the Accessibility features on your Android device. Here’s how you can access these features: 1. Open the Settings app on your Android device.2. Scroll down and select “Accessibility” from the list.3. Within the Accessibility settings, navigate to the “Display” section.4. Look for the option called “Colour correction” and select it. Within the Color correction settings, you may find options to adjust the color display and correct any abnormalities. If you see an option to turn off color adjustment, selecting it will bring back the screen to its original color mode. By following these steps, you can resolve the grayscale or black and white screen issue on your Android device and restore the vibrant colors you love. Remember to always check your device’s specific settings and options, as they may vary depending on the Android version or device model you have. Color is an essential aspect of our visual experience, and having control over it on our smartphones allows us to fully appreciate the world around us. How Do You Get Your Phone Screen Color Back to Normal? To restore your phone screen color back to normal, you can follow these steps: 1. Open the Settings app on your Android device.2. Scroll down and select “Digital Wellbeing & parental controls.”3. Tap on “Bedtime mode” or “Wind Down” (the name may vary depending on your device).4. In the Bedtime mode settings, locate the “Grayscale” option.5. Disable the grayscale mode by toggling the switch to the off position. Alternatively, if you have a quick settings panel, you can try the following steps: 1. Swipe down from the top of your screen to open the notification shade.2. Look for the quick settings panel, which usually appears as a grid of icons.3. Find the grayscale or black-and-white icon, which may be represented by a circle with different shades of gray or white.4. Tap on the grayscale icon to disable it and return your screen to its normal color mode. If you’re unable to find the grayscale option in either the Settings app or the quick settings panel, it’s possible that your device may have a different method of enabling and disabling this feature. In such cases, referring to your device’s user manual or contacting the device manufacturer’s support team can provide you with specific instructions tailored to your device. How Do You Fix Discoloration on Your Phone? To fix discoloration on your phone, you can try the following steps: 1. Check for software updates: Sometimes, software glitches can cause display issues. Ensure that your phone’s software is up to date by going to the settings menu and checking for any available updates. Install them if necessary. 2. Adjust display settings: Your phone may have settings to adjust the color temperature, saturation, or screen mode. Explore the display settings on your device and try tweaking these options to see if it resolves the discoloration issue. 3. Calibrate the screen: Some phones offer screen calibration tools that allow you to adjust the color accuracy. Look for a screen calibration option in your phone’s settings and follow the instructions provided to recalibrate the screen. 4. Remove screen protector or case: If you have a screen protector or a case on your phone, it could be causing the discoloration. Remove any accessories that might be affecting the screen’s color accuracy and check if the issue persists. 5. Perform a factory reset: If none of the above steps work, you can try performing a factory reset on your phone. This will erase all data and settings, so make sure to back up your important information before proceeding. To perform a factory reset, go to your phone’s settings, find the reset option, and follow the on-screen instructions. 6. Seek professional help: If the discoloration problem persists after trying the above steps, it might be a hardware issue. In such cases, it is recommended to contact the manufacturer or visit an authorized service center to get professional assistance. They can diagnose the problem accurately and provide appropriate solutions. Note: The steps mentioned here may vary slightly depending on the make and model of your phone. Always refer to your phone’s user manual or the manufacturer’s website for specific instructions. How to Change Screen Color? To change the screen color on your Android device, follow these steps: 1. Open the Settings app on your device. You can usually find it by swiping down from the top of the screen and tapping on the gear-shaped icon,

What Happens if You Accidentally Call Emergency SOS on Your iPhone

What Happens if You Accidentally Call Emergency SOS on Your iPhone

Home / The iPhone has a feature that allows you to quickly call emergency services if you find yourself in an emergency situation. This feature, called Emergency SOS, can be activated by pressing the side button five times quickly. But what happens if you accidentally call Emergency SOS on your iPhone? Don’t worry; the process is designed to prevent accidental calls from happening. When you press the side button five times quickly, your iPhone will display an emergency services alert along with a loud alarm noise. This alert will stay on the screen for a few seconds before it automatically ends and cancels the emergency call. If you don’t tap “Cancel” withn this time frame, then your iPhone will dial emergency services and send them your current location information. Once Emergency SOS is activated, your iPhone will also send messages to your designated contacts with a map of your current location and inormation about how to get in touch with you. If you do accidentally call Emergency SOS on your iPhone, don’t panic! The emergency services operator who answers will understand that it was an accident and help guide you thrugh canceling the call if needed. It’s important to remember that Emergency SOS is there for a reason – to help people in emergencies! So make sure that any family members or friends who use iPhones are familiar with how it works and what happens if they accidentally activate it. Accidentally Calling Emergency Services on an iPhone Yes, it is possible to accidentally call emergency services on an iPhone if you are using an iPhone 8 or newer and the Call with Hold feature is enabled. To hard reset an iPhone 8 or newer, press and hold both the side button and the volume down button. This will activate Emergency SOS, which will dial 911 if held for a few seconds. Source: 9to5mac.com The Effects of Activating Emergency SOS When you press the Emergency SOS button on your iPhone, it will first sound an alarm to alert tose around you. It will then call emergency services (911 in the US) automatically, while simultaneously sending a text message with your current location to your emergency contacts. You can also choose to cancel the call after the alarm has sounded. Depending on your region, you may also be able to access additional emergency services such as fire, medical, and police. Additionally, you have the option to add an Emergency Medical ID card with your health information so that first responders can help faster. Consequences of Accidentally Calling 911 and Hanging Up Immediately If you accidentally dial 911 and hang up right away, the dispatcher will stil call you back. If you don’t answer the call, they may choose to send police to your home to make sure everything is okay. It’s important that if you ever do accidentally dial 911, that you stay on the line and explain to the dispatcher that it was a mistake. Cancelling Emergency SOS Yes, you can cancel an emergency SOS. To cancel it on iPhone 8 or later, release the side button and volume button. On iPhone 7 or earlier, press the Stop button, then tap Stop Calling. You will then be asked to confirm that you want to end the call. What Triggers an Emergency Call on an iPhone? The emergency call feature on the iPhone can be triggered by holding down the Power button and one of the Volume buttons and swiping to call 911. It can also be triggered by pressing the Power button rapidly five times, or by holding down the Power and Volume buttons for a few seconds which will automatically call 911 without having to swipe. Getting Out of SOS Mode on a Phone To get your phone out of SOS mode, press and quickly release the Volume Down button. Then, press and hold the Side button until the Apple logo appears on the screen. After releasing the Side button, your phone should boot up normally and be out of SOS mode. Does Emergency SOS Send Location Information? Yes, emergency SOS can send your location. When you dial or text an emergency number such as 911 in the US or 112 in Europe, your phone will automatically send its location to first responders. This can help them locate you quickly and provide assistance. What to Do If Accidentally Calling 911 If you accidentally call 911, do not hang up. Stay on the line and tell the dispatcher that everything is alright and that you apologize for dialing the wrong number. Let them know that you do not need assistance. The dispatcher may ask some questions to verify your safety and make sure that no help is needed. In some cases, the police may be sent to check on your location, so it’s important to remain calm and provde honest answers. Source: cnet.com Tracing Speed of 911 Calls 911 call centers can trace cellphone calls in 30 seconds or less, thanks to rules issued by the Federal Communications Commission in 2015. These rules require wireless telecom companies to provide a dispatchable location – that is, a physical address including information such as floor, suite or apartment – to 911 call centers within 30 seconds, regardless of whether the caller is indoors or outdoors. This ensures that emergency responders can find the caller quickly and accurately. Can 911 Track a Person’s Location? 911 call centers have limited ability to track your location when you call from a wireless device. While most people expect for 911 call centers to be able to immediately pinpoint a caller’s exact location, this is not always the case. Instead, wireless carriers provide EMS with a signal that can help approximate a caller’s location. In some cases, the signal is accurate enough to determine the address of the caller and provide information about thir general vicinity. However, this is not always possible and many times 911 dispatchers must use other methods such as asking for landmarks or

How To Enable Privacy Screen On Your iPhone

How To Enable Privacy Screen On Your iPhone

In today’s world, iPhone privacy has never been more critical. Whether you’re checking your bank account on a crowded train or reviewing sensitive information while waiting in a coffee shop line, the reality is that prying eyes are everywhere in public settings. Recognizing the importance of keeping your personal data under wraps, Apple has equipped the iPhone with robust data protection, allowing you to take control of your privacy easily.  This guide will walk you through how to enable the privacy screen feature on your iPhone, ensuring that your private matters stay just that – private, no matter where you are. What is a Privacy Screen, and Why Use One? A privacy screen, whether it’s a built-in feature on your iPhone or a physical screen protector, is all about keeping your digital life private. These tools are designed with a privacy filter that narrows the viewing angle of your screen. So, what does this mean for you? Imagine you’re texting or checking your bank account in a crowded place. With a privacy screen, the person next to you won’t be able to glance over and read your screen. It’s similar to being equipped with a secret agent shield for your iPhone! Yet, the perks include more than just data security. Many privacy screens also tackle the blue light emanating from gadget screens, which may result in eye strain after long periods of use. By reducing this blue light, a privacy screen can help keep your eyes more comfortable throughout the day. Enabling Privacy Features and Finding the Right Tools Enhancing privacy on your iPhone isn’t just about software; it’s also about how you can manage your display and what physical accessories you choose. Let’s dive into maximising privacy through settings app adjustment, and selecting the right physical tools. First up, within your iPhone’s settings app, while you might not find a ‘privacy screen’ feature per se, there are several display options and accessibility features that can help. For instance, adjusting your screen brightness and text size can make it harder for those nearby to sneak a peek at your screen. To adjust these, go to Settings > Display & Brightness for brightness settings and Settings > Accessibility > Display & Text Size for text size and more. Consider a physical screen protector if you’re looking for more dedicated privacy. These handy accessories make it hard for anyone not directly in front of your phone to see observe what’s being shown on your screen. Businesses like 3M and ZAGG offer reputable physical privacy screen brands that are easy to find online or in tech stores. Don’t forget to explore additional privacy settings iOS offers, such as content restrictions. These can be found under Settings > Screen Time > Content & Privacy Restrictions, allowing you to control what content can be accessed on your device. The Benefits of Using a Privacy Screen Filter Using a privacy screen filter on your iPhone has its own invaluable benefits.  1. Enhanced Privacy: A privacy screen’s most immediate benefit is its heightened privacy. It restricts the viewing angle of your iPhone screen so that only someone directly in front of it (like you) can see the contents clearly. This means that prying eyes to the side of you, say on public transport or in a cafe, are thwarted from casually glimpsing at your private information. 2. Screen Protection: Beyond just privacy, these filters often double as screen protectors, guarding against scratches and smudges and even reducing glare. This dual functionality not only keeps your sensitive information safe from onlookers but also protects your screen from the wear and tear of daily use, keeping it pristine for longer. 3. Reduced Eye Strain: Many privacy screens are designed to minimize glare and filter out harmful blue light. This can significantly reduce eye strain, especially with increased screen time, making your iPhone use more comfortable over extended periods.  It’s a win-win for privacy and health, ensuring your eyes are safeguarded against the fatigue of staring at screens. Potential Drawbacks to Consider While enabling a privacy screen on your iPhone is a smart move for enhancing data security, it’s important to remember the limitations of such features. Privacy screens are not a magical shield against all forms of hacking. They are a layer of defense, yes, but not foolproof. This highlights the critical need for robust password protection, ensuring your passcodes are strong, unique, and changed regularly. Moreover, keeping your apps and iOS system up to date is vital to data security. App updates frequently incorporate security patches that shield against recently identified threats. Ignoring these upgrades may render your device vulnerable to potential risks. Equally crucial is phishing awareness. The smartest privacy screen can’t protect you if you unwittingly grant access to sensitive information through phishing scams. Prioritizing caution with the links you interact with and the information you divulge on the internet is crucial. Privacy Screens in Specific Scenarios Enabling a privacy screen on your iPhone can be a game-changer in various situations, especially when you’re aiming to keep prying eyes at bay. Let’s examine how this feature becomes particularly beneficial in special scenarios. While commuting, whether it’s on a bus, train, or any other public transportation, it’s not uncommon to catch someone glancing over your shoulder.  A privacy screen ensures that your messages, emails, or any sensitive content you’re viewing stays for your eyes only, enhancing your data protection. In the workplace, maintaining workplace privacy is crucial, especially when dealing with confidential information. You wouldn’t want your latest project proposal or sensitive financial forecasts to be displayed for any colleague passing by your desk. Activating a privacy screen means you can work worry-free, knowing your information is safeguarded. Talking about financial security, performing financial transactions on your iPhone, whether it’s transferring money, paying bills, or simply checking your account balance, demands the highest level of privacy. A privacy screen plays an essential role by keeping your banking details secure from those around you, ensuring your financial data is protected.

How To Send Text Messages Online With Verizon

How To Send Text Messages Online With Verizon

Home / Do you want to send text messages online with Verizon? Unfortunately, email-to-SMS and other legacy methods, such as the Verizon Messages web and desktop apps, are no longer supported. However, there are still ways to send text messages from your desktop if you have a Verizon Wireless account. Let’s get into it! What Happened to Email-to-SMS and Verizon Messages?  Email-to-SMS used to be supported by many carriers. It allowed you to send text messages to a mobile number using your email. For example, you could send an email to a specific @vtext.com email address, and the message would be delivered to the mobile number specified in the email address.  However, Verizon, as well as other major carriers, did away with email-to-SMS support around 2024. There were just too many problems with it, such as how easy it was to abuse it and send spam to multiple phone numbers at once.  Similarly, Verizon no longer supports the Verizon Messages app. However, you can still text from your desktop using Google Messages, Messages for Mac, or Microsoft Phone Link. The setup process depends on whether you have an Android or iPhone.   Android Users: How to Text With Google Messages You can use Google Messages on your desktop browser to send text messages from the web.  If you have an Android phone, download Google Messages from the Play Store, if it’s not already installed on your phone. Also, make sure your Android device is signed in with a Gmail account.  Then, make Google Messages your default messaging app. You can do that by going to Settings > Apps > Default apps > SMS app and selecting Google Messages. However, the first time you use Google Messages, it should also prompt you and ask you whether you want to make it the default app.   Next, on your desktop, go to messages.google.com/web in your browser and sign in with your Google account. Make sure it’s the same Google account that you are using with Google Messages on your phone. Once you have signed in, you will need to complete the pairing process by selecting the right emoji on your phone, based on what’s shown on your desktop screen.  Alternatively, you can pair using a QR code. Click on “Pair With QR Code” on Google Messages on your desktop. Then, on your phone, open the Google Messages app and click on your profile picture. Next, navigate to Device Pairing > QR Code Scanner. Finally, use the QR code scanner that appears on your phone to scan the QR code on your desktop.  iPhone Users: Messages for Mac and Phone Link You can use Phone Link to link your iPhone to your Windows computer.  If you have an iPhone, things get a bit more complicated.  If you have a Mac, it’s pretty straightforward. Open the Messages app on your Mac and sign in with the same Apple ID that you are using on your iPhone. Then, go to Messages > Settings > iMessage and select Enable Messages in iCloud. You can then choose which email address or phone number you want to use for sending messages.  However, if you have a Windows computer, things are a little different. There’s no iMessage app for Windows, and iPhones do not support Google Messages. Instead, if you have iOS 16 or a later version, you can use Microsoft Phone Link.  Phone Link comes preinstalled on Windows 11, so you just have to search for “Phone Link” on Windows and launch it.  Then, select “iPhone.” It will show you a QR code. Use your iPhone’s camera to scan the QR code, and it will link your iPhone to your PC over Bluetooth! You will then be able to send and view text messages on your Windows device.  However, Phone Link requires your iPhone to be within Bluetooth range of your device. New messages will not show up if your iPhone is not connected via Bluetooth to your PC. Image sharing, video sharing, and group texts are not supported by Phone Link.  Troubleshooting & Common Errors If you are having difficulty pairing Google Messages with your phone, make sure you are using the correct Google account. Open Google Messages on your phone and click on your profile image in the top-right corner to check which Gmail account you are signed in with to Google Messages. Then, sign in with the same Gmail account on Google Messages on your browser, or try the QR pairing method instead.  If you are having difficulty using Messages on your Mac, make sure you are signed in with the same Apple ID that you have on your phone and that Messages in iCloud is enabled.  Finally, if you are experiencing issues using Phone Link with your iPhone, make sure that Bluetooth is enabled on your iPhone and that it is within Bluetooth range of your PC.  Conclusion  I hope this setup checklist was useful! Once you have set up your computer with Google Messages, Messages for Mac, or Microsoft Phone link, do a delivery test by sending a test SMS to a trusted contact. Ask them to send you a message as well to see if you get a notification (make sure notifications aren’t blocked from your browser or the Messages app on Mac).  Louis MuganLouis Mugan is a seasoned technology writer with a talent for turning complicated ideas into clear, practical guidance. He focuses on helping everyday readers stay confident in a world where tech moves fast. His style is approachable, steady, and built on real understanding. He has spent years writing for platforms like EasyTechLife, where he covers gadgets, software, digital trends, and everyday tech solutions. His articles focus on clarity, real-world usefulness, and helping people understand how technology actually fits into their lives. Outside of his regular columns, Louis explores emerging tools, reviews products, and experiments with new tech so his readers don’t have to. His steady, friendly approach has made him a reliable voice for anyone trying to keep up with modern technology.

How to Fix Pictures Not Rotating on iPhone

How to Fix Pictures Not Rotating on iPhone

Home / Ever noticed that your iPhone photos aren’t rotating as they should? This iPhone photo rotation issue is a common annoyance, but the good news is that it’s usually easy to fix. Correctly oriented photos are crucial for viewing and sharing, and there are straightforward solutions to tackle the iPhone rotate photos issue.  In this guide, we’ll show you how to fix iPhone picture orientation quickly and efficiently. Whether it’s a photo orientation problem or another iPhone troubleshooting matter, we’ve got you covered with tips to ensure your photos look perfect every time. Checking Rotation Lock Is your iPhone stuck in portrait mode? This might be due to the rotation lock iPhone setting.  To disable the rotation lock and get your screen rotating again, access the Control Center by dragging your finger downwards from the top right of your display. Look for the rotation lock icon.  A highlighted icon shows that the rotation lock is enabled. Tap the icon to turn off the rotation lock and unlock the screen rotation. Your iPhone rotation settings should now allow your screen to rotate freely. Ensuring Auto-Rotate is Enabled To ensure your pictures rotate correctly, you need to enable auto-rotate on your iPhone. First, access the iPhone auto-rotate settings by opening the Control Center. Swipe down from the top-right corner of the screen if you have an iPhone X or later, or swipe up from the bottom if you have an older model.  Check out the lock icon. If the icon is highlighted, auto-rotate iPhone is disabled. Tap the icon to turn on the auto-rotate screen.  Restarting the App and Device If your iPhone isn’t rotating pictures correctly, restarting both the problematic app and the device can often fix the rotation issue.  To restart the app, follow these steps: On iPhones with a Home button, from the bottom of the screen, swipe up and pause halfway, then swipe the app’s preview upwards to shut it down. On iPhones without a Home button, swipe up diagonally from the bottom corner of the screen to close the app. Next, to restart the iPhone, simultaneously press the side button and either volume button till the power off slider shows up.  Slide the control, wait half a minute, then press the side button till the Apple logo is visible. This reboot iPhone process can often fix rotation issues. If problems persist, you might need to restart the device a few times to properly troubleshoot iPhone rotation. Checking for Obstructions One common culprit when your iPhone isn’t rotating pictures as it should is an iPhone case issue. Sometimes, a case or accessory can cause a sensor obstruction, blocking the orientation sensors that detect when you tilt your phone.  To fix this, make sure to check the phone sensors by removing the case and seeing if the rotation problem persists. If the rotation works without the case, then you’ve identified the problem. This kind of iPhone sensor issue is more common than you think. Always ensure nothing blocks orientation sensors to keep your phone working smoothly. Updating iOS Regularly performing an iOS update can fix bugs with updates that might be causing these problems. To update iPhone software, go to Settings > General > Software Update.  Here, you can check for and install the latest iOS. An iOS software update often includes fixes for various bugs, including those affecting photo rotation. Always keep your iPhone up to date to enjoy the latest features and improvements by updating the operating system regularly. Contacting Apple Support Getting in touch with Apple Support is the next step if you’ve tried all the solutions and your pictures still aren’t rotating. If needed, you can visit the Apple Store for in-person assistance. The Apple technical support team is equipped to fix iPhone issues efficiently. Why is my iPhone not rotating pictures even with auto-rotate enabled? Your iPhone not rotating pictures even with auto-rotate enabled is possible. Sometimes, sensor issues can obstruct the device’s ability to detect orientation changes. Dust or debris on the gyroscope or accelerometer sensors can cause malfunctions.  Another possible cause could be software issues; bugs or outdated software might interfere with the auto-rotate functionality.  To fix auto-rotate, try restarting your iPhone or moving on from outdated software. If these steps don’t work, you can troubleshoot the rotation issue by checking if the auto-rotate lock is accidentally turned on in the control center or reset your device’s settings. Conclusion Fixing picture rotation issues on your iPhone is simpler than it seems. By following these straightforward iPhone troubleshooting steps, you can quickly resolve photo orientation problems. Check your rotation lock to ensure it’s disabled.  If these methods don’t work, restarting your device can often fix iPhone issues. For persistent problems, updating your software or resetting settings might be necessary. With these easy-to-follow solutions, you’ll have an effective iPhone rotation fix and a reliable photo orientation solution to rotate pictures on your iPhone effortlessly. Louis MuganLouis Mugan is a seasoned technology writer with a talent for turning complicated ideas into clear, practical guidance. He focuses on helping everyday readers stay confident in a world where tech moves fast. His style is approachable, steady, and built on real understanding. He has spent years writing for platforms like EasyTechLife, where he covers gadgets, software, digital trends, and everyday tech solutions. His articles focus on clarity, real-world usefulness, and helping people understand how technology actually fits into their lives. Outside of his regular columns, Louis explores emerging tools, reviews products, and experiments with new tech so his readers don’t have to. His steady, friendly approach has made him a reliable voice for anyone trying to keep up with modern technology. get in touch at louismugan@gmail.com

Scroll to Top