Internet

How to Remove a Google Account from your Devices

How to Remove a Google Account from your Devices

Google accounts can be a necessary part of our lives, but they can also be a nuisance when we want to get rid of them. There are various ways to remove a Google account, depending on what type of device you’re using and which operating system it runs on. In this article, we’ll provide instructions for how to remove a Google account from Android and iPhone devices, as well as from computers running Windows 10 or Chrome OS. We’ll also explain what happens when you delete a Google account and what your options are if you want to keep using Gmail but no longer want the associated Google account. How Do I Remove A Google Account From My Phone? To remove a Google account from your phone, you’ll need to open your phone’s Settings app and tap Accounts. If you don’t see “Accounts,” tap Users & accounts. Next, tap the account you want to remove and then Remove account. If this is the only Google Account on the phone, you’ll need to enter your phone’s pattern, PIN, or password for security. How Do I Remove A Google Account From A Computer? To remove a Google account from a computer, you will need to select the user profile that you want to remove and click on the options icon from the top-right of the user profile. Then, remove the Gmail account from chrome by clicking on “Remove This Person”. You will get a confirmation message, click again on “Remove This Person“. What Happens If You Remove Google Account? Removing a Google account from an Android or iPhone device simply removes access from that particular device, and it can be restored later on. However, any information stored through the account on that device will be lost. That includes things like email, contacts, and settings. Why Can’t I Delete My Gmail Account? A personal Google account can only be deleted by the authenticated owner (i.e. the person signed into it). A company domain Google account (G Suite) can be deleted by the domain administrator. How Do I Delete User Accounts On My Computer? To delete user accounts on your computer, you will need to go to the Accounts section of your Settings. From there, you will be able to select the person’s name or email address and then select Remove. After reading the disclosure, you will need to select Delete account and data in order to complete the process. How Do You Remove A Google Account From Windows 10? Removing a Google account from Windows 10 is a fairly simple process. First, open the Settings app and click on Accounts. Then, click on Email & accounts and select the account that you want to remove. Next, click the Manage button and then click the Delete account from this device option. Finally, click the Delete button and then click the Done button. How Do I Remove A Gmail Account From Chrome? To remove a Gmail account from Chrome, press the settings menu icon in the top-right area of your profile card. In the drop-down menu that appears, press the Remove This Person option. Once pressed, the Chrome profile linked to your Gmail account will be removed. Conclusion Removing a Google account is a fairly simple process, but it’s important to understand what happens when you do. Deleting an account can result in the loss of information stored on that device, so be sure to back up any data you want to keep before removing the account. If you only have one Google account and want to continue using Gmail, your best option may be to create a new Gmail address without the associated Google account. Louis MuganLouis Mugan is a seasoned technology writer with a talent for turning complicated ideas into clear, practical guidance. He focuses on helping everyday readers stay confident in a world where tech moves fast. His style is approachable, steady, and built on real understanding. He has spent years writing for platforms like EasyTechLife, where he covers gadgets, software, digital trends, and everyday tech solutions. His articles focus on clarity, real-world usefulness, and helping people understand how technology actually fits into their lives. Outside of his regular columns, Louis explores emerging tools, reviews products, and experiments with new tech so his readers don’t have to. His steady, friendly approach has made him a reliable voice for anyone trying to keep up with modern technology. get in touch at louismugan@gmail.com

How To Send Text Messages Online With Verizon

How To Send Text Messages Online With Verizon

Home / Do you want to send text messages online with Verizon? Unfortunately, email-to-SMS and other legacy methods, such as the Verizon Messages web and desktop apps, are no longer supported. However, there are still ways to send text messages from your desktop if you have a Verizon Wireless account. Let’s get into it! What Happened to Email-to-SMS and Verizon Messages?  Email-to-SMS used to be supported by many carriers. It allowed you to send text messages to a mobile number using your email. For example, you could send an email to a specific @vtext.com email address, and the message would be delivered to the mobile number specified in the email address.  However, Verizon, as well as other major carriers, did away with email-to-SMS support around 2024. There were just too many problems with it, such as how easy it was to abuse it and send spam to multiple phone numbers at once.  Similarly, Verizon no longer supports the Verizon Messages app. However, you can still text from your desktop using Google Messages, Messages for Mac, or Microsoft Phone Link. The setup process depends on whether you have an Android or iPhone.   Android Users: How to Text With Google Messages You can use Google Messages on your desktop browser to send text messages from the web.  If you have an Android phone, download Google Messages from the Play Store, if it’s not already installed on your phone. Also, make sure your Android device is signed in with a Gmail account.  Then, make Google Messages your default messaging app. You can do that by going to Settings > Apps > Default apps > SMS app and selecting Google Messages. However, the first time you use Google Messages, it should also prompt you and ask you whether you want to make it the default app.   Next, on your desktop, go to messages.google.com/web in your browser and sign in with your Google account. Make sure it’s the same Google account that you are using with Google Messages on your phone. Once you have signed in, you will need to complete the pairing process by selecting the right emoji on your phone, based on what’s shown on your desktop screen.  Alternatively, you can pair using a QR code. Click on “Pair With QR Code” on Google Messages on your desktop. Then, on your phone, open the Google Messages app and click on your profile picture. Next, navigate to Device Pairing > QR Code Scanner. Finally, use the QR code scanner that appears on your phone to scan the QR code on your desktop.  iPhone Users: Messages for Mac and Phone Link You can use Phone Link to link your iPhone to your Windows computer.  If you have an iPhone, things get a bit more complicated.  If you have a Mac, it’s pretty straightforward. Open the Messages app on your Mac and sign in with the same Apple ID that you are using on your iPhone. Then, go to Messages > Settings > iMessage and select Enable Messages in iCloud. You can then choose which email address or phone number you want to use for sending messages.  However, if you have a Windows computer, things are a little different. There’s no iMessage app for Windows, and iPhones do not support Google Messages. Instead, if you have iOS 16 or a later version, you can use Microsoft Phone Link.  Phone Link comes preinstalled on Windows 11, so you just have to search for “Phone Link” on Windows and launch it.  Then, select “iPhone.” It will show you a QR code. Use your iPhone’s camera to scan the QR code, and it will link your iPhone to your PC over Bluetooth! You will then be able to send and view text messages on your Windows device.  However, Phone Link requires your iPhone to be within Bluetooth range of your device. New messages will not show up if your iPhone is not connected via Bluetooth to your PC. Image sharing, video sharing, and group texts are not supported by Phone Link.  Troubleshooting & Common Errors If you are having difficulty pairing Google Messages with your phone, make sure you are using the correct Google account. Open Google Messages on your phone and click on your profile image in the top-right corner to check which Gmail account you are signed in with to Google Messages. Then, sign in with the same Gmail account on Google Messages on your browser, or try the QR pairing method instead.  If you are having difficulty using Messages on your Mac, make sure you are signed in with the same Apple ID that you have on your phone and that Messages in iCloud is enabled.  Finally, if you are experiencing issues using Phone Link with your iPhone, make sure that Bluetooth is enabled on your iPhone and that it is within Bluetooth range of your PC.  Conclusion  I hope this setup checklist was useful! Once you have set up your computer with Google Messages, Messages for Mac, or Microsoft Phone link, do a delivery test by sending a test SMS to a trusted contact. Ask them to send you a message as well to see if you get a notification (make sure notifications aren’t blocked from your browser or the Messages app on Mac).  Louis MuganLouis Mugan is a seasoned technology writer with a talent for turning complicated ideas into clear, practical guidance. He focuses on helping everyday readers stay confident in a world where tech moves fast. His style is approachable, steady, and built on real understanding. He has spent years writing for platforms like EasyTechLife, where he covers gadgets, software, digital trends, and everyday tech solutions. His articles focus on clarity, real-world usefulness, and helping people understand how technology actually fits into their lives. Outside of his regular columns, Louis explores emerging tools, reviews products, and experiments with new tech so his readers don’t have to. His steady, friendly approach has made him a reliable voice for anyone trying to keep up with modern technology.

What Happens to iMessages When You’re Blocked?

What Happens to iMessages When You’re Blocked?

Home / When it comes to communication, blocking someone is a necessary step that many people take. Blocking someone on your iPhone blocks them from contacting you via the Messages app, FaceTime, or other messaging services such as WhatsApp and Skype. But what happens when you block someone on iMessage? Does the person know they’ve been blocked? Can they stil see your messages? The answer is no. When you block someone on iMessage, their messages will not show up on your device at all. Instead, they will simply see a “Delivered” status for their message, even though it never actually arrived to you. This is becase their messages are now blocked by Apple’s servers and will never reach you. Blocking someone on iMessage also prevents them from seeing any of your past conversations or being able to start new ones with you. They will not be able to see when you are typing a message either. If they try to call or FaceTime you, the call will immediately go straight to voicemail without ringing your phone at all. It’s important to remember that blocking someone on iMessage does not automatically delete any of your conversations with the blocked contact. If you want to delete the conversation thread with this person, then you must do so manually before blocking them. Otherwise, the conversation thread stil remains in Messages and can be accessed by anyone who has access to your phone or computer (unless it’s password protected). In short, if you block someone on iMessage they won’t be able to contact or view anything related to you in any way – instead they’ll only see a “Delivered” status for their message that never actually arrives. Does an iPhone Message Say ‘Delivered’ When Blocked? No, messages will not say “delivered” when a user has been blocked on an iPhone. When a user has been blocked, the messages they send will still appear to be sent as normal, but the recipient will not receive them. The sender will not receive any notification that their messages have not been received. Identifying If You Have Been Blocked on iMessage If you are blocked on iMessage, you will no longer see a delivery status when sending a message. The message will simply say “Delivered” and remain in that state. You will also not receive any notifications when the other person is typing or has read your message. Furthermore, if you attempt to call the person who has blocked you, you will only hear a single ring before beng sent to voicemail. Can You Determine If Someone Has Blocked Your Texts? Yes, you can tell if someone has blocked your texts. If you have sent a text message to someone and they don’t reply, it’s possible that they have blocked you. You may also notice that the message status is ‘delivered’ but you don’t get any notification or response back. Additionally, if the person has blocked your texts, tere will be a blank space beneath your message when you view it in the conversation thread. Does Blocking a Message Affect Its Delivery Status? No, it does not. If you have been blocked, you will not be able to see any delivery status or read receipts for the message you sent. The message itself will still apper in a blue bubble, but there will be no delivery status below it, not even a “Not Delivered.” What Happens When You Text Someone Who Has Blocked You on an iPhone? When you text someone who has blocked you on an iPhone, the message will still send normally. However, the recipient will not receive it and you will not receive any type of notification that the message was blocked. Furthermore, if you try to call the person, your call will go straight to voicemail without ringing. Louis MuganLouis Mugan is a seasoned technology writer with a talent for turning complicated ideas into clear, practical guidance. He focuses on helping everyday readers stay confident in a world where tech moves fast. His style is approachable, steady, and built on real understanding. He has spent years writing for platforms like EasyTechLife, where he covers gadgets, software, digital trends, and everyday tech solutions. His articles focus on clarity, real-world usefulness, and helping people understand how technology actually fits into their lives. Outside of his regular columns, Louis explores emerging tools, reviews products, and experiments with new tech so his readers don’t have to. His steady, friendly approach has made him a reliable voice for anyone trying to keep up with modern technology. get in touch at louismugan@gmail.com

How To Delete An Email Address From Outlook Memory

How To Delete An Email Address From Outlook Memory

Home / Outlook is one of the most popular email clients in the world. Millions of people use it to manage their email communications every day. Outlook is known for its reliability and ease of use, as well as its many features and options. One of Outlook’s most important features is its ability to store email addresses in its memory. This allows you to quickly and easily send emails to people you’ve previously communicated with. However, there may be times when you need to delete an email address from Outlook’s memory. How Do I Permanently Delete An Email Address From Outlook? To delete an email address from Outlook, you fist need to remove it from your account settings. From the main Outlook window, select File in the upper left corner of the screen. Select Account Settings > Account Settings. Select the account you want to delete, then select Remove. Once the email address is removed from your account settings, you can delete it from Outlook by selecting it in the Address Book and pressing the Delete key on your keyboard. How Do I Delete An Old Email Address That Keeps Popping Up In Outlook? To delete an old email address that keeps popping up in Outlook, you need to select the unwanted address. The selected entry is highlighted and shown with an ‘X’ indicating it can be deleted. Press the Delete key. How Do I Delete An Email Address From Autofill? IOS allws you to delete an email address from the autofill list. You can remove an email address from the list by opening Mail app and clicking on the New Email button. In the new e-mail window, start typing the address you want to remove in the To: field. When it appears, tap on the i button next to the address. Then tap Remove From Recents at the bottom. How Do I Delete An Old Email Address That Keeps Popping Up? To delete an old email address from Mail, fist go to the ‘Window’ menu and select ‘Previous Recipients’. Then click on the old email address and press the ‘Remove from List’ button. You should do this anytime someone sends you a ‘my email address has changed’ email. How Do I Delete Cached Email Addresses In Outlook 2016? To clear the autocomplete list of all cached email addresses in Outlook 2016: Go to the File tab. Select Options. In the Outlook Options dialog box, select the Mail category. In the Send messages section, select Empty Auto-Complete List. In the confirmation dialog box, select Yes. Can You Permanently Delete An Email Address? Yes, email addresses can be permanently deleted. After going through the process, all of your emails and account settings will be erased. You will no longer be able to use your email address to send or receive emails, and the address will not be made available for anyone else to use in the future. How Do I Remove Old Address From Autofill? To remove an old address from autofill on Android, open the Autofill and Payments menu and tap eiter Address and more or Payment Methods. Edit both Address and more or Payment Methods to reflect your new name and information. Delete any incorrect or unused information. How Do I Delete An Autofill Email Address In Outlook 365? To delete an autofill email address in Outlook 365, type the email address into the To: field when composing an email. When the address appears, select the “X” next to it and it will be removed. How Do I Delete An Email Address From Outlook App? To delete an email address from Outlook app, open the app and go to settings. Select the account you want to remove and hit delete account. Tap delete again to confirm. Discover how to block spam emails on Spectrum and keep your inbox organized. How to Permanently Delete Emails from Outlook | Hotmail | msn https://youtu.be/bD4v9WduVic?si=VvTA3a1h1qJHCJPQ Louis MuganLouis Mugan is a seasoned technology writer with a talent for turning complicated ideas into clear, practical guidance. He focuses on helping everyday readers stay confident in a world where tech moves fast. His style is approachable, steady, and built on real understanding. He has spent years writing for platforms like EasyTechLife, where he covers gadgets, software, digital trends, and everyday tech solutions. His articles focus on clarity, real-world usefulness, and helping people understand how technology actually fits into their lives. Outside of his regular columns, Louis explores emerging tools, reviews products, and experiments with new tech so his readers don’t have to. His steady, friendly approach has made him a reliable voice for anyone trying to keep up with modern technology. get in touch at louismugan@gmail.com

How to Access and Manage Your Spectrum Email

How to Access and Manage Your Spectrum Email

Home / Spectrum Email is an email service offered by Spectrum, a company that provides Wi-Fi, cable TV, home phone, and mobile phone services. Although Spectrum email is no longer accepting new users, and you can no longer set up a new Spectrum Email address, existing users can still sign in and access Spectrum’s email services.  In this guide, I will be showing you how to access and use Spectrum email. Let’s get into it!  How to Access Your Spectrum Email To access your Spectrum email account, sign into webmail.spectrum.net using your email address and password.  Click on the Email tab at the top to see your emails. If you see an Inbox tab on the left, click on it to access your inbox.  Accessing Your Old Roadrunner Email You can access your Roadrunner email, if it’s still active, by signing in to Spectrum webmail using the link above.  Note that Spectrum locks emails after six months of inactivity. So, if you have an old Roadrunner email that you haven’t used in a while, it will probably be locked. That means that new incoming messages won’t reach your inbox, although older messages will still be accessible. Note that if you no longer have an active Spectrum Internet account, the email account will be deleted altogether.  How to Set Up Spectrum Email on Mobile Devices Using the Mail app on your iPhone, you can add your Spectrum email account so you can access your Spectrum emails on your phone. To set up Spectrum email on your iPhone, follow these steps: On an Android, go to your Accounts in your Settings and add an account. Choose email, and then choose to add another email address (not Gmail or Outlook). Add in the information here to connect it to the Spectrum webmail server. Note that this process can vary slightly depending on which Android version and manufacturer you have. You can also see all of the Spectrum IMAP details in the screenshot above.  Connecting Spectrum Email With Outlook You can also connect your Spectrum email with Outlook. To do that in Outlook 2021, follow these steps:  For other versions of Outlook, or if you are having trouble adding your Spectrum account and want to add it manually using IMAP, see here.  Troubleshooting Common Spectrum Email Issues The most common issue when setting up Spectrum email on your phone or with Outlook is incorrectly configuring the Spectrum server details in the IMAP settings. This will prevent your phone from connecting with Spectrum’s mail server. So, make sure that you are entering the correct server details, which you can find here.  If you are having trouble logging in, make sure that you are using the correct username and password.  Managing Your Spectrum Email Account After Leaving the Provider If you cancel your Spectrum service, you will not be able to keep your Spectrum email after canceling. Spectrums’s policy for former customers is that it keeps emails for 60 days, after which you will lose everything.  You should back up your contacts before the 60 days are over. To do that, follow these steps:  If you want to save an actual email, you will need to forward it to another email address, such as your Gmail address. You can forward an email by clicking on it and then clicking on Forward, after which you can specify which email address you want to forward it to.  Conclusion We hope this guide has helped you manage your Spectrum email effectively. The truth is that Spectrum no longer allows people to sign up for new email accounts. But, if you have an older email account, you can still log in. Remember, though, that if you are canceling your Spectrum service, the email account will be deleted after 60 days.  Louis MuganLouis Mugan is a seasoned technology writer with a talent for turning complicated ideas into clear, practical guidance. He focuses on helping everyday readers stay confident in a world where tech moves fast. His style is approachable, steady, and built on real understanding. He has spent years writing for platforms like EasyTechLife, where he covers gadgets, software, digital trends, and everyday tech solutions. His articles focus on clarity, real-world usefulness, and helping people understand how technology actually fits into their lives. Outside of his regular columns, Louis explores emerging tools, reviews products, and experiments with new tech so his readers don’t have to. His steady, friendly approach has made him a reliable voice for anyone trying to keep up with modern technology. get in touch at louismugan@gmail.com

My Xfinity Email: Access, Recovery, Setup, and Troubleshooting

My Xfinity Email: Access, Recovery, Setup, and Troubleshooting

Home / Facebook X-twitter Whatsapp Reddit Are you an Xfinity email user? In this guide, I will show you how to log in to your Xfinity email login and access your Comcast email sign in page using your My Xfinity email account. I will also explain the current Xfinity email Yahoo migration to Yahoo Mail for Xfinity users and what you need to know about it. Let’s get into it and learn how to use Xfinity webmail, manage your Comcast.net email, complete Xfinity email setup, and handle Xfinity email troubleshooting. Access Your Xfinity Email on the Web You can still access your email using the Xfinity email login page and Comcast email web access if you did not get an email saying that it’s time to transition and did not yet migrate to Yahoo Mail. Go to the Xfinity login page and use Xfinity webmail sign in with your Xfinity account sign in details. Note that if you received an email to migrate to Yahoo Mail, and you migrated to Xfinity email Yahoo Mail, you need to sign in using Yahoo Mail for Xfinity users. Enter the same email address as before to complete your Comcast email login online. Current Xfinity accounts are in the process of being migrated as part of the Xfinity email Yahoo migration. Once you receive an email about the migration, you have 30 days to migrate your email. If you don’t, you have the options to export your email and close your account. However, if you don’t migrate it, you will eventually be unable to access your inbox. This Comcast email transition process will continue through 2026 until all emails are migrated. Recover Your Xfinity ID or Reset Your Password If you can’t remember your Xfinity ID, you can recover Xfinity ID using your phone number or email as part of Xfinity account recovery. If you don’t remember your Xfinity ID, click on “Find My Xfinity ID” and proceed to enter your email address or phone number. Then, follow the on-screen steps if you forgot Xfinity ID and need Comcast account login help. On the other hand, if you forgot your password, go to xfinity.com/password to reset Xfinity password. Enter your ID to begin the Comcast email password reset process. Then, choose how you want to receive your password reset code. Once you get the code, enter it on the page and create a new password to fix Xfinity sign in problems. Recover Deleted Emails (Time-Limited) For a limited time, you can recover deleted Xfinity emails and restore Comcast email messages by restoring them from the Trash folder. Sign in to your account and open the Trash folder to start Xfinity trash folder recovery. Then, click on Recover Deleted Items. Select the items you want to restore to retrieve deleted emails Xfinity and complete your Comcast email recovery. Choose the folder you want them to be moved to so you can Xfinity email restore messages properly. Note that this is a time-limited option! After 30 days of being in the trash, emails will be deleted permanently. Use Xfinity Email After Disconnecting Service You can still use Xfinity email after canceling service and keep Comcast email after disconnect, as long as you signed in within 90 days before disconnecting the service. So, if you plan on disconnecting the service, make sure to sign in first if you want to keep comcast.net email address active. Also, you will need to sign in to your account at least once every nine months afterward if you want to maintain access. This is part of the Xfinity email retention policy and Comcast email after cancellation rules, otherwise your Xfinity email account inactive status may lead to loss of access. Set Up a Third-Party Email App (IMAP) You can also set up access to your Xfinity email using a third-party email client via IMAP. You will need to enter the following information in the corresponding fields: Note that if you are using a popular client like Outlook or the Gmail app, you can find instructions for setup here. Also, once you migrate to Yahoo Mail, you will need to update the settings in the email client to reflect Yahoo Mail’s settings. See more information here.  Access on Mobile Without the Old App Once you migrate, you can use the Yahoo Mail app for Xfinity to check your Xfinity email on iPhone or Xfinity email on Android. While the old app was retired, you can still use a Comcast email mobile app alternative like Outlook or Gmail to check Xfinity email on phone. After migration, the Yahoo Mail app becomes the main way to access your account and manage Xfinity email without app limitations. Fix Common Sign-In and Loading Issues If your Xfinity email not working or you face Comcast email login issues, make sure you entered your ID or email address correctly. Also confirm your password if you see Xfinity sign in error or Xfinity email not loading problems. If issues continue, try clearing cookies, switching browsers, or using another device to fix Xfinity email problems. If Comcast webmail not opening, these steps often solve Xfinity account login troubleshooting cases. Conclusion I hope this guide was helpful for understanding Xfinity email Yahoo migration, the Comcast email transition, and how to move Xfinity email to Yahoo Mail. This Xfinity email access guide should help you with Comcast email help and Xfinity email support so you don’t lose access to your inbox during the transition. Frequently Asked Questions (FAQ) Can I still use my Xfinity email without Xfinity internet service? Yes, you can still use your Xfinity (Comcast) email even after canceling your internet service, as long as you signed in within 90 days before disconnecting. After that, you must log in at least once every nine months to keep the account active. If you don’t, the account may become inactive and you could lose access. Do I have to migrate my Xfinity email to Yahoo Mail? If you receive a migration notice from Xfinity, you will need to migrate

Why Your iPhone Is Safer From Viruses Than You Think, And When To Worry

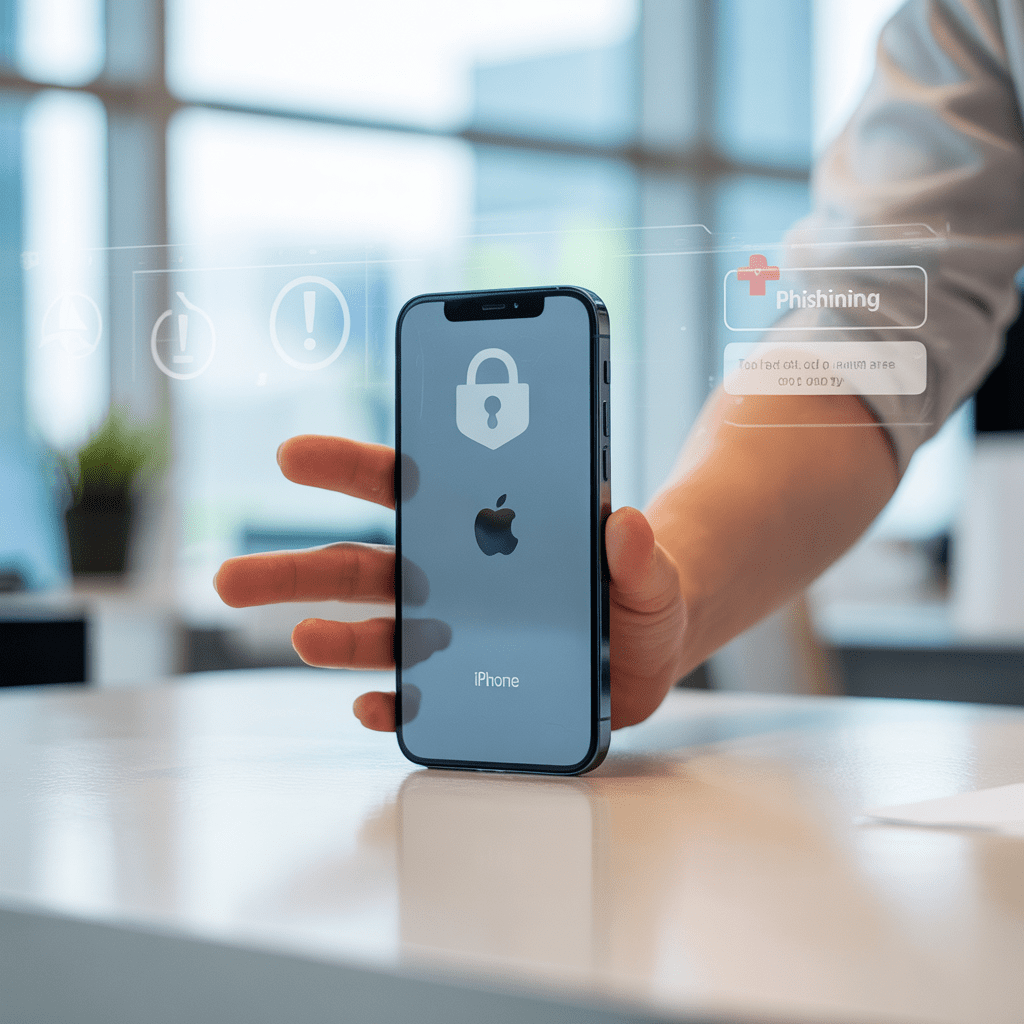
If you have ever seen a scary pop up that said “Your iPhone has a virus,” you are not alone. Many iPhone owners worry that one strange message or a hot battery means their phone has been “infected” or “hacked.” The truth is that classic computer style viruses are very rare on iPhone because of how Apple designed iOS and the App Store. At the same time, there are very real threats such as phishing, shady configuration profiles, and apps that misuse permissions. This guide will walk you through what is real and what is mostly fear, show you how iPhone security actually works, and give you a simple checkup you can do today to decide whether you can relax or whether it is time to take action. Key Takeaways Understanding iPhone Viruses And Real Threats Before you can judge whether your iPhone is in danger, it helps to be clear on a few basic terms. VirusIn classic computer security, a virus is a program that installs itself, runs on its own, and then spreads to other systems without the user doing very much. On older desktop systems, a virus could attach itself to other programs or files and silently move from device to device. MalwareMalware is a broader term for any harmful software. It includes viruses, but also worms, trojans, spyware, and adware. Malware on phones usually needs some kind of user action for example, installing an app, tapping a link, or accepting a profile. PhishingPhishing is a social trick. Instead of attacking the device directly, the attacker tries to fool you into entering your password, bank details, or verification code on a fake site or in a fake message. Security researchers consistently describe phishing as one of the main ways attackers target phone users. Why classic viruses are rare on iPhone Apple designed iOS so that each app runs in its own isolated space called a sandbox. According to Apple’s own security documentation, third party apps on iOS are restricted from accessing files stored by other apps or from making changes to the device outside their own container. Apple Support For a traditional virus to spread, it would need to install itself, run freely, and talk directly to other apps or system files. iOS blocks most of the paths that older viruses used: On top of that, Apple vets apps before they appear on the App Store. Apple’s review guidelines focus on safety, performance, and legal compliance, and security checks are part of that process. Apple Developer Security writers who study iOS point out an important side effect of this design. Real time antivirus tools that scan every file are not possible on iPhone in the same way as on Windows. Any antivirus style app you install on iOS is itself sandboxed and cannot scan other apps or system files directly. So the combination of sandboxing, code signing, and App Store review makes the classic virus model very difficult on iPhone. “No viruses” does not mean “no risk” None of this means iPhone users are perfectly safe. Several other threats matter much more in real life: For everyday users who keep iOS up to date and use the normal App Store, the bigger danger is usually giving data away accidentally rather than a virus silently taking over the device. How iPhone Security Really Works You do not need to be a security engineer to understand the big pieces of iPhone protection. Think of iOS security as layers that work together. App sandboxing Apple’s platform security guide explains that each third party app runs in an isolated environment with its own directories and limited access to hardware features. In simple terms, this means: Some shared resources, like the photo library or location services, are controlled through permissions. An app has to ask, and you see a system prompt where you can allow or deny. App Store review and code signing Before an app appears in the App Store, Apple reviews it against safety and content guidelines. The review is not perfect, as the SparkCat incident and other rare cases show, but it filters out many obviously malicious or broken apps. Every app that runs on iOS is also signed with a certificate. Code signing helps the system verify that: Unsigned or tampered code is blocked during the boot and install process. System updates and security patches Apple regularly publishes iOS updates that include security fixes and new protections, not just new emoji and features. The platform security documentation explains that each release layers new exploit mitigations on top of the old ones. If you let your iPhone stay on an old system version for many months, you miss these patches. That gives attackers more opportunity to use publicly known flaws. Built in protections and prompts Modern iOS versions include several safety nets: These features do not remove all risk, but they raise the cost for attackers. In practice, most criminals aim for easier paths such as phishing rather than rare, expensive exploits. When You Should Actually Worry Every phone has glitches. An app can crash, the battery can drain faster after a system update, or Safari can misbehave on a poorly coded website. These issues are annoying, but they are not clear proof of malware. Here are clearer red flags that deserve your attention. Suspicious profiles, VPNs, or device management entries If you open Settings and see a “Profile Downloaded” banner or configuration profiles you do not recognize under General then VPN and Device Management or similar menus, that is a concern. Malicious profiles can: If you never set up a company device management account yourself, any unexpected profile is a strong reason to act. Repeated prompts for passwords on strange sites Phishing often looks like this: If you see a page that asks for sensitive data and you arrived there from an unexpected message, close it. Check by going directly to the official site or app instead of using the link inside the message. Apps you do


Roku Express vs Stick: What is the Difference and Which One Is Best? (2025 Comparison)

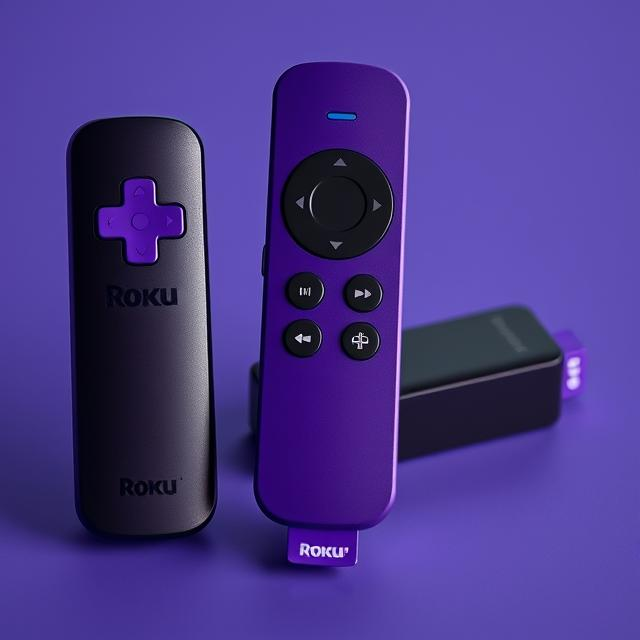
Both the Roku Express and Roku Streaming Stick 4K are powered by the same Roku OS and stream from identical apps – but they diverge in terms of design, Wi-Fi strength, HDR support and connectivity. Ideal for budget users who want 4K HDR without Dolby Vision and favor Ethernet-friendly. The Streaming Stick 4K brings Dolby Vision, more powerful long-range Wi-Fi and a fancy plug-in design. If you prioritize wireless performance and image quality, opt for the Stick. The Express 4K+ is still shining for value and its wired stability. Roku is still one of the most trusted names in streaming, with inexpensive devices that are no-fuss and easy to use. Two of the more popular models in the lineup are the Roku Express and Roku Streaming Stick 4K, but making a comparison between them is difficult. They’re both capable of feeding you thousands of streaming channels, they both have intuitive interfaces and easy setup — if all your gear is lined up in exactly the right way. We’ll break down everything – specs, Wi-Fi, picture quality and features, so you can decide which Roku is for you. Roku Express vs Roku Streaming Stick 4K: The (Very) Basic Differences Feature Roku Express (HD / 4K+) Roku Streaming Stick 4K Price (2025) $25 to $40 $39.99 to $49.99 Resolution 1080p (HD), 4K HDR on 4K+ 4K HDR + Dolby Vision HDR HDR10/HLG (4K+) HDR10/HDR10+/HLG/Dolby Vision WiFi Dual-band (4K+) / standard (HD) Long-range dual-band WiFi 5 Ethernet Supports USB to Ethernet adapter Wi-Fi only Key Notes • The Voice Remote: Included only with a 4K+ model. One of the things you can still get done only on a much boxier Express was the Voice Remote. It also powers down your TV for you, automatically, most of the time. • Design: Small box requiring an HDMI cable. Prefer a small box to having it all built into an HDMI plug? The Express was the best choice for you! • Best for: The Roku Express was perfect for budget users who played it old school and keep it wired. Roku Express: Small Box, Big Value Roku’s budget-friendly entry-level player has always been the Express. The Express is tiny, inexpensive, and unbloated. It connects to your TV with an HDMI cable and is powered by USB. The base Express supports up to 1080p HD and ships with a regular IR remote. The Express 4K+ adds 4K streaming and HDR, a Roku Voice Remote, and optional USB adapter compatibility for Ethernet. It’s the best performer for the price; the Express 4K+ makes a great second TV or the best option for anyone who wants a crunchy, solid wired connection. However, it doesn’t support Dolby Vision, and it doesn’t include the Stick’s enhanced Wi-Fi antenna. Roku Streaming Stick 4K: Compact Powerhouse The Streaming Stick 4K was totally the greatest and peppiest Roku in the group. Not as small as the Express and more than the streaming power of even the Ultra. If you want to twist something in the 4K stream, The Roku Streaming Stick 4K is for you! The Stick will see how many TV setups run entirely on Wi-Fi or you consume much 4K or Dolby Vision content. 2025 Update: Roku Simplifies Its Lineup Roku’s 2025 refresh will consolidate and streamline its offerings, akin to its rivals. Stick-made sticks are gradually replacing older Express boxes. According to The Verge, Roku is simplifying its lineup; new Stick models will essentially replace the Express 4K+ for most people. That said, the Express 4K+ is the current option and widely sold, making it one of our top picks for folks who want a cheap streamer with an Ethernet port. But if you buy new in 2025 or later, expect the Stick 4K (or hopefully a more recent version of it) to be Roku’s workhorse. Which One Should You Choose? Pick Roku Express 4K+ if you: Choose Roku Streaming Stick 4K if you: Expert Verdict For many people, that would make the Roku Streaming Stick 4K the wiser long-term buy – its Dolby Vision support and generally stronger wireless signal justify the slightly higher cost. But, the Roku Express 4K+ is still untouchable for bargain hunters who simply want reliable 4K HDR streaming without fancy extras. If you’re using an Ethernet connection or adding a second TV, it’s the better match. Bottom line: Both devices provide Roku’s familiar simplicity and wealth of apps, though the Stick has an upper hand on performance and it’s the direction Roku is going with its upcoming lineup. Final Thoughts The Roku Express 4K+ and Streaming Stick 4K are excellent streaming values. If you’re looking for a budget and wire-friendly solution, the Express 4K+ is still great. Assuming you care only about Dolby Vision picture quality and faster Wi-Fi performance, the Stick 4K is the top dog. Whichever you choose, you’ll get Roku’s signature: a simple, instinctual streaming experience from one of the most bulletproof platforms in the business. FAQs Q1: Can Roku Express do 4K? Only the Express 4K+ does it’s capable of streaming 4K HDR, while the regular Express (HD) tops out at 1080p. Q2: Is Dolby Vision available on the Roku Express? No. Only the Streaming Stick 4K is compatible with Dolby Vision and HLG for even richer color and contrast. Q3: Can Roku Stick work with Ethernet? No. The Stick is Wi-Fi only. Express 4K+ does have USB ports and it could use a USB to ethernet adapter. Q4: Which one has better Wi-Fi? The Stick 4K wins here. It features a long-range dual-band receiver for a faster, more consistent connection. Q5: Do they produce the same image quality? Both play 4K HDR footage (even if the quality of those streams is another matter), but only the Stick supports Dolby Vision, which can result in a visibly superior picture on compatible TVs. Q6: Which is best for travel? The Streaming Stick 4K is much more portable – it plugs into a hotel TV’s HDMI port and there are no additional

Scroll to Top