Laptops

How to Unlink School Logins from Your Browser

How to Unlink School Logins from Your Browser

Welcome to our blog post about school login and Google keeps redirecting you back to the school login page. This can be a very frustrating issue, but we are here to help. First, let’s start off by explaining what is happening when this phenomenon occurs. When you attempt to access your Google account, it will redirect you back to your school login page. This is because when your school or institution sets up a Google account for you, they link it with their own authentication system. This means that whenever you go to log in with your Google account, it will automatically detect that you are part of the school or institution and redirect you back to their authentication system. So how can we prevent this from happening? The first thing we suggest is that you clear all of the cookies related to your school or institution from your browser. This will allow you to unlink your Google account from their authentication system and should stop the redirection loop from occurring. Additionally, if thre are any other accounts associated with the same school or institution that have been linked with your Google account (such as an email address), then we recommend unlinking those accounts as well. Finally, if the problem persists after clearing all related cookies and unlinking any linked accounts, then we suggest contacting either the IT department of your institution or the support team of whichever service provider (Google, Microsoft etc.) was used for setting up the account initially. They should be able to provide more detailed assistance in resolving this issue for you. We hope that this blog post has been helpful in providing some insight into why Google keps redirecting back to school login pages and how one can prevent it from happening again in future. If there are any further questions regarding this topic or other related topics, please do not hesitate to contact us at [insert contact information]. Thank You! Stopping Gmail from Redirecting to School Login To stop Gmail from redirecting to your school login page, you will need to clear all cookies or any Google-related cookies from your browser. To do this, locate the settings in your browser and select the option to delete cookies. Once deleted, try accessing Gmail again; if the problem persists, you may need to reset your browser’s cache as well. Additionally, make sure that any third-party applications that have access to your Google account are logged out of as well. Removing School Login from Google To remove your school login from Google, you’ll need to access your Google Profile. On your computer, open Chrome and click the profile icon in the top right corner. Select Manage Profiles and then point to the profile associated with your school login that you want to remove. At the top right of the profile, click More and then select Delete. To confirm, click Delete again and that should be it! Your school login will now be removed from Google. Unlinking a School Email from Google To unlink your school email from Google, you will need to open the Gmail app on your Android phone or tablet. In the top left, tap the Menu and scroll down to Settings. Then, select the Gmail account that is linked with your school email address. In the “Linked Account” section, tap Unlink account. You will then be asked if you want to keep copies of emails from that account – make sure to choose an option that best suits your needs. Once this is done, your school email sould be successfully unlinked from Google. Stopping Google from Auto Redirecting In order to stop Google from auto redirecting, you will need to adjust your browser settings. For example, if you are uing Google Chrome on an Android device, follow these steps:1. Open the Google Chrome app on your Android device.2. Tap the three dots at the top-right corner and select “Settings.”3. Scroll down to “Advanced” and press “Site settings.”4. Tap “Pop-ups and redirects” and switch the toggle button off. If you are using a different browser, such as Mozilla Firefox or Safari, you may need to adjust similar settings in order to stop auto redirects from Google. Additionally, some browsers may offer additional features that can help limit pop-ups or auto redirects from crtain websites or sources. You can also install extensions or add-ons that are designed specifically for blocking pop-ups and redirects in your browser of choice. Removing a School or Work Account from a Computer To remove a school or work account from your computer, start by opening the Settings menu. Go to the Accounts tab, then select Access work or school. Choose the account you wish to remove, then click Disconnect. A confirmation window will appear; click Yes to confirm and complete the process. Please note that this will not delete the account entirely, but it will only remove access from your PC. Removing a School Account from a Computer To remove a school account from your computer, follow these steps:1. Go to Settings > Accounts > Access work or school.2. Select your account and then click Disconnect.3. Confirm that you want to remove the account by clicking on Disconnect again.4. Once the account has been disconnected, it will no longer be connected to your computer and all data asociated with the account will be removed. Unlinking a School Email from Windows To unlink your school email from Windows, start by navigating to the Start menu and selecting the Settings icon. Then select Accounts, followed by Email & app accounts. On the right-pane, select the account you want to remove and then click Manage. From there, select Delete account and then confirm your choice when prompted. That shuld unlink your school email from Windows successfully. Louis MuganLouis Mugan is a seasoned technology writer with a talent for turning complicated ideas into clear, practical guidance. He focuses on helping everyday readers stay confident in a world where tech moves fast. His style is

How to Connect Logitech K540 Keyboard to Your Computer

How to Connect Logitech K540 Keyboard to Your Computer

Introduction Are you looking for a reliable, comfortable, and easy to use keyboard? Look no further than the Logitech K540 Wireless keyboard. This keyboard is perfect for those who want to stay productive in the office or at home. With this keyboard, you can easily connect to your computer via a USB receiver or Bluetooth connection. The Logitech K540 wireless keyboard has a sleek and modern design with an ergonomic shape that fits comfortably in your hands. The keys are well-spaced and have a soft touch that is easy on your fingertips. The key action is responsive, and the backlighting helps you stay productive even in low-light environments. The Logitech K540 has all the features you need to help you stay productive with its multi-device connectivity, media keys, and customizable function keys. This allows you to quickly switch between multiple devices and applications while still having access to all of your shortcuts and settings.  Functionality and Review of the Logitech Logitech K540 The media keys give you quick access to media, while the customizable function keys allow you to quickly launch certain functions, such as the calculator, with just one press of a button. The fn keys can also be personalized.  For added convenience, the Logitech K540 comes with a Unifying receiver that allows for easy Logitech K540 keyboard pairing between your mouse, keyboard, and computer, so everything is always just one click away! The battery life on this keyboard is also very good; it lasts up to 36 months on batteries so you don’t have to worry about constantly replacing them. Overall, the Logitech K540 Wireless Keyboard is an excellent choice for those who are looking for a reliable and comfortable wireless keyboard that can handle their daily tasks with ease. Its ergonomic design ensures comfort while its multiple-device connectivity makes sure that everything is always just one click away! To connect the Logitech K450 keyboard, you’ll need to activate the Logitech K540 pairing mode. Read on to learn how to do it.  Where to Buy A Logitech Logitech K540 Keyboard The Amazon Marketplace is the best place to purchase A Logitech Logitech K540 Keyboard. Although, I may be bias seeing as I purchase everything on Amazon, and the odds are so do you haha! If you would like to purchase the Logitech K540 Keyboard check it out on Amazon below! Logitech MK540 Advanced Wireless Keyboard and Mouse Combo With Bluetooth Connecting a Logitech Wireless Keyboard To connect your Logitech wireless keyboard, start by making sure the device is on. Check for a switch at the top right corner of the keyboard and push it to turn on the keyboard. The LED should be blinking quickly, indicating that you are ready to connect the Logitech K450 keyboard with your computer.  Next, open your computer’s Bluetooth settings and select “Add New Device” or “Pair a Device”. Your computer should then search for nearby Bluetooth devices; when it finds your Logitech wireless keyboard, click on it and follow any additional instructions on the screen to complete the pairing process.  Your computer might give you a Bluetooth pairing code. Enter it on your keyboard to pair the Logitech K450 keyboard with your computer.  After a few moments, you should be able to type on the keyboard and use it with your computer! Does the Logitech K540 Have Bluetooth Capabilities? Yes, the Logitech K540 supports Bluetooth.  However, in addition to Logitech K540 Bluetooth pairing, you can also pair the Logitech keyboard to your computer using the Logitech K450 USB receiver. The receiver plugs into your computer’s USB port, allowing you to use the keyboard and mouse wirelessly. Here are the steps to take to use your Logitech K450 with the wireless receiver:  You might want to use the receiver if you are having trouble with your Bluetooth connection. This can happen on certain macOS versions if you have FileVault enabled.  Resetting a Logitech K540 Keyboard If you are experiencing Logitech K450 pairing issues, you can try to reset your wireless keyboard.  To reset your Logitech K540 keyboard, you will need to follow the steps below: 1. Turn on the keyboard by pressing the power switch. 2. Once the keyboard is turned on, press the following key combination: ESC + O + ESC + O + ESC + B. For example, press the ESC key, then the O key, then the ESC key, and so on.  3. You should see a brief flash of light indicating that the reset was successful. If you are still experiencing Logitech pairing issues, try using the receiver. If your computer hardware doesn’t support Bluetooth Low Energy, a type of Bluetooth technology, you might have difficulty pairing it with your keyboard.  You can also contact Logitech support for help.  Understand how to effortlessly switch between paired devices on Logitech K850. Conclusion The Logitech K540 Wireless Keyboard is a great choice for anyone looking for a wireless keyboard with reliable performance.  With its USB receiver and Bluetooth Logitech k540 keyboard pairing, the K540 provides an easy and secure connection to your computer, allowing you to type and move around without having to worry about wires getting in the way.  It also has an adjustable height for the perfect typing angle, so you can find the most comfortable position for hours of uninterrupted typing. Furthermore, it features an intuitive design that makes it easy to use and customize with various settings. The Logitech K540 is a great option for anyone looking for a reliable wireless keyboard and mouse combination, and it is easy to connect the Logitech keyboard to your computer with the USB receiver or a Bluetooth connection. Louis MuganLouis Mugan is a seasoned technology writer with a talent for turning complicated ideas into clear, practical guidance. He focuses on helping everyday readers stay confident in a world where tech moves fast. His style is approachable, steady, and built on real understanding. He has spent years writing for platforms like EasyTechLife, where he covers gadgets, software, digital trends, and everyday tech solutions.

Chromebook Won’t Turn On?

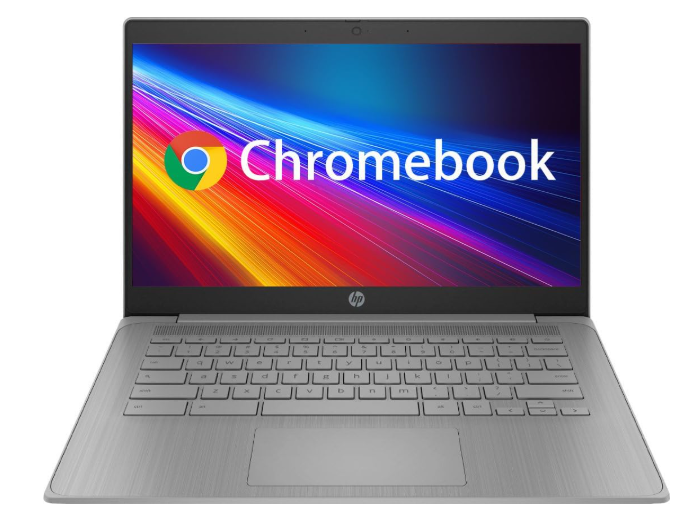
2025 Updated Troubleshooting Guide If your Chromebook doesn’t turn on, you will need to plug it in and wait for at least 30 minutes. Look for a charging light – color can differ by brand (amber/orange = charging; white/green = fully charged; blue = power on). Press and hold the Power button for 10 seconds to hard reset. And if that doesn’t work, do a hardware reset (Refresh + Power or Esc + Refresh + Power, depending on model), disconnect any peripherals and try another outlet or charger. Ongoing problems could mean you have a defective battery, charging port or Chrome OS corruption – if so, consider trying a Safety Reset (a new feature in Chrome OS 131 and beyond], performing a Powerwash or getting it looked at by professionals. There are few things more frustrating than attempting to turn on your Chromebook and nothing happens — or seeing the screen flash something before it is suddenly dead. The good news: Most power problems are minor and can be fixed without a visit to the repair shop. This 2025 troubleshooting guide is a collection of checked methods for all big Chrome OS manufacturers – the Acer, HP, Lenovo, Dell, Samsung, Toshiba and Asus Chromebooks as well as Google-based on the most recent manufacturer documentation and suggestions from Google Support. Step-by-Step Solution: How to Restart Your Chromebook Confirm Battery, Charger & Charging Light Plug your Chromebook into a power source such as an electrical outlet or the original charger. Look for an LED indicator next to the port: LED Color Meaning Notes Amber / Orange Charging Common on HP & Dell models White / Green Charging Frequently found on HP, Lenovo Blue Power on / Status normal Visible on Samsung Lit none May indicate deep discharge or charger problem Attempt charge for 30-60 min first Pro Tip: Several Chromebooks go into deep discharge mode if left unused; it might be a full hour before LEDs respond. If the light does not turn back on after an extended charging time, try a different charger or outlet. Perform a Hard Power Reset If your Chromebook doesn’t turn on or it needs to be reset: Press the Power button for 10 seconds to force shut down. If that does not work, then you might want to try one of these reset combinations (which ones depend on the model): Reset Type Key Combo Reference Power-down the device and boot it back into Recovery Mode. / Hard Reset Refresh + press the Power button Google Support Recovery Mode Esc + Refresh + Power Asus Support FAQ 1039185 Convertible / Tablet Models Volume Up + Power Chrome OS Tablets (HP, Lenovo) This eliminates any temporary hardware malfunction and frequently restores power. Unplug All External Devices Eject USB thumb drives, SD cards, headphones and dongles. Bad peripherals counter-intuitively can interfere with startup, particularly if Chrome OS is caught trying to read an external boot device. Test Guest or New User Account Logging in on a different user account could help.If your Chromeboots and but freezes upon logging in, the problem may be related to your Google Account sync data. Choose Browse as Guest or add another user with a distinct Google Account.If it does load, the profile is probably scrambled. Update Chrome OS For devices that power on, but are slow or prompt crashes: Navigate to Settings → About Chrome OS → Check for updates. Install pending updates. Restart after completion. We’ll continue to invest in federated testing to help ensure Chrome OS is a stable platform for drivers and that firmware remains compatible with the very latest power-management optimizations. Remove Problematic Apps or Extensions If your Chromebook is booting up but crashing or randomly showing black or blank screens, uninstall recently-installed and optional extensions or Android apps before restarting. Background loops that simulate power/battery can be the result of poorly designed extensions. If You Don’t, Safety Reset or Powerwash Instead Safety Reset (Chrome OS 131 and beyond):I’m making a change that will restore the core system files but I wont be touching you locally stored data.Navigate to Settings → Advanced → Reset Settings → Safety Reset.(Google Release Notes, 2024) Powerwash (Factory Reset):A full reset of Chrome OS will restore your Chromebook to factory settings and delete all local data.Navigate to Settings → Advanced → Reset Settings → Powerwash.Back up important files on Google Drive first. Inspect or Replace the Battery If your device charges only when it’s connected, or doesn’t maintain a charge: Something wrong inside the battery, might be it’s dead. With many Chromebooks, battery replacement requires removing the back panel with Torx screws. This could void your warranty, so check first with the manufacturer offspring. For warranty, contact your brand’s authorized service centre. Common Reasons Why Your Chromebook Won’t Turn On Cause Description Fix Battery / Charger Problem Battery is dead, port broken or adapter depleted Try a different charger; if LED continues to stay off please contact support Software Issue Corrupt software Chrome OS Damaged or Out-of-date firmware Try Safety Reset or Powerwash External Hardware Conflict USB or SD device extended boot hang Disconnect all peripherals Overheating / Static Lock Up System becomes incapacitated due to overheat or static electricity buildup Allow system to cool off, then hard reset Hardware Damage Bad motherboard / Bad Power button Service repair needed More Fix: Chromebook Freezing or Stuck on Screen If the screen is freezing and it can be seen: Do a hard reboot – Esc + Refresh + Power, and hold down for 10 seconds.Release and wait for reboot. If the keyboard lights up, but the display remains blank, try plugging in and waiting for several minutes – deep sleep recovery can take time. When to Contact Support If none of these steps work: FAQs Q1: Why does the screen of my Chromebook not turn on, although the power light is ON? Its probably just a display backlight or gpu lock up. Attempt the Refresh + Power reset, or plug into an external monitor

How to Get Rid of Horizontal Lines on Monitor – Step-by-Step Guide

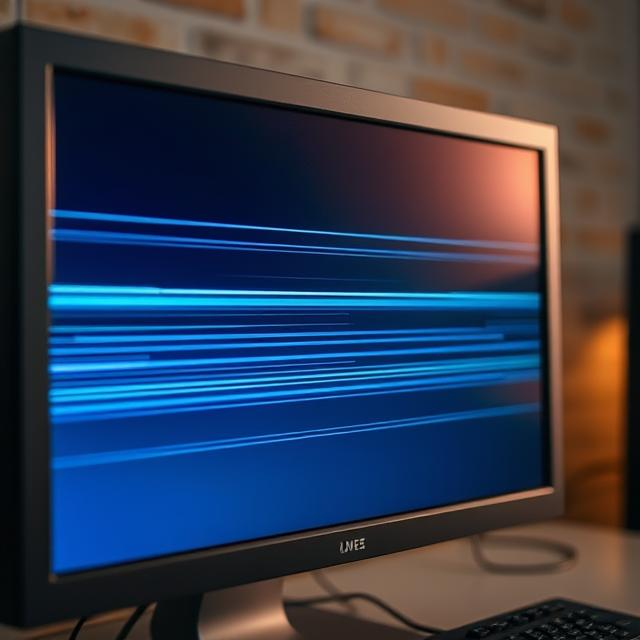
Horizontal lines on a computer screen are usually caused by issues with the video cable or a problem with the graphics driver. We’ll begin by covering getting you connected immediately, verifying cable/connectors and restarting your devices..then we cover display settings for refresh rate/resolution. If these issues persist, try to update all the system drivers o or reach out the support – sometimes a new monitor will be required. It can be frustrating to see horizontal lines going across your monitor after you have spent time, effort and money buying the best possible one with high-end specs. Sometimes these lines may be barely visible and sometimes they can occur in moving, dynamic patterns on the screen; but more often than not, you could have just discovered a pretty convincing way the universe is letting you know there’s something wrong with your display, connections and/or software. Through this guide, you’ll be walked through some troubleshooting steps to help determine the source of those pesky lines and fix it. No matter if you rock a desktop monitor or use a laptop, we’ve put together some handy fixes to bring your display back up to speed for max image quality. What Causes Horizontal Lines on a Monitor? A horizontal line generally mean one of a few things: Once you understand the problem’s root, you can apply an efficient solution. Step-by-Step Solutions Restart Your Monitor and Computer Easier said than done, but a speedy reboot can sweep away temporary software or display glitches that create lines or flickering. Check and Reseat the Cables Be sure all video cables from the monitor to your computer are connected properly. Check for bent prongs or wear. Try different cable or port (ie HDMI to DisplayPort) and check if it’s still the same. Pro Tip: Wiggle the cable a bit and see what happens on the screen. If there’s a difference in picture quality, discard the cable at once. Adjust the Refresh Rate A wrong refresh rate may result in horizontal or flickering lines. Try various higher or lower rates to get the most stable setting. Try Another Monitor or Device Hook your computer up to another monitor, or use another PC with your monitor. If the lines show up on both, then it is a problem with your GPU or cable.If the second display shows a good image, your monitor panel is likely damaged. Disconnect the Monitor and Observe Turn the monitor on, but remove it from the computer. If you continue to see lines or flickers, your monitor is likely physically damaged, and would need to be professionally repaired or replaced. Examine Laptop Hinges and Position For laptop users, gently open and close the laptop to watch the monitor. Lines that only appear at specific angles signal damaged internal display wiring, or hinge connectivity. Prevent Overheating There should not be anything over the fain grill of your lap followed by table. Blocked air vents can also cause flickering or lines due to overheating. Dust silt from fans and vents on a regular basis. Turn Off the Instant Replay Feature (for AMD Radeon Users) Some AMD Radeon users have discovered that disabling Instant Replay or setting its saving source to an SSD resolves the problem. Head to Radeon Settings → Recording → Instant Replay to adjust it. Update System Software and Drivers Corrupted display drivers or incompatible OS is the reason behind this. If the issue started after the driver update, roll back to the previous version. Change the Screen Resolution If line distortion is pereptual, try adapting to a resolution ur monitor can handle. Run Built-in Troubleshooters Windows has a Video Playback Troubleshooter, as well as Hardware Troubleshooter. You can find them at Settings → System → Troubleshoot. Follow the on-screen recommendations. Calibrate or Reset Your Monitor Press the menu buttons on your monitor if you have them to reset factory settings and/or recalibrate display color and contrast. Calibration tools compensate for such distortions from badly-calibrated display profiles. Eliminate Magnetic Interference Phones, speakers and other electronic or magnetic devices belong nowhere near your screen and cables. The interference of magnetism can affect the display and form lines on it. Clean and Maintain Your Setup Vents can get clogged, connectors dirty and a build up of dust or dirt that blocks them all will also lead to overheating and signal paths coming loose. Frequently wipe both your screen and cable ports with a dry microfiber cloth. Seek Professional Help or Replacement If all else fails, the panel or your GPU is failing. Get in touch with your manufacturer’s support team for repair options — or a new screen. Preventing Future Monitor Issues Conclusion Lines on the background of your computer screen are generally unbecoming, but they should not cause permanent damage. In many instances, you can fix them with a few simple tweaks – checking cables, updating software or programming the correct inputs into a receiver. Persistent problems however can be symptomatic of a more serious hardware problem. Following this guide you will be able to diagnose and repair your monitor easily. FAQ Q1. How do you repair “No Signal” on a PC monitor? Make sure your wires are connected tightly, reboot your computer, and if the monitor connects to more than one port, connect it via a different port. If the problem continues, your video card or cable is damaged. Q2. Why are the colors or tints on my monitor not displayed in a normal fashion? Try turning off both units and re-checking the cable connections. Depending on your display (color-contrast profiles in settings, or simply degaussing if you have a CRT). Q3. What is ghosting and how can I eliminate it? Ghosting (or screen burn) happens when images from the past remains faint. Power down the monitor for 24 to 48 hours, or display a white screensaver / pixel-refreshing app like JScreenFix to eliminate screen burn-in. Louis MuganLouis Mugan is a seasoned technology writer with a talent for turning complicated ideas into clear, practical guidance.

What Is a Bezel, and What Does Bezels-Less Mean?

And a bezel is the frame or border that surrounds a device’s display – which you’ve probably seen on pictures of cellphones, tablets, laptops, monitors, and TVs. Sure, it offers rigidity and backing for gadgets such as cameras, microphones and sensors but modern tech typically ditches the metal bezel in favor of “bezel-less” designs that let displays take up almost 100% of the surface. But bezels do have their uses, and thinner isn’t always better. The term bezel is a word commonly used in consumer electronics to describe the frame that surrounds ‘a display’. Similar to the frame surrounding a photo, bezels safeguard an eyeport, lend strength and contain vital parts. For years, bezels served a practical purpose and were often thick; however, in the race for ever-larger screens across the world, manufacturers like Apple, Samsung, LG and Dell started moving to slim-bezel or “bezel-less” designs. From trimmer wraparound smartphone displays to much thinner HDTVs, bezels are shrinking – but the equilibrium between practicality, durability, and looks means the trend is less about “bigger is always better.” What Exactly Is a Bezel? Bezel is the physical boundaries of a device’s display. Its thickness depends on the device and design: Thick bezels might seem old-fashioned, but they’re there to protect the phone and house stuff such as camera sensors. What Does “Bezel-Less” Mean? “Bezel-less” is mostly a marketing word. That’s because no device exists without bezels – they are just very, very slim, giving the impression of a screen that goes from edge to edge. Examples: Whereas bezel-less design means you get bigger screens without a larger device. Benefits of Bezel-Less Devices Drawbacks of Bezel-Less Design In other words, more screen doesn’t necessarily mean better usability. Bezel-Less TVs and Monitors For TVs and computer monitors, the bezel-less approach tends to have more upsides: Fun fact: Projectors are as close as you can get to “true bezel-less” displays, since they project the image right onto the wall or screen. Real-World Perspective Conclusion Bezels deliver more than just looks: they help protect, reinforce and hold everything in place. Devices become much more sleek and immersive when technology is designed with no bezel, but you may lose durability and usability. The design that is “best” depends on what you prioritize as a user: FAQ Q1: What are bezels on a laptop? The borders around your screen on your laptop are called bezels. Thinner bezels enable larger displays in smaller casings, which are increasingly prevalent for ultrabooks. Q2: Why do watch bezels rotate? Rotating bezels came about in diver’s watches as a way to keep track of how much time had passed underwater. Today they’re also found in smartwatches (such as the Samsung Galaxy Watch) for scrolling and navigation. Q3: Are bezel-less phones more fragile? Yes. And with more glass on display and leaner frames, they are more susceptible to cracking, so protective cases are recommended. Q4: Do bezels improve durability? Yes. Bezels add structure, absorb shock and make room for sensors and cameras. Q5: Are TVs truly bezel-less? No. “Bezel-less” TVs still have ultra-thin frames. Projectors are the only source for a completely bezel-free experience. Louis MuganLouis Mugan is a seasoned technology writer with a talent for turning complicated ideas into clear, practical guidance. He focuses on helping everyday readers stay confident in a world where tech moves fast. His style is approachable, steady, and built on real understanding. He has spent years writing for platforms like EasyTechLife, where he covers gadgets, software, digital trends, and everyday tech solutions. His articles focus on clarity, real-world usefulness, and helping people understand how technology actually fits into their lives. Outside of his regular columns, Louis explores emerging tools, reviews products, and experiments with new tech so his readers don’t have to. His steady, friendly approach has made him a reliable voice for anyone trying to keep up with modern technology. get in touch at louismugan@gmail.com

Scroll to Top