Updated September 2026
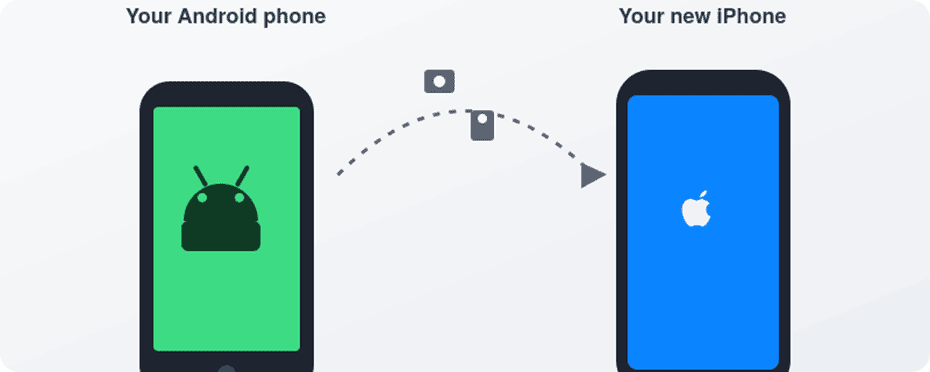
Switching from Android to iPhone can feel exciting and a little scary at the same time. Your phone holds everything — banking, messaging, photos, work — so the idea of moving it all and learning a new system can feel risky. This guide walks through what actually happens when you move from Android to iPhone: what transfers easily, what needs extra care, and which tools to use. With a bit of preparation, most people move their important data safely and start using their new iPhone with confidence.
Key takeaways
- Most everyday data — contacts, text messages, photos, videos, calendars, mail accounts, call history, and even WhatsApp chats — can move from Android to iPhone using Apple’s Move to iOS app.
- As of iOS 26.5, compatible Android devices running Android 17 or later can transfer supported data — including an eSIM — without installing Move to iOS at all, using a QR code during setup. Device support varies, so Apple recommends checking with your phone’s manufacturer.
- Some things don’t move automatically: paid Android apps, app data stored only on the device, and most two-factor authentication apps need fresh setup on the new phone. Music, books, and PDFs generally need to be moved manually, though some audio files may appear among Move to iOS’s selectable transfer categories.
- You’ll likely use a mix of tools: Move to iOS (or the app-free transfer), your Google account, iCloud, and possibly a computer with Finder or the Apple Devices app.
- The most common mistakes are starting the transfer on weak Wi-Fi, erasing the Android phone too soon, and assuming every Android app and purchase will simply reappear on the iPhone.
Understanding the switch
Android and iOS are two different operating systems with their own app stores, account systems, and backup methods. On Android, you sign in with a Google Account and typically back up device data to your Google Account, while services such as Google Photos and Google Contacts keep photos and contacts synced separately. On iPhone, you sign in with an Apple ID, download apps from the App Store, and back up with iCloud or a computer.
You’re not just moving files — you’re adding a new ecosystem alongside the one you already use. Your Google account doesn’t disappear when you switch. You can add the same Google account under Settings → Apps → Contacts → Contacts Accounts → Add Account (and the equivalent path in the Calendar app) so Gmail, Contacts, and Calendar keep syncing there, just as they did on Android. Meanwhile, you’ll create or sign in to an Apple ID, which becomes your main account for the App Store, iCloud backups, iMessage, FaceTime, and purchases.
What will feel familiar:
- The basics are the same — a home screen of apps, a notification shade, quick settings, a camera app.
- Popular apps like WhatsApp, Instagram, Google Maps, Spotify, and most banking apps exist on both platforms — you just download the iPhone version and sign in.
- You can keep using Google services. Gmail, Google Photos, Drive, Calendar, and Maps all have solid iPhone apps.
What will feel new:
- Many system controls live in the Settings app, with app-specific options generally found under Settings → Apps → [app name] — for example, Mail account settings live under Settings → Apps → Mail.
- iMessage and FaceTime are built in. Messages to other iPhone users appear as blue bubbles and travel over Apple’s servers instead of your carrier’s SMS network.
- Photo backup defaults to iCloud Photos instead of Google Photos, unless you set it up differently.
Before you touch the new iPhone: the pre-switch checklist
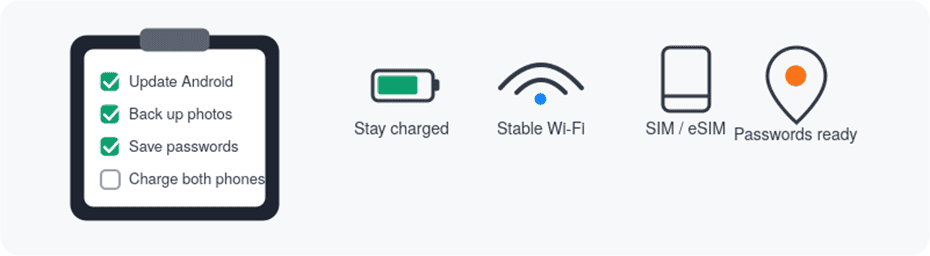
A little prep now saves a lot of stress later. Transfers usually go smoothly, but Wi-Fi drops, batteries die, and cables come loose — so a backup is your safety net if anything interrupts the process.
- Update your Android phone. A recent Android version tends to work more reliably with transfer tools.
- Back up your data.
- Turn on Google backup so contacts and app data are stored in your Google account.
- Back up photos and videos to Google Photos or another cloud service.
- Copy anything irreplaceable — work files, family videos — to a computer or external drive as well.
- Clean up unused apps and large files. Fewer gigabytes means a faster transfer and less risk of the new iPhone running out of space.
- Confirm your passwords and sign-in methods for your Google account, your Apple ID (if you have one already), and any important apps — banking, authenticator apps, cloud storage, email. If a two-factor authenticator app lives only on your Android phone, save its backup codes somewhere safe; you’ll likely need to re-register it on the iPhone.
- Prepare both phones and your network. Keep both phones connected to power throughout the transfer, as Apple recommends. Use a stable Wi-Fi connection, or test a USB-C cable in advance if you plan to connect the phones directly — Apple notes this is generally faster than Wi-Fi.
- Sort out your SIM situation. Decide whether you’ll use a physical SIM or an eSIM. Many carriers and regions now default to eSIM, and recent iPhones can transfer your number and eSIM as part of setup — you may be redirected to your carrier’s site to finish activating it. If your Android phone is locked to a carrier or still under contract, check with them about moving your number.
Spending a little time on this checklist before you start can prevent problems later.
Choosing your transfer method
There are three main approaches, and you can combine them.
Move to iOS app (or the app-free version). Apple’s official switching tool. You start setup on the new iPhone and connect the Android phone over a temporary Wi-Fi network the iPhone creates, or a USB-C cable for a faster connection. According to Apple’s current transfer guidance, it moves contacts, message history, SMS, photos and videos, files and folders, accessibility and display settings, bookmarks, mail accounts, WhatsApp messages and media, Voice Memos, call history, and calendars.
As of iOS 26.5, if your Android device runs a compatible version of Android 17 or later, you don’t need to install anything: on the “Transfer Your Apps & Data” screen, choose From Android, then Transfer without App, and simply scan a QR code to connect the two phones — this method can also transfer your eSIM directly. Check with your device’s manufacturer to see if it supports this.
This method only works while the iPhone is brand new or freshly erased — it runs during initial setup, not afterward.
Cloud-based methods. Rely on your existing accounts rather than a single tool: add your Google account in Settings and turn on Contacts and Calendar sync, use Google Photos (or another photo service) on both phones, and lean on streaming services for music instead of copying local files. This is the better route if your iPhone is already set up and you don’t want to erase it.
Computer-based methods. Connect your Android phone to a computer, copy over photos, videos, music, and documents, then sync that folder to the iPhone using Finder (Mac) or the Apple Devices app (Windows), following Apple’s manual transfer guide. Best for large local media libraries or when you want more manual control.
A common combination: use Move to iOS for messages and core data, then a computer for a big local music collection.
Setting up the new iPhone
If the iPhone is brand new or you’re willing to erase it:
- Turn it on and follow the initial screens for language, region, and Wi-Fi.
- At the Quick Start screen, choose Set Up Without Another Apple Device.
- When you reach Transfer Your Apps & Data, tap From Android.
- Choose Transfer with App (uses Move to iOS) or, if your Android device supports it, Transfer without App.
If the iPhone is already in use and you don’t want to erase it, you can’t use Move to iOS — Apple’s own guidance is clear on this. You’ll need cloud- and computer-based methods instead, or erase the iPhone via Settings → General → Transfer or Reset iPhone → Erase All Content and Settings to get back to that setup screen.
Using Move to iOS: the main transfer
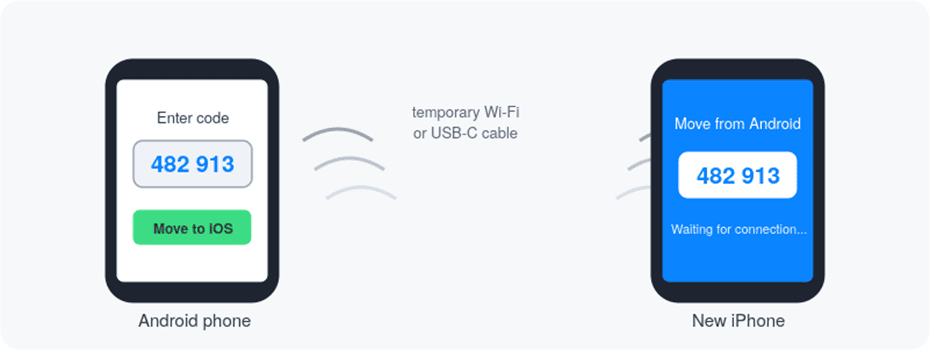
- On Android, install Move to iOS from Google Play, or scan the QR code shown on the iPhone.
- Open the app, tap Continue, accept the terms, and allow the permissions required for the transfer.
- On the iPhone’s “Move from Android” screen, tap Continue. A six- or ten-digit code appears.
- Enter that code on the Android phone. It will connect to a temporary Wi-Fi network the iPhone creates (or use your USB-C cable connection).
- On the “Transfer Data” screen, choose what to move — contacts, messages, photos, files, mail accounts, WhatsApp, call history, calendars, and more — then tap Continue.
- Leave both phones alone, plugged in and near each other, until the loading bar on the iPhone finishes — even if the Android phone claims it’s done first.
- Tap Done on Android, then continue the rest of setup on the iPhone (passcode, Face ID, privacy settings).
- If you’re transferring your number, you’ll be prompted to activate your SIM or eSIM, possibly via your carrier’s website.
If the transfer fails: keep the Move to iOS app open on Android the entire time, turn off Wi-Fi-interfering settings (like a “Smart Network Switch” feature), forget saved networks that might be causing interference, restart both phones, and try again. Turning off Android’s cellular data during the attempt can also help.
What transfers, category by category
Contacts. These normally appear directly in the iPhone’s Contacts app after a Move to iOS transfer. If you’d rather rely on Google, go to Settings → Apps → Contacts → Contacts Accounts → Add Account, sign in, and turn on Contacts sync — then any changes stay in sync going forward. Either way, scroll through your contact list afterward and fix anything missing while the Android phone is still around.
Text messages and messaging apps. Regular SMS/MMS history moves into the Messages app. For third-party apps: apps like Telegram and Messenger store chats in the cloud, so you just install and sign in.
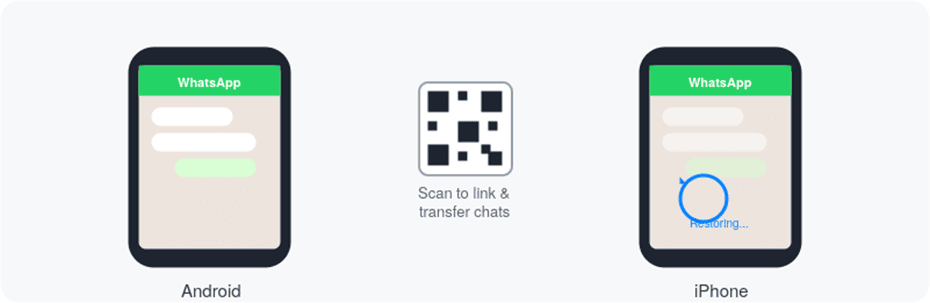
WhatsApp supports transferring eligible chat history and media from Android to iPhone, most commonly through the Move to iOS method: select WhatsApp during the transfer, then confirm the migration the first time you open WhatsApp on the iPhone using the same phone number. Because WhatsApp’s supported data and transfer options can change, check WhatsApp’s own current migration instructions before you erase the Android device, rather than assuming everything will carry over. Other apps that only ever stored chats locally on the device may not be transferable at all — check the developer’s documentation too.
Two-factor authentication apps deserve special attention: Move to iOS doesn’t reliably move these. Before switching, use whatever backup-code or account-migration process each service provides.
Photos and videos. Move to iOS carries over camera photos, videos, and albums. If you already use Google Photos, it may be simpler to keep using it — install the same app on iPhone, sign in, and decide whether to also bring copies into the native Photos library. For very large libraries, the computer method — locating your photos and videos on the Android device (commonly in a DCIM or Camera folder, though this varies by manufacturer), copying them to a computer, then syncing via Finder or the Apple Devices app — gives you more control. Double-check your recent trips and family albums are present before erasing the Android phone.
Music. If your music lives in a streaming service — Spotify, Apple Music, YouTube Music — there’s nothing to transfer; just install the app and sign in. Local music files need to be copied to a computer and synced over via Finder or the Apple Devices app. Local, DRM-free formats generally work fine; older DRM-protected files from long-discontinued stores may not play at all on iPhone.
Calendar events. These move either through Move to iOS or by adding your Google account under Settings → Apps → Calendar → Calendar Accounts → Add Account and turning on Calendar sync. Check the next few weeks of events afterward to confirm birthdays and meetings look right.
Email accounts. Email doesn’t really “transfer” — you connect the same accounts on the new device, and your mail syncs down from the provider’s servers. Move to iOS can bring across your account settings automatically, or you can add accounts manually in Settings. If you use a work or school email system, confirm you have the right server details before wiping the old phone.
Files and cloud storage. Move to iOS brings over files stored in shared storage on the Android device, landing in the iPhone’s Files app. If you already keep documents in Google Drive, Dropbox, OneDrive, or similar, it’s usually simpler to just install those apps and sign in — the Files app can show all of them, plus iCloud Drive, in one place.
Apps and app data. This is the biggest reality check: Android apps don’t run on iPhone, and paid Android apps generally need to be repurchased in the App Store. Some free apps that are available on both Google Play and the App Store, and that support the transfer feature, can be matched during migration and downloaded from the App Store afterward — but Move to iOS can’t move the apps themselves. App data that lives in the cloud (like Spotify or most task apps) reappears once you sign in; data stored only on the device may be stuck on the old phone. Make a list of must-have apps and confirm they exist on iOS — and that your content shows up after signing in — before you erase anything.
Verify everything before you erase the Android phone

Once setup finishes, take time to check:
- Contacts — open the app and confirm key people are there with correct details.
- Messages — scroll recent conversations; if you moved WhatsApp, check that groups and chats look right.
- Photos and videos — check Albums, Recents, and any special folders from trips.
- Calendar and mail — confirm upcoming events and that your inbox is syncing.
- Important apps — open banking apps, authenticators, and password managers to confirm you can sign in and that any codes or settings you need are in place.
If something’s missing, fix it now, while the Android phone is still on your desk.
Wrapping up on the Android side
Once you’re confident everything important made it over:
- Update trusted-device settings. For any account that treated the Android phone as a trusted device (Google, Apple, banking, password managers), make the iPhone the trusted device instead.
- Remove stored payment methods from the Google Play Store if you’re not keeping the phone.
- Sign out of Google, social media, and cloud accounts.
- Factory-reset the Android phone once you’re sure your data is safely transferred. This erases the personal data stored on the device — useful before you sell, trade in, or give it away — though it’s still worth completing the sign-out and trusted-device steps above first, since a reset alone doesn’t guarantee every account association is cleared.
- Handle your SIM. Move a physical SIM to the iPhone once your number is active there. If you switched to eSIM, ask your carrier whether to keep the old SIM as backup or destroy it.
Common mistakes to avoid
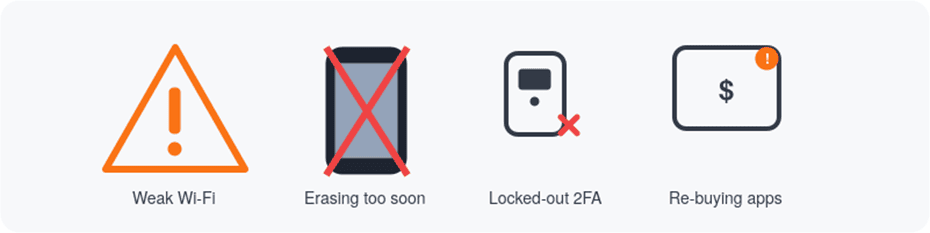
Starting on weak Wi-Fi. A shared or distant network can stall the transfer partway through. Stay close to the router, plug both phones in, and consider a USB-C cable for a more stable connection.
Erasing the Android phone too early. As a practical safety margin (not an official requirement from Apple), it’s worth keeping the Android phone powered on for a few days after the move, until you’ve thoroughly checked your new iPhone. Recovery gets much harder once it’s wiped.
Forgetting about two-factor authentication. If your only trusted device was the Android phone, switching without preparation can lock you out of accounts. Update your 2FA methods and add the iPhone as a trusted device before you switch.
Assuming purchases carry over. Android and iPhone app stores are separate. Subscriptions (Spotify, Netflix, etc.) usually just need a sign-in on the new device, but one-time app purchases generally need to be bought again.
Ignoring storage limits. Compare how much data your Android phone is using against your new iPhone’s storage capacity before you start, and deselect categories you don’t need during the Move to iOS transfer if space is tight.
Frequently asked questions
What happens to my Google account after I move to iPhone?
Nothing changes about the account itself. Add it under Settings on the iPhone and keep using Gmail, Contacts, Calendar, Drive, and Photos exactly as before.
Can I keep using Google services on iPhone?
Yes — most have dedicated, fully-featured iPhone apps. You can mix and match Apple’s built-in apps with Google’s, or lean entirely on one ecosystem.
Can I go back to Android later without losing data?
Generally yes, as long as your information lives in cloud services like Google or in cross-platform apps. iMessage is the main exception: conversations don’t transfer to Android as complete iMessage histories. Before switching back, you should also deregister iMessage (in Settings, or via Apple’s online deregistration tool) so that future messages from iPhone users reach your Android phone as regular texts instead of getting lost trying to reach an iMessage account that’s no longer active on an iPhone.
How long does the Move to iOS transfer take?
It depends entirely on how much data you’re moving and your connection speed — a modest amount of data might take well under an hour, while a phone full of video can take considerably longer.
What if Move to iOS fails partway through?
Keep the app visible on Android the whole time, disable Wi-Fi-interfering settings, restart both phones, and try again with cellular data turned off on the Android side. If it keeps failing, fall back to manual cloud or computer-based transfers for the items that matter most.
The bottom line
Switching from Android to iPhone is a real change, but it doesn’t have to be stressful. Back up your Android phone first, pick the transfer method that matches your situation — Move to iOS (with or without the app), cloud sync, or a computer — and carefully check everything on the new iPhone before you erase the old one. Give yourself a few days to settle into the new settings and gestures. If you get stuck, Apple’s Move from Android to iPhone or iPad page and Google’s own Google Account on iPhone help page are reliable places to check for the latest, most accurate instructions — transfer tools and supported categories do change from one iOS release to the next.

Louis Mugan is a seasoned technology writer with a talent for turning complicated ideas into clear, practical guidance. He focuses on helping everyday readers stay confident in a world where tech moves fast. His style is approachable, steady, and built on real understanding.
He has spent years writing for platforms like EasyTechLife, where he covers gadgets, software, digital trends, and everyday tech solutions. His articles focus on clarity, real-world usefulness, and helping people understand how technology actually fits into their lives.
Outside of his regular columns, Louis explores emerging tools, reviews products, and experiments with new tech so his readers don’t have to. His steady, friendly approach has made him a reliable voice for anyone trying to keep up with modern technology. get in touch at louismugan@gmail.com