Digital Platforms

Why Did My Apps Disappear

Why Did My Apps Disappear

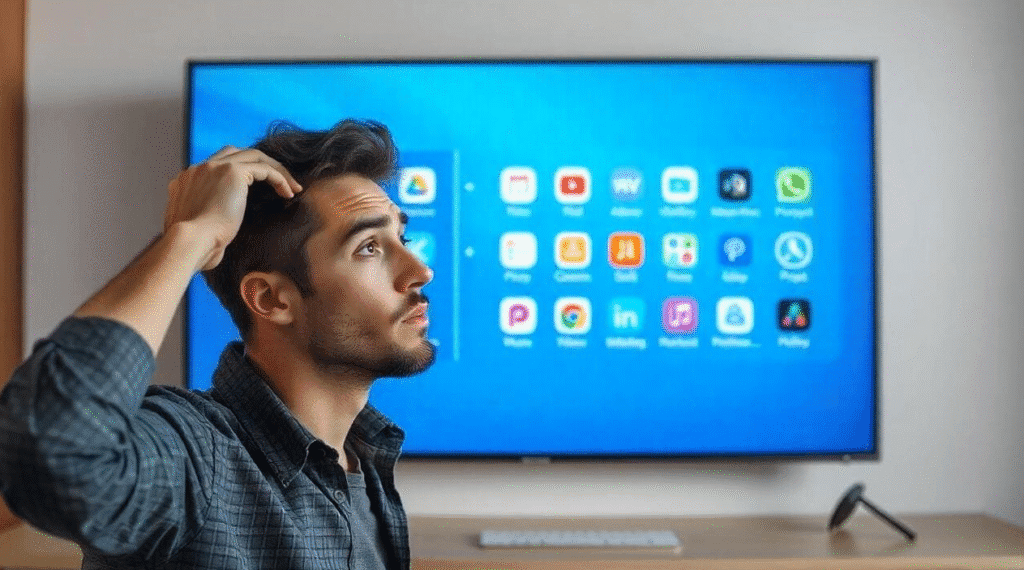
Have you ever experienced the frustration of apps mysteriously disappearing from your device? It can be quite baffling, but fear not, as there are a few possible explanations for this occurrence. In this article, we will explore why apps may disappear and what you can do to find and restore them. One possible reason for missing apps is that they may have been deleted. It’s quite easy to accidentally delete an app, especially when you have numerous apps cluttering your device. To check if this is the case, navigate to your device’s Settings and then to the Apps & Notifications section. From there, select “See all apps” and look for the app in question. If you find it listed, it means it’s still installed on your device. However, if it’s not there, it means it has been deleted. Another possibility is that the app has been disabled. Some devices, like certain Xperia™ devices running Android™ version 4.2 or higher, allow you to disable apps, effectively hiding them from the Application screen. To check if this is the case, go to the Apps & Notifications section in your device’s Settings, select “See all apps,” and then choose “Disabled apps” from the drop-down menu. If you find the missing app in the disabled apps list, simply tap on it and click “Enable” to restore it. Furthermore, it’s worth considering that the app may have been hidden. This can happen if you have a particularly cluttered home screen or if you’ve unintentionally moved the app to a different location. To locate a hidden app, swipe upwards on your home screen to open the App Drawer. From there, you have two options: you can either scroll through the list of apps until you find the missing one, or you can use the search function to quickly locate it. Once you’ve found the app, tap and hold it, then drag it to your preferred location on the home screen. If none of these methods help you locate your missing app, it’s possible that it has been moved to the App Library. The App Library is the last home screen on some devices. To access it, simply swipe left on your screen until you reach it. Once in the App Library, you can search for your app and then touch, hold, and drag it out of the library and onto your desired location on the home screen. If your apps have disappeared, there are several potential reasons for this occurrence. They may have been deleted, disabled, hidden, or moved to the App Library. By following the steps outlined in this article, you should be able to locate and restore your missing apps with ease. So don’t panic, take a deep breath, and get your favorite apps back where they belong! Why Did My App Suddenly Disappear? There could be several reasons why your app suddenly disappeared. Here are some possible explanations: 1. App Deletion: It is possible that you or someone with access to your device accidentally deleted the app. Check your app drawer or home screen to see if it has been completely removed. 2. App Disabling: Some devices allow users to disable certain apps. This means that the app is still installed on your device but is not visible or usable. Check your device settings to see if the app has been disabled. 3. App Hiding: Certain devices, like Xperia™ devices running on Android™ version 4.2 or higher, have the option to hide apps from the Application screen. This means that the app is still installed but is not visible in the app drawer. Check your device settings or launcher settings to see if the app has been hidden. 4. App Update: Sometimes, when an app is updated, it may temporarily disappear from your device until the update is complete. Check your device’s notification center or app store to see if there are any pending app updates. 5. System Glitch: Occasionally, a system glitch or software bug can cause apps to disappear from the device. In such cases, restarting your device or performing a software update may resolve the issue. If none of these explanations apply to your situation, it is possible that there may be a more specific issue with your device or app. In that case, it may be helpful to contact the app developer or your device manufacturer for further assistance. How Do You Get Your Apps Back When They Disappear? To retrieve your missing apps, follow these steps: 1. Go to your device’s Settings.2. Look for the “Apps & Notifications” or “Applications” option and tap on it.3. In the next screen, select “See all apps” or a similar option to view all the installed apps on your device.4. At the top of the screen, you’ll find a drop-down tab labeled “All apps.” Tap on it.5. From the drop-down menu, choose “Disabled apps” or a similar option. This will display a list of apps that are currently disabled on your device.6. Scroll through the list and look for the app that has gone missing. If you find it among the disabled apps, tap on it.7. On the app’s information screen, you should see an option labeled “Enable.” Tap on it to re-enable the app.8. Once the app is enabled, you should be able to find it in your app drawer or on your home screen, depending on your device’s settings. By following these steps, you can easily recover your missing apps and bring them back to your device’s regular functionality. How Do I Get My Apps Back On My Home Screen? To get your apps back on your home screen, follow these step-by-step instructions: 1. Swipe upwards on your Home screen to open the App Drawer. This is where all your installed apps are stored.2. Now, there are two ways to find the app you want to add back to your home screen:– Scroll through the list of apps in the App Drawer until you find the one you’re looking
How to Remove a Google Account from your Devices

How to Remove a Google Account from your Devices

Google accounts can be a necessary part of our lives, but they can also be a nuisance when we want to get rid of them. There are various ways to remove a Google account, depending on what type of device you’re using and which operating system it runs on. In this article, we’ll provide instructions for how to remove a Google account from Android and iPhone devices, as well as from computers running Windows 10 or Chrome OS. We’ll also explain what happens when you delete a Google account and what your options are if you want to keep using Gmail but no longer want the associated Google account. How Do I Remove A Google Account From My Phone? To remove a Google account from your phone, you’ll need to open your phone’s Settings app and tap Accounts. If you don’t see “Accounts,” tap Users & accounts. Next, tap the account you want to remove and then Remove account. If this is the only Google Account on the phone, you’ll need to enter your phone’s pattern, PIN, or password for security. How Do I Remove A Google Account From A Computer? To remove a Google account from a computer, you will need to select the user profile that you want to remove and click on the options icon from the top-right of the user profile. Then, remove the Gmail account from chrome by clicking on “Remove This Person”. You will get a confirmation message, click again on “Remove This Person“. What Happens If You Remove Google Account? Removing a Google account from an Android or iPhone device simply removes access from that particular device, and it can be restored later on. However, any information stored through the account on that device will be lost. That includes things like email, contacts, and settings. Why Can’t I Delete My Gmail Account? A personal Google account can only be deleted by the authenticated owner (i.e. the person signed into it). A company domain Google account (G Suite) can be deleted by the domain administrator. How Do I Delete User Accounts On My Computer? To delete user accounts on your computer, you will need to go to the Accounts section of your Settings. From there, you will be able to select the person’s name or email address and then select Remove. After reading the disclosure, you will need to select Delete account and data in order to complete the process. How Do You Remove A Google Account From Windows 10? Removing a Google account from Windows 10 is a fairly simple process. First, open the Settings app and click on Accounts. Then, click on Email & accounts and select the account that you want to remove. Next, click the Manage button and then click the Delete account from this device option. Finally, click the Delete button and then click the Done button. How Do I Remove A Gmail Account From Chrome? To remove a Gmail account from Chrome, press the settings menu icon in the top-right area of your profile card. In the drop-down menu that appears, press the Remove This Person option. Once pressed, the Chrome profile linked to your Gmail account will be removed. Conclusion Removing a Google account is a fairly simple process, but it’s important to understand what happens when you do. Deleting an account can result in the loss of information stored on that device, so be sure to back up any data you want to keep before removing the account. If you only have one Google account and want to continue using Gmail, your best option may be to create a new Gmail address without the associated Google account. Louis MuganLouis Mugan is a seasoned technology writer with a talent for turning complicated ideas into clear, practical guidance. He focuses on helping everyday readers stay confident in a world where tech moves fast. His style is approachable, steady, and built on real understanding. He has spent years writing for platforms like EasyTechLife, where he covers gadgets, software, digital trends, and everyday tech solutions. His articles focus on clarity, real-world usefulness, and helping people understand how technology actually fits into their lives. Outside of his regular columns, Louis explores emerging tools, reviews products, and experiments with new tech so his readers don’t have to. His steady, friendly approach has made him a reliable voice for anyone trying to keep up with modern technology. get in touch at louismugan@gmail.com

Troubleshooting: How to Recover a Disappeared Clock App on Your Phone

Troubleshooting: How to Recover a Disappeared Clock App on Your Phone

Have you noticed that the clock app on your Android device has mysteriously disappeared from your home screen? Don’t worry, you’re not alone. Many users have encountered this issue, but luckily, there’s a simple solution to get your clock app back where it belongs. If you’re using an Android device running Android 12 or newer, such as Google’s Pixel phones, you’ll find that the clock app is usually displayed on the home screen by default. However, if you’re using an older version of Android, like Android 11 or earlier, the clock app may not be visible on your home screen. To add the date and time back to your home screen, follow these steps: 1. Ensure that your phone is on and you’re on the home page.2. Press and hold down on the screen (not on an app) for about 2 seconds.3. A menu will appear, and you’ll need to select the “Widgets” option.4. Scroll down until you find the “Clock” widget. Tap on it.5. You’ll see different versions of the clock widget available. Touch and hold the desired clock version for at least a second.6. Now, you can move the clock widget to the desired location on your home screen by dragging it with your finger. That’s it! You’ve successfully added the date and time back to your home screen. You can now tap on the clock widget to launch the Clock app and access all its features. It’s a convenient way to always have the time and date at your fingertips. Keep in mind that these instructions may vary slightly depending on the make and model of your Android device or the version of Android you’re running. However, the general steps should be similar across most devices. So, if you find that your clock app has disappeared from your Android home screen, don’t panic. Follow the steps outlined above, and you’ll have it back in no time. Stay punctual and never miss a beat with your trusty clock app right on your home screen. How Do I Get My Clock Icon Back On My Phone? To get the clock icon back on your phone, you can follow these steps: 1. Unlock your phone and go to the home screen.2. Tap and hold on an empty space on the home screen. This will bring up the customization options.3. Look for the “Widgets” or “Add Widgets” option and tap on it.4. Scroll through the list of available widgets until you find the one labeled “Clock” or “Digital Clock”.5. Tap and hold on the clock widget, then drag it to the desired location on your home screen.6. Release your finger to place the clock widget on the home screen. Alternatively, you can try the following steps if the clock widget is not available in the widget list: 1. Unlock your phone and go to the app drawer.2. Look for the “Clock” app among your installed apps. It is usually pre-installed on most Android devices.3. Tap and hold on the Clock app icon.4. Drag the Clock app icon to the home screen and release your finger to place it. If you’re unable to find the Clock app in your app drawer, it may be hidden or disabled. In that case, you can try the following steps: 1. Go to the “Settings” app on your phone.2. Look for the “Apps” or “Applications” option and tap on it.3. Depending on your device, you may need to tap on “App Manager” or “Manage Apps” to access the list of installed apps.4. Scroll through the list of apps and look for the Clock app.5. If you find the Clock app, tap on it and select “Enable” or “Show” to make it visible on your home screen or app drawer. By following these steps, you should be able to get the clock icon back on your phone’s home screen. How Do I Get The Clock App On My Home Screen? To add the Clock app to your Android home screen, follow these steps: 1. Start by locating an empty space on your home screen. Long tap (press and hold) on the screen until options appear.2. Look for the “Widgets” or “Add Widgets” option in the menu that appears. Tap on it.3. Scroll through the list of available widgets until you find the Clock widget. It may be located under the “Widgets” or “System” section.4. Once you find the Clock widget, long tap on it and hold it.5. Drag the Clock widget to the desired location on your home screen. Release your finger to place it there.6. You can resize the widget by tapping and holding on the edges of the widget until resizing options appear. Drag the edges to adjust the size according to your preference.7. Once the Clock widget is in place, you can tap on it to launch the Clock app directly from your home screen. That’s it! You have successfully added the Clock app widget to your Android home screen, allowing easy access to the Clock app with a single tap. How Do I Get My Clock Back On My Front Page? To add the date and time back to your home screen, follow these steps: 1. Ensure that your phone is turned on and you are on the home screen.2. Press and hold your finger on an empty area of the screen (not on an app or widget) for about 2 seconds.3. A menu will appear, showing options such as wallpapers, themes, and widgets. Select the “Widgets” option.4. You will be taken to the widgets menu, where you can see various widgets available for your device.5. Scroll down or swipe left until you find the “Clock” widget. Tap on it to access the available clock options.6. Depending on your device and launcher, you may see different clock styles or sizes. Touch and hold the desired clock version for at least a second.7. Once you have selected the clock widget, you can move it to the desired location by dragging it across the

How To Change Outlook Password on Your iPhone

How To Change Outlook Password on Your iPhone

Are you having trouble updating your Outlook password on your iPhone? You’re not alone! Many users struggle to keep their passwords up-to-date, especially when it comes to Outlook. But don’t worry – changing your Outlook password on your iPhone is easy once you know how. Here’s a step-by-step guide to help you update your Outlook password on your iPhone: 1. Open the Outlook app and tap Sign In at the bottom of the screen. If the sign in prompt doesn’t appear, try agin later. 2. Enter your updated password and tap Sign In. 3. To find saved passwords and passkeys on your iPhone, open Settings and select Passwords (or Passwords & Accounts for iOS 13 or earlier). Then use Face ID or Touch ID when prompted, or enter your passcode. Select a website or app to view its associated password or passkey. 4. To change your password, open Microsoft account security and select Password security. As a security measure, you may be required to verify your identity with a security code first. 5. Once verified, enter your current password and then enter your new password twice for confirmation purposes. For additional security, you can also check the box which prompts you to update your password every 72 days before selecting Save at the bottom of the page. And there you have it – now you’re all set! With these simple steps, you can easily update or change your Outlook password on any iPhone device running iOS 12 or later versions of iOS software. Source: youtube.com Changing Outlook Password on a Phone Changing your Outlook password on your phone is easy! First, tap on the Outlook app on your device. Then, tap Sign In at the bottom of the screen. If you don’t see the sign-in prompt, try aain later. Once you do see it, enter your updated password and tap Sign In. That’s it! Your new password will now be active on your device. Retrieving Outlook Password on an iPhone To find your Outlook password on your iPhone, you will need to tap on the Settings app and select Passwords. If you are uing iOS 13 or earlier, select Passwords & Accounts and then tap Website & App Passwords. You will be prompted to use Face ID or Touch ID, or enter your passcode. Once you have done that, select Outlook and then view the password associated with it. Changing an Outlook Account Password Changing your Outlook account password is easy and secure! First, go to Microsoft account security and select Password security. You might be asked to verify your identity with a security code, so have your phone or other device ready. Once you’re authenticated, enter your current password and then enter the new password you would like to use. Finally, select Save to complete the process. It’s that simple! Your new password will take effect immediately and will be used for all Outlook services such as email, calendar, contacts, OneDrive, Office applications, etc. Finding Outlook Password on a Phone To find your Outlook password on your phone, start by opening the mail app. Tap Menu, and then tap Settings. Tap your Microsoft account, and then tap Incoming settings (under Server settings). Here you’ll see the current password for your Outlook account. If you need to change it, simply replace it with a new app password and then tap Done. Accessing Outlook Settings on an iPhone In order to access Outlook settings on an iPhone, you will need to open the Outlook app and select Settings from the main menu. From there, you can choose account specific settings such as email accounts, calendars, tasks and contacts. Additionally, in this section you can manage notification settings, signature settings, sync settings and more. Changing Outlook Password on iPhone with iOS 12 If you’re looking to change your Outlook password on an iPhone running iOS 12, here are the steps you’ll need to take: 1. Open your iPhone’s Settings and select Accounts & Passwords.2. Tap on the Outlook account that you want to update.3. Select the Account field and enter your new password.4. Tap Done in the upper right-hand corner of the screen to save your changes.5. Return to Accounts & Passwords and toggle Mail off then back on again to apply the new password. And that’s it! Your Outlook password will now be updated on your iOS 12 device. Changing Outlook Password on iPad Changing your Outlook password on an iPad is easy and can be done in just a few steps. First, locate and press the Settings icon. Then, select Mail, Contacts, Calendars from the left menu. Next, choose the Outlook account for which you want to change the password. After that, select the Outlook account and enter your new password in the Password field. Finally, hit Done at the top-right corner of the screen to save your changes. Your Outlook password should now be changed on your iPad. Conclusion In conclusion, Outlook Password is important to ensure the security of your Outlook account. It is important to update your password regularly and use unique passwords for each account. You can easily update your Outlook password using the Outlook app on Apple iOS or Android devices. Additionally, you can find saved passwords and passkeys on your iPhone by accessing the Passwords section of Settings. Finally, you can also change your Outlook password in Outlook.com by visiting Microsoft account security and selecting Password Security. By followng these steps, you can ensure that your Outlook account is secure and protected from unauthorized access. Louis MuganLouis Mugan is a seasoned technology writer with a talent for turning complicated ideas into clear, practical guidance. He focuses on helping everyday readers stay confident in a world where tech moves fast. His style is approachable, steady, and built on real understanding. He has spent years writing for platforms like EasyTechLife, where he covers gadgets, software, digital trends, and everyday tech solutions. His articles focus on clarity, real-world usefulness, and helping people understand how technology actually

Force Stop: What Does it Mean and When Should You Use It?

Force Stop: What Does it Mean and When Should You Use It?

As a user of an Android device, you may have come across the term “Force Stop” when dealing with misbehaving apps. But what does it actually mean? In this article, we will dive into the details of Force Stop and when it should be used. Firstly, Force Stop is an option that can be found in the App Info section of an app. It is used to completely stop a running app and prevent it from running in the background. When you Force Stop an app, it means that the app’s current state is completely cleared from memory and all its background processes are terminated. So, when should you use Force Stop? Well, the most common reason is when an app is misbehaving or has become unresponsive. In such cases, Force Stop can be used to close the app and restart it, which often fixes the problem. This is because Force Stop kills the app’s current instance and clears its cache, which can sometimes become corrupted and cause issues. Another reason to use Force Stop is when you want to conserve battery life or data usage. Some apps continue to run in the background even after you have closed them, which can drain your battery and use up your data. Force Stopping these apps can prevent them from running in the background and save you precious battery life and data. However, it’s important to note that Force Stop should only be used as a last resort. This is because Force Stopping an app can sometimes cause it to lose unsaved data, so if you have important information in the app, it’s best to save it before using Force Stop. In addition, Force Stopping an app can also cause it to take longer to start up the next time you open it. This is because the app has to start from scratch and rebuild its cache and other data. Force Stop is a useful option to have when dealing with misbehaving apps or trying to conserve battery life and data usage. However, it should only be used as a last resort and with caution, as it can cause the app to lose unsaved data and take longer to start up. It’s always best to save your data before using Force Stop and only use it when necessary. Is It OK To Force Stop An App? Force-stopping an app is generally considered safe and can be useful in some situations. When you force-stop an app, you are essentially closing it down immediately and preventing it from running in the background. This can be helpful if an app is misbehaving or causing your device to slow down. However, it’s important to keep in mind that force-stopping an app can also have some negative consequences. For example, if you force-stop an app while it’s in the middle of saving data, you may lose any unsaved changes. Additionally, some apps rely on running in the background to provide notifications and other important features. So, while force-stopping an app can be a useful tool, it’s important to weigh the potential benefits and drawbacks before doing so. What Happens If I Force Stop? When you force-stop an app, you are essentially closing it forcibly and abruptly. This means that any ongoing processes or tasks within the app will be immediately terminated. Additionally, the app will no longer be able to access any of its cache files or data until the next time it is launched. It’s important to note that force-stopping an app should generally only be done as a last resort when an app is misbehaving or causing issues on your device. Force-stopping an app too frequently can actually have negative effects on your device’s performance, as it may cause the app to behave unpredictably or not function properly the next time it is launched. Force-stopping an app is a way to immediately terminate any ongoing processes or tasks within the app and prevent it from accessing its cache files or data until the next time it is launched. However, it should only be done sparingly and as a troubleshooting measure when an app is misbehaving or causing issues. Is Force Stop the Same As Delete? Force-stopping an app is not the same as deleting it. When you force stop an app, you are simply telling the operating system to stop all of the app’s ongoing processes and clear it from the memory, but the app itself remains installed on your device and all of its data is still there. On the other hand, deleting an app from your device will completely remove it, including any data that has been saved to your device. It’s important to note that force-stopping an app should be used as a last resort, as it can cause unexpected behavior and should only be used if an app is not responding or causing problems. How Do I Restart An App After Force Stop? To restart an app after force stop on an Android device, you can follow these steps: 1. Tap on the “Settings” icon on your device’s home screen.2. Scroll down and tap on “Apps”.3. You will see a list of all the apps installed on your device. Find the app you want to restart and tap on it.4. Tap on the “Force stop” button to stop the app from running.5. Once the app has been stopped, tap on the “Open” button to restart it. Alternatively, you can also restart an app by simply tapping on its icon on your device’s home screen or app drawer. This will launch the app and start it from scratch, without any background processes or data that may have been cached from the previous session. Conclusion Using Force Stop can be a useful tool when trying to fix a misbehaving app on your Android device. However, it’s important to keep in mind that force-stopping an app means that you will likely lose any unsaved data within the app. It’s important to weigh the

How to Access Your Cash App Account on Your Computer?

How to Access Your Cash App Account on Your Computer?

Cash App is a popular mobile payment service that allows users to send and receive money from their friends, family, or even businesses. But did you know that you can also access your Cash App account on your computer? That’s right, Cash App provides a convenient way for you to view your account information right from the comfort of your own desktop. To log into your Cash App account on your computer, simply follow these steps: 1. Open your preferred web browser and go to cash.app/account.2. Once on the website, you’ll see a login page where you can enter your email address or phone number associated with your Cash App account.3. After entering your login information, click on the “Next” button.4. If you’re logging in from a trusted device, Cash App may send you a verification code via email or SMS. Enter the code to proceed.5. Once you’ve successfully entered the verification code, you’ll be redirected to your Cash App account dashboard. From your Cash App account on your computer, you’ll be able to access various features and view your account information. You can see your current balance, review your transaction history, add or update your linked bank accounts, and even send or request money from other Cash App users. Logging into your Cash App account on your computer provides a convenient way to manage your finances without having to rely solely on your mobile device. It allows for a larger screen view, making it easier to navigate and review your account details. Whether you’re at home, at work, or anywhere with access to a computer, logging into your Cash App account on your computer gives you the flexibility to stay on top of your financial transactions and keep track of your money. So, if you’re wondering whether you can log into Cash App on your computer, the answer is yes! With just a few simple steps, you can access your Cash App account and enjoy the convenience of managing your finances from your desktop. Give it a try and see how easy it is to stay connected to your money with Cash App. Can You Check Your Cash App Account on a Computer? You can check your Cash App account on a computer. To do so, follow these steps: 1. Open a web browser on your computer (such as Google Chrome, Mozilla Firefox, or Safari).2. Go to the official Cash App website by typing “cash.app” in the address bar.3. Once on the website, locate and click on the “Sign In” button. This will take you to the login page.4. Enter the email address or phone number associated with your Cash App account and click on the “Continue” button.5. On the next page, enter the password for your Cash App account and click on the “Sign In” button.6. After successfully logging in, you will be directed to your Cash App account dashboard, where you can view your account information. It’s important to note that the Cash App website is designed to be responsive and user-friendly on both mobile devices and computers. This allows you to access and manage your account conveniently from any device with internet access. If you encounter any issues or have trouble accessing your account on a computer, you can reach out to Cash App customer support for further assistance. Can You Use Cash App On The Web? Cash App can be used on the web. Customers have the convenience of using Cash App for faster checkout on both web and mobile platforms. Whether on a desktop or a mobile device, users can make payments using their Cash App balance or debit card. On the web, customers can utilize Cash App Pay to complete their transactions seamlessly. This feature allows them to pay at their favorite brands by simply scanning a QR code displayed on the desktop website. By scanning the code, customers can easily access their Cash App account and choose to pay with their available balance or debit card. In addition to scanning QR codes, Cash App also provides a redirect option for mobile users. When customers are on a mobile website and choose to pay with Cash App, they can be redirected to the Cash App mobile app to complete the transaction. This ensures a smooth and efficient checkout process for mobile users. Cash App offers a convenient and efficient payment experience, whether users are on the web or using a mobile device. With the ability to pay using their Cash App balance or debit card, customers can enjoy faster checkout at their favorite brands. Conclusion Cash App is a convenient and secure platform that allows users to easily manage their finances, send and receive money, and make purchases at their favorite brands. With its user-friendly interface and fast transaction processing, Cash App provides a seamless experience for individuals looking for a modern and efficient way to handle their money. Whether you want to view your account information, send money to friends or family, or make a purchase at a store, Cash App offers a range of features that cater to your financial needs. So, if you’re looking for a hassle-free way to manage your money, Cash App is definitely worth considering. Louis MuganLouis Mugan is a seasoned technology writer with a talent for turning complicated ideas into clear, practical guidance. He focuses on helping everyday readers stay confident in a world where tech moves fast. His style is approachable, steady, and built on real understanding. He has spent years writing for platforms like EasyTechLife, where he covers gadgets, software, digital trends, and everyday tech solutions. His articles focus on clarity, real-world usefulness, and helping people understand how technology actually fits into their lives. Outside of his regular columns, Louis explores emerging tools, reviews products, and experiments with new tech so his readers don’t have to. His steady, friendly approach has made him a reliable voice for anyone trying to keep up with modern technology. get in touch at louismugan@gmail.com

How to Arrange Apps Alphabetically on Your Android Device?

How to Arrange Apps Alphabetically on Your Android Device?

Are you tired of scrolling through endless pages of apps on your Android device? Do you find it frustrating to locate the app you need amidst the clutter? Well, fret no more! In this article, we will guide you on how to arrange your apps alphabetically on Android, making it easier for you to find and access them. The first step is to open the Apps screen on your Android device. This can usually be done by tapping on the square or circle icon at the bottom of your home screen. Once you’re on the Apps screen, look for the ellipsis icon, which is usually represented by three dots arranged vertically. Tap on this icon to open a menu of options. In the menu, you should see an option called “Display layout.” Tap on this option to proceed. Within the Display layout menu, you will find different options to organize your apps. Look for the one that says “Alphabetical list” and tap on it. By selecting the Alphabetical list option, your apps will now be arranged in alphabetical order, making it easier for you to find them. You no longer have to scroll through multiple pages or remember where you placed a specific app. Simply swipe up or down to navigate through the list and locate the app you need. But what if you have a lot of apps and want to further organize them into categories? Well, Android allows you to create folders to group similar apps together. To create a folder, simply long-press on an app icon until it becomes draggable. Then, drag and drop the app onto another app that you want to include in the same folder. Android will automatically create a folder with both apps inside. To rename the folder, simply tap on the folder and look for the option to rename it. This will allow you to give the folder a name that reflects the category of apps it contains. For example, you can create a folder called “Social Media” and place apps like Facebook, Instagram, and Twitter inside. You can also add or remove apps from a folder at any time. To do this, simply long-press on an app icon within the folder and drag it out or into another folder. This gives you the flexibility to customize your app organization as needed. Once you have created folders and arranged your apps, you can move the folders around your home screen. Simply long-press on a folder and drag it to the desired location. This allows you to prioritize certain categories of apps or place them in a convenient spot for easy access. Now that you know how to arrange your apps alphabetically and create folders, you can enjoy a cleaner and more organized home screen on your Android device. No more wasting time searching for apps or dealing with cluttered screens. With just a few simple steps, you can have a streamlined and efficient app organization system. So go ahead and give it a try! Take control of your app organization and make your Android experience even better. Happy organizing! How Do You Put Your Apps in Alphabetical Order on Android? To arrange your Android apps in alphabetical order, follow these steps: 1. Open the Apps screen on your Android device. This can typically be done by tapping on the “Apps” icon, which is usually a grid of small squares or dots, on your device’s home screen. 2. Once the Apps screen is open, look for an icon that resembles three vertical dots or lines. This is often referred to as the ellipsis icon or menu icon. 3. Tap on the ellipsis icon to open the menu options for organizing your apps. 4. In the menu options, look for an option called “Display layout” or something similar. This option allows you to customize how your apps are displayed on the screen. 5. Tap on the “Display layout” option to open the available layout choices. 6. Among the layout options, you should see one labeled “Alphabetical list” or something similar. This layout will arrange your apps in alphabetical order. 7. Select the “Alphabetical list” option by tapping on it. Your apps will now be automatically rearranged in alphabetical order. By following these steps, you can easily organize your Android apps in alphabetical order, making it easier for you to find and access specific apps on your device. How Do You Organize Apps on Your Android Home Screen? To organize your apps on your Android home screen, follow these steps: 1. Long press on any app icon on your home screen. This will activate the app editing mode. 2. Once in editing mode, you can drag and drop app icons to rearrange them on your home screen. You can move them to different pages or positions to suit your preference. 3. To create a folder, drag an app icon on top of another app icon. This will automatically create a folder grouping both apps together. 4. You can then customize the folder by giving it a name. Simply tap on the folder and enter a name of your choice. 5. To add more apps to a folder, simply drag and drop them onto the folder icon. 6. If you want to remove an app from a folder, open the folder and long press on the app icon. Then, drag it out of the folder and onto the home screen. 7. To delete a folder, open the folder and remove all the apps from it. The folder will automatically disappear once it’s empty. 8. Additionally, you can also move entire folders around your home screen. Just long press on the folder and drag it to a new position. By following these steps, you can efficiently organize your apps into folders, making your Android home screen cleaner and more organized. Conclusion Arranging apps alphabetically on your Android device can help you stay organized and easily find the apps you need. By following a simple process of

How To Send Text Messages Online With Verizon

How To Send Text Messages Online With Verizon

Home / Do you want to send text messages online with Verizon? Unfortunately, email-to-SMS and other legacy methods, such as the Verizon Messages web and desktop apps, are no longer supported. However, there are still ways to send text messages from your desktop if you have a Verizon Wireless account. Let’s get into it! What Happened to Email-to-SMS and Verizon Messages?  Email-to-SMS used to be supported by many carriers. It allowed you to send text messages to a mobile number using your email. For example, you could send an email to a specific @vtext.com email address, and the message would be delivered to the mobile number specified in the email address.  However, Verizon, as well as other major carriers, did away with email-to-SMS support around 2024. There were just too many problems with it, such as how easy it was to abuse it and send spam to multiple phone numbers at once.  Similarly, Verizon no longer supports the Verizon Messages app. However, you can still text from your desktop using Google Messages, Messages for Mac, or Microsoft Phone Link. The setup process depends on whether you have an Android or iPhone.   Android Users: How to Text With Google Messages You can use Google Messages on your desktop browser to send text messages from the web.  If you have an Android phone, download Google Messages from the Play Store, if it’s not already installed on your phone. Also, make sure your Android device is signed in with a Gmail account.  Then, make Google Messages your default messaging app. You can do that by going to Settings > Apps > Default apps > SMS app and selecting Google Messages. However, the first time you use Google Messages, it should also prompt you and ask you whether you want to make it the default app.   Next, on your desktop, go to messages.google.com/web in your browser and sign in with your Google account. Make sure it’s the same Google account that you are using with Google Messages on your phone. Once you have signed in, you will need to complete the pairing process by selecting the right emoji on your phone, based on what’s shown on your desktop screen.  Alternatively, you can pair using a QR code. Click on “Pair With QR Code” on Google Messages on your desktop. Then, on your phone, open the Google Messages app and click on your profile picture. Next, navigate to Device Pairing > QR Code Scanner. Finally, use the QR code scanner that appears on your phone to scan the QR code on your desktop.  iPhone Users: Messages for Mac and Phone Link You can use Phone Link to link your iPhone to your Windows computer.  If you have an iPhone, things get a bit more complicated.  If you have a Mac, it’s pretty straightforward. Open the Messages app on your Mac and sign in with the same Apple ID that you are using on your iPhone. Then, go to Messages > Settings > iMessage and select Enable Messages in iCloud. You can then choose which email address or phone number you want to use for sending messages.  However, if you have a Windows computer, things are a little different. There’s no iMessage app for Windows, and iPhones do not support Google Messages. Instead, if you have iOS 16 or a later version, you can use Microsoft Phone Link.  Phone Link comes preinstalled on Windows 11, so you just have to search for “Phone Link” on Windows and launch it.  Then, select “iPhone.” It will show you a QR code. Use your iPhone’s camera to scan the QR code, and it will link your iPhone to your PC over Bluetooth! You will then be able to send and view text messages on your Windows device.  However, Phone Link requires your iPhone to be within Bluetooth range of your device. New messages will not show up if your iPhone is not connected via Bluetooth to your PC. Image sharing, video sharing, and group texts are not supported by Phone Link.  Troubleshooting & Common Errors If you are having difficulty pairing Google Messages with your phone, make sure you are using the correct Google account. Open Google Messages on your phone and click on your profile image in the top-right corner to check which Gmail account you are signed in with to Google Messages. Then, sign in with the same Gmail account on Google Messages on your browser, or try the QR pairing method instead.  If you are having difficulty using Messages on your Mac, make sure you are signed in with the same Apple ID that you have on your phone and that Messages in iCloud is enabled.  Finally, if you are experiencing issues using Phone Link with your iPhone, make sure that Bluetooth is enabled on your iPhone and that it is within Bluetooth range of your PC.  Conclusion  I hope this setup checklist was useful! Once you have set up your computer with Google Messages, Messages for Mac, or Microsoft Phone link, do a delivery test by sending a test SMS to a trusted contact. Ask them to send you a message as well to see if you get a notification (make sure notifications aren’t blocked from your browser or the Messages app on Mac).  Louis MuganLouis Mugan is a seasoned technology writer with a talent for turning complicated ideas into clear, practical guidance. He focuses on helping everyday readers stay confident in a world where tech moves fast. His style is approachable, steady, and built on real understanding. He has spent years writing for platforms like EasyTechLife, where he covers gadgets, software, digital trends, and everyday tech solutions. His articles focus on clarity, real-world usefulness, and helping people understand how technology actually fits into their lives. Outside of his regular columns, Louis explores emerging tools, reviews products, and experiments with new tech so his readers don’t have to. His steady, friendly approach has made him a reliable voice for anyone trying to keep up with modern technology.

Declutter Your Home Screen: Easy Ways to Remove Apps on Android

Declutter Your Home Screen: Easy Ways to Remove Apps on Android

Home / When it comes to organizing your Android home screen, it’s important to have control over the apps that are displayed. If you no longer need a particular app, you can easily remove it from your home screen. This article will guide you through the steps to remove an app from your Android home screen. To get started, tap or click the “Home” button on your device. This will take you to the home screen that you want to modify. Take a moment to swipe through the screens until you locate the specific home screen where the app you wish to remove is located. Once you’ve found the app, tap and hold on its icon. You’ll notice that a few options appear at the bottom of the screen. One of these options is a “Remove” icon. Drag the shortcut icon of the app you want to remove and drop it onto the “Remove” icon. Alternatively, you can also remove an app by touching and holding on its icon and selecting the “Remove” option from the pop-up menu. You can also drag the app icon to the top of the screen where a “Remove” option is displayed. By following these simple steps, you can easily remove an app from your Android home screen. This helps you declutter your home screen and keep it organized with only the apps that you frequently use. How Do I Remove An Icon From My Android Home Screen? To remove an icon from your Android home screen, follow these steps: 1. Tap or click the “Home” button on your device to go to the home screen you want to modify.2. Swipe left or right until you find the specific home screen containing the icon you wish to delete.3. Locate the icon you want to remove and tap and hold on it for a few seconds.4. As you hold the icon, you will see various options appear at the top or bottom of the screen.5. Look for an option that says “Remove” or an icon that looks like a trash bin. It may vary depending on your device and Android version.6. Once you find the “Remove” option or trash bin icon, drag the shortcut icon towards it.7. Release your finger when the shortcut icon is over the “Remove” option or trash bin icon.8. The icon will be removed from your home screen, and you won’t see it anymore. If you have multiple home screens or app drawers on your Android device, make sure you are on the correct screen where the icon is located before attempting to remove it. Note: Removing an icon from the home screen does not uninstall the app itself. It simply removes the shortcut from your home screen. The app will still be accessible from the app drawer or through the device’s settings. How Do I Move An App Off My Home Screen? To remove an app from your home screen, follow these steps: 1. Locate the app that you want to remove on your home screen.2. Touch and hold the app icon for a few seconds until it starts to wiggle or a menu appears.3. Once the app icons are wiggling, you will see an “X” symbol or a “Remove” option on the top left corner of the app icon. This may vary depending on your device and operating system.4. Tap on the “X” symbol or the “Remove” option.5. A confirmation message may appear asking if you want to delete the app. Read the message carefully and select “Delete” or “Remove” to proceed.6. The app will be removed from your home screen and may be placed in the app drawer or in a separate folder called “Removed” or “Deleted Apps.” If you want to move the app to a different location on your home screen instead of removing it entirely, you can drag and drop the app icon to your desired position. Simply touch and hold the app icon, then drag it to the desired location on the screen. Release your finger to drop the app into the new position. Remember that removing an app from your home screen does not uninstall or delete the app from your device. It only removes the shortcut from your home screen, and you can still find and access the app through the app drawer or search function on your device. Conclusion Removing icons from a home screen is a simple and straightforward process. Whether you are using an Android or iOS device, the steps are similar. By tapping and holding the icon you wish to delete, a “Remove” icon will appear at the bottom of the screen. You can then drag the shortcut icon to the “Remove” icon to remove the app from your home screen. This allows you to declutter your home screen and keep it organized with only the apps you regularly use. Louis MuganLouis Mugan is a seasoned technology writer with a talent for turning complicated ideas into clear, practical guidance. He focuses on helping everyday readers stay confident in a world where tech moves fast. His style is approachable, steady, and built on real understanding. He has spent years writing for platforms like EasyTechLife, where he covers gadgets, software, digital trends, and everyday tech solutions. His articles focus on clarity, real-world usefulness, and helping people understand how technology actually fits into their lives. Outside of his regular columns, Louis explores emerging tools, reviews products, and experiments with new tech so his readers don’t have to. His steady, friendly approach has made him a reliable voice for anyone trying to keep up with modern technology. get in touch at louismugan@gmail.com

What Happens to iMessages When You’re Blocked?

What Happens to iMessages When You’re Blocked?

Home / When it comes to communication, blocking someone is a necessary step that many people take. Blocking someone on your iPhone blocks them from contacting you via the Messages app, FaceTime, or other messaging services such as WhatsApp and Skype. But what happens when you block someone on iMessage? Does the person know they’ve been blocked? Can they stil see your messages? The answer is no. When you block someone on iMessage, their messages will not show up on your device at all. Instead, they will simply see a “Delivered” status for their message, even though it never actually arrived to you. This is becase their messages are now blocked by Apple’s servers and will never reach you. Blocking someone on iMessage also prevents them from seeing any of your past conversations or being able to start new ones with you. They will not be able to see when you are typing a message either. If they try to call or FaceTime you, the call will immediately go straight to voicemail without ringing your phone at all. It’s important to remember that blocking someone on iMessage does not automatically delete any of your conversations with the blocked contact. If you want to delete the conversation thread with this person, then you must do so manually before blocking them. Otherwise, the conversation thread stil remains in Messages and can be accessed by anyone who has access to your phone or computer (unless it’s password protected). In short, if you block someone on iMessage they won’t be able to contact or view anything related to you in any way – instead they’ll only see a “Delivered” status for their message that never actually arrives. Does an iPhone Message Say ‘Delivered’ When Blocked? No, messages will not say “delivered” when a user has been blocked on an iPhone. When a user has been blocked, the messages they send will still appear to be sent as normal, but the recipient will not receive them. The sender will not receive any notification that their messages have not been received. Identifying If You Have Been Blocked on iMessage If you are blocked on iMessage, you will no longer see a delivery status when sending a message. The message will simply say “Delivered” and remain in that state. You will also not receive any notifications when the other person is typing or has read your message. Furthermore, if you attempt to call the person who has blocked you, you will only hear a single ring before beng sent to voicemail. Can You Determine If Someone Has Blocked Your Texts? Yes, you can tell if someone has blocked your texts. If you have sent a text message to someone and they don’t reply, it’s possible that they have blocked you. You may also notice that the message status is ‘delivered’ but you don’t get any notification or response back. Additionally, if the person has blocked your texts, tere will be a blank space beneath your message when you view it in the conversation thread. Does Blocking a Message Affect Its Delivery Status? No, it does not. If you have been blocked, you will not be able to see any delivery status or read receipts for the message you sent. The message itself will still apper in a blue bubble, but there will be no delivery status below it, not even a “Not Delivered.” What Happens When You Text Someone Who Has Blocked You on an iPhone? When you text someone who has blocked you on an iPhone, the message will still send normally. However, the recipient will not receive it and you will not receive any type of notification that the message was blocked. Furthermore, if you try to call the person, your call will go straight to voicemail without ringing. Louis MuganLouis Mugan is a seasoned technology writer with a talent for turning complicated ideas into clear, practical guidance. He focuses on helping everyday readers stay confident in a world where tech moves fast. His style is approachable, steady, and built on real understanding. He has spent years writing for platforms like EasyTechLife, where he covers gadgets, software, digital trends, and everyday tech solutions. His articles focus on clarity, real-world usefulness, and helping people understand how technology actually fits into their lives. Outside of his regular columns, Louis explores emerging tools, reviews products, and experiments with new tech so his readers don’t have to. His steady, friendly approach has made him a reliable voice for anyone trying to keep up with modern technology. get in touch at louismugan@gmail.com

How To Delete An Email Address From Outlook Memory

How To Delete An Email Address From Outlook Memory

Home / Outlook is one of the most popular email clients in the world. Millions of people use it to manage their email communications every day. Outlook is known for its reliability and ease of use, as well as its many features and options. One of Outlook’s most important features is its ability to store email addresses in its memory. This allows you to quickly and easily send emails to people you’ve previously communicated with. However, there may be times when you need to delete an email address from Outlook’s memory. How Do I Permanently Delete An Email Address From Outlook? To delete an email address from Outlook, you fist need to remove it from your account settings. From the main Outlook window, select File in the upper left corner of the screen. Select Account Settings > Account Settings. Select the account you want to delete, then select Remove. Once the email address is removed from your account settings, you can delete it from Outlook by selecting it in the Address Book and pressing the Delete key on your keyboard. How Do I Delete An Old Email Address That Keeps Popping Up In Outlook? To delete an old email address that keeps popping up in Outlook, you need to select the unwanted address. The selected entry is highlighted and shown with an ‘X’ indicating it can be deleted. Press the Delete key. How Do I Delete An Email Address From Autofill? IOS allws you to delete an email address from the autofill list. You can remove an email address from the list by opening Mail app and clicking on the New Email button. In the new e-mail window, start typing the address you want to remove in the To: field. When it appears, tap on the i button next to the address. Then tap Remove From Recents at the bottom. How Do I Delete An Old Email Address That Keeps Popping Up? To delete an old email address from Mail, fist go to the ‘Window’ menu and select ‘Previous Recipients’. Then click on the old email address and press the ‘Remove from List’ button. You should do this anytime someone sends you a ‘my email address has changed’ email. How Do I Delete Cached Email Addresses In Outlook 2016? To clear the autocomplete list of all cached email addresses in Outlook 2016: Go to the File tab. Select Options. In the Outlook Options dialog box, select the Mail category. In the Send messages section, select Empty Auto-Complete List. In the confirmation dialog box, select Yes. Can You Permanently Delete An Email Address? Yes, email addresses can be permanently deleted. After going through the process, all of your emails and account settings will be erased. You will no longer be able to use your email address to send or receive emails, and the address will not be made available for anyone else to use in the future. How Do I Remove Old Address From Autofill? To remove an old address from autofill on Android, open the Autofill and Payments menu and tap eiter Address and more or Payment Methods. Edit both Address and more or Payment Methods to reflect your new name and information. Delete any incorrect or unused information. How Do I Delete An Autofill Email Address In Outlook 365? To delete an autofill email address in Outlook 365, type the email address into the To: field when composing an email. When the address appears, select the “X” next to it and it will be removed. How Do I Delete An Email Address From Outlook App? To delete an email address from Outlook app, open the app and go to settings. Select the account you want to remove and hit delete account. Tap delete again to confirm. Discover how to block spam emails on Spectrum and keep your inbox organized. How to Permanently Delete Emails from Outlook | Hotmail | msn https://youtu.be/bD4v9WduVic?si=VvTA3a1h1qJHCJPQ Louis MuganLouis Mugan is a seasoned technology writer with a talent for turning complicated ideas into clear, practical guidance. He focuses on helping everyday readers stay confident in a world where tech moves fast. His style is approachable, steady, and built on real understanding. He has spent years writing for platforms like EasyTechLife, where he covers gadgets, software, digital trends, and everyday tech solutions. His articles focus on clarity, real-world usefulness, and helping people understand how technology actually fits into their lives. Outside of his regular columns, Louis explores emerging tools, reviews products, and experiments with new tech so his readers don’t have to. His steady, friendly approach has made him a reliable voice for anyone trying to keep up with modern technology. get in touch at louismugan@gmail.com

How to Access and Manage Your Spectrum Email

How to Access and Manage Your Spectrum Email

Home / Spectrum Email is an email service offered by Spectrum, a company that provides Wi-Fi, cable TV, home phone, and mobile phone services. Although Spectrum email is no longer accepting new users, and you can no longer set up a new Spectrum Email address, existing users can still sign in and access Spectrum’s email services.  In this guide, I will be showing you how to access and use Spectrum email. Let’s get into it!  How to Access Your Spectrum Email To access your Spectrum email account, sign into webmail.spectrum.net using your email address and password.  Click on the Email tab at the top to see your emails. If you see an Inbox tab on the left, click on it to access your inbox.  Accessing Your Old Roadrunner Email You can access your Roadrunner email, if it’s still active, by signing in to Spectrum webmail using the link above.  Note that Spectrum locks emails after six months of inactivity. So, if you have an old Roadrunner email that you haven’t used in a while, it will probably be locked. That means that new incoming messages won’t reach your inbox, although older messages will still be accessible. Note that if you no longer have an active Spectrum Internet account, the email account will be deleted altogether.  How to Set Up Spectrum Email on Mobile Devices Using the Mail app on your iPhone, you can add your Spectrum email account so you can access your Spectrum emails on your phone. To set up Spectrum email on your iPhone, follow these steps: On an Android, go to your Accounts in your Settings and add an account. Choose email, and then choose to add another email address (not Gmail or Outlook). Add in the information here to connect it to the Spectrum webmail server. Note that this process can vary slightly depending on which Android version and manufacturer you have. You can also see all of the Spectrum IMAP details in the screenshot above.  Connecting Spectrum Email With Outlook You can also connect your Spectrum email with Outlook. To do that in Outlook 2021, follow these steps:  For other versions of Outlook, or if you are having trouble adding your Spectrum account and want to add it manually using IMAP, see here.  Troubleshooting Common Spectrum Email Issues The most common issue when setting up Spectrum email on your phone or with Outlook is incorrectly configuring the Spectrum server details in the IMAP settings. This will prevent your phone from connecting with Spectrum’s mail server. So, make sure that you are entering the correct server details, which you can find here.  If you are having trouble logging in, make sure that you are using the correct username and password.  Managing Your Spectrum Email Account After Leaving the Provider If you cancel your Spectrum service, you will not be able to keep your Spectrum email after canceling. Spectrums’s policy for former customers is that it keeps emails for 60 days, after which you will lose everything.  You should back up your contacts before the 60 days are over. To do that, follow these steps:  If you want to save an actual email, you will need to forward it to another email address, such as your Gmail address. You can forward an email by clicking on it and then clicking on Forward, after which you can specify which email address you want to forward it to.  Conclusion We hope this guide has helped you manage your Spectrum email effectively. The truth is that Spectrum no longer allows people to sign up for new email accounts. But, if you have an older email account, you can still log in. Remember, though, that if you are canceling your Spectrum service, the email account will be deleted after 60 days.  Louis MuganLouis Mugan is a seasoned technology writer with a talent for turning complicated ideas into clear, practical guidance. He focuses on helping everyday readers stay confident in a world where tech moves fast. His style is approachable, steady, and built on real understanding. He has spent years writing for platforms like EasyTechLife, where he covers gadgets, software, digital trends, and everyday tech solutions. His articles focus on clarity, real-world usefulness, and helping people understand how technology actually fits into their lives. Outside of his regular columns, Louis explores emerging tools, reviews products, and experiments with new tech so his readers don’t have to. His steady, friendly approach has made him a reliable voice for anyone trying to keep up with modern technology. get in touch at louismugan@gmail.com

My Xfinity Email: Access, Recovery, Setup, and Troubleshooting

My Xfinity Email: Access, Recovery, Setup, and Troubleshooting

Home / Facebook X-twitter Whatsapp Reddit Are you an Xfinity email user? In this guide, I will show you how to log in to your Xfinity email login and access your Comcast email sign in page using your My Xfinity email account. I will also explain the current Xfinity email Yahoo migration to Yahoo Mail for Xfinity users and what you need to know about it. Let’s get into it and learn how to use Xfinity webmail, manage your Comcast.net email, complete Xfinity email setup, and handle Xfinity email troubleshooting. Access Your Xfinity Email on the Web You can still access your email using the Xfinity email login page and Comcast email web access if you did not get an email saying that it’s time to transition and did not yet migrate to Yahoo Mail. Go to the Xfinity login page and use Xfinity webmail sign in with your Xfinity account sign in details. Note that if you received an email to migrate to Yahoo Mail, and you migrated to Xfinity email Yahoo Mail, you need to sign in using Yahoo Mail for Xfinity users. Enter the same email address as before to complete your Comcast email login online. Current Xfinity accounts are in the process of being migrated as part of the Xfinity email Yahoo migration. Once you receive an email about the migration, you have 30 days to migrate your email. If you don’t, you have the options to export your email and close your account. However, if you don’t migrate it, you will eventually be unable to access your inbox. This Comcast email transition process will continue through 2026 until all emails are migrated. Recover Your Xfinity ID or Reset Your Password If you can’t remember your Xfinity ID, you can recover Xfinity ID using your phone number or email as part of Xfinity account recovery. If you don’t remember your Xfinity ID, click on “Find My Xfinity ID” and proceed to enter your email address or phone number. Then, follow the on-screen steps if you forgot Xfinity ID and need Comcast account login help. On the other hand, if you forgot your password, go to xfinity.com/password to reset Xfinity password. Enter your ID to begin the Comcast email password reset process. Then, choose how you want to receive your password reset code. Once you get the code, enter it on the page and create a new password to fix Xfinity sign in problems. Recover Deleted Emails (Time-Limited) For a limited time, you can recover deleted Xfinity emails and restore Comcast email messages by restoring them from the Trash folder. Sign in to your account and open the Trash folder to start Xfinity trash folder recovery. Then, click on Recover Deleted Items. Select the items you want to restore to retrieve deleted emails Xfinity and complete your Comcast email recovery. Choose the folder you want them to be moved to so you can Xfinity email restore messages properly. Note that this is a time-limited option! After 30 days of being in the trash, emails will be deleted permanently. Use Xfinity Email After Disconnecting Service You can still use Xfinity email after canceling service and keep Comcast email after disconnect, as long as you signed in within 90 days before disconnecting the service. So, if you plan on disconnecting the service, make sure to sign in first if you want to keep comcast.net email address active. Also, you will need to sign in to your account at least once every nine months afterward if you want to maintain access. This is part of the Xfinity email retention policy and Comcast email after cancellation rules, otherwise your Xfinity email account inactive status may lead to loss of access. Set Up a Third-Party Email App (IMAP) You can also set up access to your Xfinity email using a third-party email client via IMAP. You will need to enter the following information in the corresponding fields: Note that if you are using a popular client like Outlook or the Gmail app, you can find instructions for setup here. Also, once you migrate to Yahoo Mail, you will need to update the settings in the email client to reflect Yahoo Mail’s settings. See more information here.  Access on Mobile Without the Old App Once you migrate, you can use the Yahoo Mail app for Xfinity to check your Xfinity email on iPhone or Xfinity email on Android. While the old app was retired, you can still use a Comcast email mobile app alternative like Outlook or Gmail to check Xfinity email on phone. After migration, the Yahoo Mail app becomes the main way to access your account and manage Xfinity email without app limitations. Fix Common Sign-In and Loading Issues If your Xfinity email not working or you face Comcast email login issues, make sure you entered your ID or email address correctly. Also confirm your password if you see Xfinity sign in error or Xfinity email not loading problems. If issues continue, try clearing cookies, switching browsers, or using another device to fix Xfinity email problems. If Comcast webmail not opening, these steps often solve Xfinity account login troubleshooting cases. Conclusion I hope this guide was helpful for understanding Xfinity email Yahoo migration, the Comcast email transition, and how to move Xfinity email to Yahoo Mail. This Xfinity email access guide should help you with Comcast email help and Xfinity email support so you don’t lose access to your inbox during the transition. Frequently Asked Questions (FAQ) Can I still use my Xfinity email without Xfinity internet service? Yes, you can still use your Xfinity (Comcast) email even after canceling your internet service, as long as you signed in within 90 days before disconnecting. After that, you must log in at least once every nine months to keep the account active. If you don’t, the account may become inactive and you could lose access. Do I have to migrate my Xfinity email to Yahoo Mail? If you receive a migration notice from Xfinity, you will need to migrate

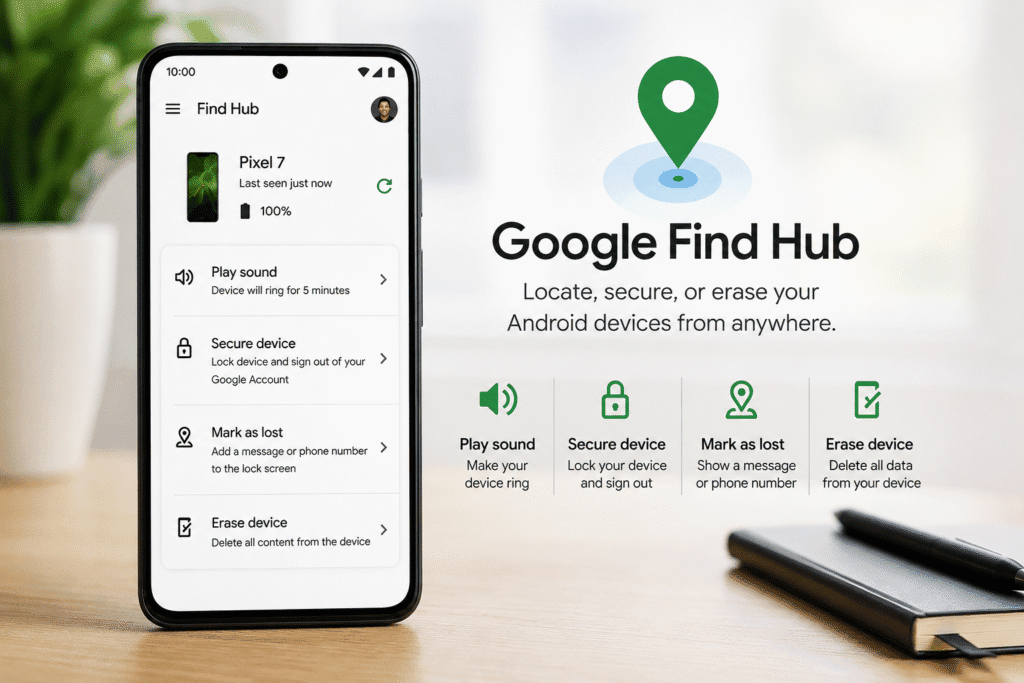
Illustration of Google Find Hub features for locating a lost Android phone

Lost Your Android Phone? Use Find Hub to Find, Lock, or Erase It

Losing your Android phone can be stressful, but Google’s Find Hub gives you several ways to locate it, secure it, or erase it if recovery looks unlikely. If you remember the older name Find My Device, Find Hub is the newer version of Google’s device-finding service. It can help you: Here’s what to do if your Android phone goes missing. 1. Open Google Find Hub Use another phone, tablet, or computer and open Google Find Hub. Sign in with the same Google Account that is used on your missing Android phone. If you are using someone else’s Android phone, you can use the guest sign-in option instead of permanently adding your Google Account to their device. After signing in, select your missing phone. Find Hub will try to show the phone’s location on a map. If it cannot find the phone’s current location, it may show the most recently available location instead. 2. If the Phone Is Nearby, Make It Ring If the map suggests your phone is somewhere nearby, use Play sound first. Find Hub can make the phone ring at full volume for up to five minutes, even when the phone is set to silent or vibrate. This is useful if your phone is: Using Play sound is usually faster than repeatedly calling your own number. 3. Check the Location Carefully Look at the location shown on the map, but remember that the pin may not show the phone’s exact physical position. Android can estimate location using information such as: Location accuracy may be lower indoors, underground, or in places with weak signals. Also check when the location was last updated. A location from a few hours ago should not be treated as a live location. If the phone appears to be at a restaurant, office, store, or other place you recently visited, calling that location may be the fastest option. 4. Use Find Nearby When Available Some supported devices and accessories may provide a Find nearby option when you are close to them. This can help you narrow down the location when a normal map pin is not precise enough. It can be especially useful inside: Availability depends on the device and hardware support. 5. Mark the Phone as Lost If you cannot recover your phone immediately, use Mark as lost. This locks the device using its existing screen-lock protection. You can also display a short message and a contact number on the lock screen. For example: This phone is lost. Please call me at [alternate phone number]. Use a number that you can currently answer. Do not put your: on the lock screen. 6. Can Find Hub Locate an Offline Phone? Sometimes. Find Hub can use encrypted recent location information and Google’s crowdsourced Find Hub network to help locate supported devices that are not currently connected to Wi-Fi or mobile data. Nearby participating Android devices may help provide location information. However, offline finding depends on several things, including: So an offline phone may still be locatable, but there is no guarantee. 7. What If the Phone Is Turned Off? If the phone has no power, it cannot continually send new location information. Find Hub may still show a recent location depending on the phone and its settings. Always check the time shown with the location. A location recorded several hours earlier may still help you retrace your steps. 8. Do Not Erase the Phone Too Quickly Find Hub also gives you the option to remotely erase the device. This should normally be your last resort. Erasing the phone permanently removes data stored on the device. More importantly, after the phone has been erased, its location will no longer be available through Find Hub. Consider erasing the phone when: If there is still a realistic chance of recovering the phone, try securing and locating it first. 9. What to Do If You Think the Phone Was Stolen Do not use the map location as a reason to confront someone. If your phone appears at an unfamiliar private location or seems to be moving unexpectedly, focus on protecting yourself and your accounts. You may want to: Remember that location estimates are not always exact. 10. Find Your Phone’s IMEI Your mobile carrier may ask for the phone’s IMEI number if the device is stolen. Find Hub may show device information that can help you locate the IMEI. It is also a good idea to save your IMEI somewhere safe before you ever lose the phone. 11. Android Remote Lock Supported Android devices may also offer Remote Lock. This feature can help you quickly lock a missing phone using your verified phone number. Remote Lock needs to be configured before you need it and may require: If the phone is offline when you send the request, the lock may take effect when the phone reconnects. 12. Turn On Android Theft Protection Newer Android versions may include additional theft-protection features. Availability depends on your phone model and Android version. Theft Detection Lock Theft Detection Lock can use device signals to detect movement that may indicate someone has grabbed the phone and run away. When Android detects possible theft, it can automatically lock the screen. Offline Device Lock A thief may try to disconnect the phone from the internet. Offline Device Lock can automatically lock the screen after the phone has been used offline for a period of time. Failed Authentication Lock Supported devices can automatically lock after repeated failed authentication attempts. Search your phone’s Settings for Theft protection to see which features are available on your device. 13. Set Up Find Hub Before You Lose Your Phone The best time to check Find Hub is while your phone is still with you. Check Your Google Account Make sure the correct Google Account is signed in on the phone. If you have several Google Accounts, remember which one is connected to the device. Make Sure Find Hub Is Enabled Open Android Settings and search for: Find Hub Make sure the

Encrypt Your iPhone – A Clear and Accurate Guide For Everyday Users

Encrypting your iPhone sounds very technical, but in practice it mostly comes down to a few core settings that you can check in a minute or two. Modern iPhones use built in Data Protection that automatically encrypts your data when you turn on a passcode. The problem is that many people never check whether that protection is actually working, or whether their iCloud backups are still readable by others. This guide explains in plain language what “encrypting your iPhone” really means, how to confirm that Data Protection is enabled, how to turn on missing protections, and how to strengthen your overall security without becoming a security expert. The explanations and steps in this guide are based on Apple support documentation and widely used best practices for iOS security. Apple Support Key Takeaways Understanding iPhone Encryption What encryption actually is In everyday terms, encryption turns the readable information on your phone into locked code. Only someone who has the correct key can turn that locked code back into something readable. On an iPhone, that “key” is tied to hardware inside the device and your passcode. When the phone is locked, your data is stored in encrypted form on the internal flash storage. When you unlock the phone with your passcode, Face ID, or Touch ID, the system briefly unlocks the right keys so that your apps can read your data. According to Apple platform security documentation, this system is called Data Protection. Apple Support What Data Protection does on an iPhone Apple uses Data Protection on devices with Apple system on a chip, which includes current iPhone models. When a passcode is enabled, Data Protection encrypts user data stored on the device with keys that are tied to your passcode and the hardware. Apple Support Based on Apple documentation and reputable technical guides, the following types of information are protected on a locked iPhone when Data Protection is enabled: Different types of data use different protection classes internally, but from a user point of view the important idea is simple. Once you see “Data protection is enabled,” most personal data on the phone is strongly protected while the device stays locked. Local iPhone encryption versus iCloud Device encryption and cloud security are not the same thing. With Apple’s standard iCloud protection, the company holds some encryption keys in its data centers. That design lets Apple help you recover your account or respond to lawful data requests from authorities. Apple Support Advanced Data Protection, a feature available in many regions for iOS sixteen point two and later, turns on end to end encryption for many more iCloud categories, including device backups and Photos. When Advanced Data Protection is on, Apple does not hold the keys for that extra data, so only you and your trusted recovery methods can decrypt it. In some countries, such as the United Kingdom, Apple has limited Advanced Data Protection in response to local law, so the option may not appear for every user. Why this matters in real life Encryption is important because: Encryption does not solve every problem. If someone tricks you into revealing your passcode, or if they can unlock your iPhone while you are looking away, they can still see a lot of data. But strong encryption with a good passcode makes it significantly harder for attackers to recover data from a locked device or from cloud backups that use end to end encryption. Apple Support Step by Step Guide To Encrypting Your iPhone In many cases your iPhone is already encrypted as soon as you set a passcode. This section walks through how to confirm that and how to add missing protections. All steps are based on current iOS menus and Apple documentation, but the exact wording can vary slightly between versions. Green River College 1. Check whether your iPhone is already encrypted If the screen shows an option labeled “Turn Passcode Off,” that means a passcode is active. On iPhones with a passcode, Apple and several university security guides confirm that Data Protection is in place. University of Alberta Support Now scroll all the way to the bottom of the Face ID and Passcode screen. Look for a line that says: Data protection is enabled When you see this phrase, it means your iPhone storage is encrypted and the keys that protect your personal data are tied to your passcode. Apple Support Community If you do not see this message, or if the device is asking you to “Turn Passcode On,” move to the next step. 2. Turn on or strengthen your passcode If you do not have a passcode yet: Apple recommends at least a six digit numeric code. Security professionals generally suggest either a longer numeric code or a custom alphanumeric code that includes letters and numbers, since those are harder to guess. Green River College If you already have a simple passcode, you can make it stronger: Your passcode is the foundation of encryption on your iPhone. If it is weak, such as a year of birth or “123456,” the protection can be easier to break with enough time and resources. 3. Set up Face ID or Touch ID for easier secure unlocking Face ID and Touch ID are convenience features that sit on top of your passcode. They do not replace encryption. Instead, they let the device securely unlock the keys without you having to type the passcode every time. Apple Support To set up or review these features: If Face ID fails a few times, iOS will ask for your passcode again. This design helps prevent attackers from endlessly trying biometric unlocks. 4. Understand what is actually encrypted on the device When “Data protection is enabled” is visible and your phone is locked, information stored in Apple apps and many third party apps is stored in encrypted form on the internal storage. Based on Apple security documentation and backup behavior, here are examples of data that is covered on a locked device. Apple Support Some third

Apps That Make Your iPhone Feel Smarter Every Day

If you mostly use your iPhone for messages, social media, and photos, you are only using a fraction of what it can do. The right iOS apps can quietly turn your phone into a habit coach, a travel assistant, a secure password vault, a portable writing studio, and even a gentle health reminder. In this guide, we will walk through the types of apps that genuinely improve the iPhone experience, not just fill storage. You will see how habit trackers, note taking apps, travel planners, password managers, health tools, and creativity apps fit into real life. We will also talk about how to connect them with Siri, widgets, and Apple Watch so they feel like part of your phone rather than extra clutter. You do not need to be “techie” for any of this. If you can install an app and follow a short checklist, you can turn your iPhone into a calmer, more useful everyday tool. Key Takeaways Insight into Apps That Make Your iPhone Even Better What it really means for an app to “make your iPhone better” An app does not make your iPhone better just because it is popular. It improves your iPhone experience when it: In simple terms, apps that make your iPhone better are the ones that turn vague intentions such as “I should drink more water” or “I should keep better notes” into easy daily actions. Why these apps matter in everyday life Most people juggle work, family, health, and social life using the same phone. Thoughtful iOS apps can: Core categories you will see in this guide We will focus on categories that consistently show up in “best iPhone apps” and “iPhone productivity apps” lists, including the Lifewire guide that inspired this article. For each category, you can choose between Apple’s built in tools such as Notes, Reminders, Health, Journal, and Apple Passwords, or third party apps when you want more features or a nicer interface. Wikipedia Method: Step by Step Guide to Choosing and Setting Up Better iPhone Apps 1. Identify your real life needs Before searching the App Store, write a short list of the problems you actually want to solve. Examples: Be honest. If you already struggle with too many notifications, you probably do not want five new apps at once. 2. Match needs to app categories Now connect each need to a type of app rather than a brand name: When you treat these as interchangeable categories, it is easier to swap apps later without rebuilding your whole system. 3. Research and shortlist apps Open the App Store and: Pick two or three candidates per category at most so you do not overwhelm yourself. 4. Check pricing and subscription details Before you tap “Get” or start a trial, carefully review: If you are not sure about the exact price in your country, treat the amounts you see online as examples and always confirm the current local price inside the App Store before subscribing, since developers can change prices over time. 5. Install and handle permissions safely After choosing an app: If you change your mind later, go to Settings, scroll to the app, and adjust permissions such as Camera, Photos, Health, or Location. 6. Connect apps to iOS features This is where apps start to feel deeply integrated. 7. Create a simple starter workflow Choose one or two categories and set up very basic routines first. The goal is not perfection. It is proof that each app can reliably handle one small job before you trust it with more. 8. Review, refine, and avoid overload Once you have used your chosen apps for a week or two: If you prefer to avoid subscriptions entirely, lean on Apple built in tools such as Notes, Reminders, Health, Journal, and the built in password manager in Settings, and then only add third party apps when you really need their extra features. Wikipedia Key Benefits of Using Apps That Make Your iPhone Even Better Better habits and routines Habit trackers like Streaks transform vague goals such as “be healthier” into specific daily actions that you can check off. Integration with the Health app means you do not need to log every walk manually, since step counts and workouts can sync automatically. Journaling tools such as Day One and the Apple Journal app help you reflect on your day with photos, text, or audio, which can support mental clarity and long term memory. More focused mind and lower stress Meditation apps such as Headspace offer short sessions that fit into a coffee break, commute, or bedtime routine, with science backed programs for stress and sleep. Podcast and white noise sessions in Overcast can also help some people focus, especially when combined with features like smart speed and voice boost to make spoken audio easier to follow. Secure and convenient digital life Password managers such as Dashlane create strong, unique passwords, store them securely, and autofill logins in Safari and many apps. That reduces password reuse and the habit of writing credentials down in unsafe places. Because Dashlane works on multiple platforms, it can keep your iPhone, laptop, and tablet in sync so you are not stuck when you need to log in on a different device. Smoother travel and logistics TripIt reads your travel confirmation emails and builds a single trip view with flights, hotels, and car rentals. The Pro tier adds alerts for gate changes and delays. Pair this with your calendar and a packing list in Notes or Bear and you can move through airports with far less stress. Health and wellbeing support Medication reminder apps such as MyTherapy send scheduled alerts, track doses, and let you log symptoms and measurements over time. This can be useful when discussing treatment with a doctor. Water tracking apps such as WaterMinder make hydration more visible, using visual characters, goals, and widgets. If you struggle to remember water during busy days, a gentle nudge on your wrist can make a real difference in

The 5 Best Barcode Scanner Apps for Smarter Shopping and Everyday Use

Barcode and QR code scanner apps turn your Android phone or iPhone into a pocket tool that can look up prices, show product details, save books to a reading list, build grocery lists, or catalog a vinyl collection. Instead of typing long product names, you just point your camera at a simple pattern of lines or squares and let the app do the hard work. In this guide, you will see how barcode scanner apps work, how they differ from your phone’s built in camera, and detailed reviews of five of the best options for Android and iPhone. You will also learn how to choose the right app for your needs and how to use it safely and confidently. Key takeaways Insight into barcode scanner apps for Android and iPhone What are barcode and QR code scanner apps A barcode is a pattern of vertical black lines with numbers underneath. It usually appears on product packaging and stores a product identifier. A QR code is a square pattern made of many small dark and light squares that can hold website links, Wi Fi details, contact information, tickets, and more. Barcode and QR code scanner apps use your phone’s camera and image recognition to read these patterns. The app decodes the numbers or symbols inside the code and then looks them up in an online database or in its own records. For example, when you scan a grocery item, the app can match the barcode to a known product and show its name, brand, and sometimes pricing or nutrition information. Why these apps matter in everyday life Here are some everyday situations where a barcode scanner app is genuinely useful: In all of these cases, barcode scanner apps save time, avoid typing mistakes, improve price awareness, and help you keep your life more organized. How dedicated apps differ from built in camera scanning Modern Android phones and iPhones can often scan QR codes directly in the camera app. When you point the camera at a QR code, the phone recognizes it and shows a small link or action for you to tap. However, that built in scanner usually does only one thing. It opens the link, shows the Wi Fi details, or adds a contact. It does not keep a history, does not create grocery lists, and does not track prices or collections. Dedicated barcode scanner apps add extra features such as: If you only scan the occasional QR code on a poster, the camera app might be enough. If you want to build lists, track prices, or manage a collection, a dedicated barcode scanner app is worth it. Step by step guide to choosing and using the right barcode scanner app Step one: Identify your main goal Before you install anything, decide what you want the app to do for you. Knowing your main goal will help you pick the right app from the five detailed reviews later in this guide. Step two: Check platform and cost Next, make sure the barcode scanner app works on your devices and that its pricing is clear. Always check the app’s page in the store to see whether it contains ads, offers in app purchases, or requires a paid subscription for core features. Step three: Review privacy, permissions, and reputation Because barcode scanner apps can see what you scan and often have internet access, privacy matters. Step four: Install and run your first scan For most barcode scanner apps, the first scan looks like this: If the app struggles to scan, wipe your camera lens, move closer or further away, or try in better light. Step five: Use additional features Once you are comfortable with basic scans, explore the extra tools that make barcode apps so powerful: Step six: Consider alternatives and built in options Remember that many phones already include basic QR code scanners in the camera or quick settings. Use these built in options for simple QR code tasks. Use dedicated barcode scanner apps when you need extra features such as lists, collections, and price comparison. The 5 best barcode scanner apps for Android and iPhone – detailed reviews 1. QR Code and Barcode Scanner by TeaCapps (QRbot) Supported platformsAndroid and iOS. Google Play Best suited forEveryday users who want a reliable, free barcode scanner app for both QR codes and product barcodes, with history, export, and simple inventory features. Key features Pricing and monetization The core QR and barcode scanner is free to download. Some advanced features and the removal of ads may require a pro upgrade or subscription, according to the developer’s terms. Pros Cons or limitations Who should choose this app Choose this app if you want a general purpose barcode scanner app that can handle almost any code type, work on both platforms, and support history and export without locking you into a heavy shopping or collection ecosystem. 2. ShopSavvy – shopping and price comparison Supported platformsAndroid and iOS. ca.chartoo.com Best suited forBargain hunters and everyday shoppers who want to compare prices across many retailers and track deals with a barcode scanner app. Key features Pricing and monetization ShopSavvy is free to download and earns money through ads and affiliate links. On Android, the Google Play listing notes that it contains ads and may offer in app purchases. Google Play Pros Cons or limitations Who should choose this app Choose ShopSavvy if your main goal is price comparison. For example, when you are standing in an electronics store looking at a pair of headphones, scanning the barcode can show whether an online retailer offers a lower price and whether a better sale is expected soon. 3. Goodreads – best barcode scanner app for book lovers Supported platformsAndroid and iOS. Goodreads Best suited forReaders who want to scan books to add them to shelves, track their reading history, and see community reviews. Key features Pricing and monetization Goodreads is free to use and supported by Amazon. There is no extra fee for using the barcode scanner or

Great Spreadsheet Apps for Android in 2026: How to Pick the Right One and Work Faster on Your Phone

Spreadsheets on Android are not just for editing an Excel file in a rush anymore. In 2026, the best spreadsheet app for Android can handle budgets, school trackers, invoices, inventory lists, shared team sheets, and quick analysis without forcing you to wait until you are back at a laptop. This guide compares the strongest options, explains the real trade-offs, and helps you choose a spreadsheet app that fits your device, your workflow, and your comfort level. Key Takeaways • If you collaborate often, start with the Google Sheets app because it is built for live sharing, offline work, and automatic saving.• If you need advanced Excel compatibility and you already use Microsoft tools, Microsoft Excel for Android is usually the most familiar choice, but you will need a Microsoft account to edit in many cases• If you want a free spreadsheet app that can work offline without forcing signup first, Zoho Sheet for Android explicitly supports that workflow. • If you want an all in one office suite that includes a WPS Office spreadsheet experience plus paid upgrades, WPS Office has a free plan and paid plans listed on its official pricing page. WPS• If privacy matters and you prefer open source tools, Collabora Office supports offline use and documents a minimum Android version in its own release notes. Collabora Online and Collabora Office Insight into Great Spreadsheet Apps for Android in 2026 A spreadsheet app is a grid of cells that lets you store data, calculate with formulas, sort and filter, and visualize information with charts. On Android, the core challenge is not whether an app can do spreadsheets. The challenge is whether it feels usable on a small screen and whether it fits how you actually work. Mobile spreadsheet apps differ from desktop tools in a few practical ways: • Touch input changes everything. The best apps add smart selection handles, formula suggestions, and quick formatting so you are not digging through menus.• Phone screens reward simple layouts. If an app hides basic actions behind layers, it will feel slow even if it has powerful features. Some bloggers noted menu navigation issues in some popular choices, which is a real mobile pain point. • Cloud sync and collaboration are now central. Many people start a sheet on a phone, continue on a tablet, then finish on a computer. Apps that sync cleanly reduce mistakes and version confusion.• Offline mode is not optional for many users. Commuting, travel, and weak connectivity still happen, so offline spreadsheets matter, especially for budgets and checklists. Google Sheets and Zoho Sheet both highlight offline use in their Play Store descriptions. Google Play Best Spreadsheet Apps for Android in 2026 Below are strong options you can confidently consider in 2026. For each spreadsheet app for Android, you will see what it is best for, what works well, where it falls short, and who should pick it. Google Sheets app Best for: Real time collaboration, sharing with classmates or teams, and quick edits that stay synced. Specification mini blockType: Spreadsheet onlyPricing: Free for personal use, with additional features for Google Workspace subscribersRequires account: Yes, you need to sign in with a Google account or Google Workspace account to access Sheets online Google DocsOffline mode: Yes, the Play Store listing states you can work offlineMinimum Android version: Not clearly visible in the accessible Play Store text snippet, so check the Requires Android field in Google Play on your device Google Sheets is the default choice for many people because it nails the basics of mobile collaboration. The Play Store listing highlights offline work, automatic saving, and the ability to open, edit, and save Excel files. That combination is exactly what most students, families, and small teams need. What works well• Offline spreadsheets supported, according to the Play Store listing• Autosave reduces the risk of losing quick edits• Collaboration features are central, not an afterthought• Excel files can be opened and saved in the app, per the listing Where it falls short• Mobile menu navigation can feel slower than desktop for complex formatting tasks, which aligns with common reviewer feedback• The best experience assumes you are comfortable with a Google account and Drive based workflow Who should pick this over othersPick Google Sheets if you share sheets often, if you want a reliable free spreadsheet app that stays synced, or if you need simple collaboration more than deep Excel power features. Microsoft Excel for Android Best for: People who live in Excel, need strong workbook compatibility, and want familiar Excel features on mobile. Specification mini blockType: Spreadsheet onlyPricing: Free download, with Microsoft 365 subscription mentioned for full experienceRequires account: Yes, the Play Store listing states you must sign in with a free Microsoft account to create or edit documents on many devicesOffline mode: Possible for local workbooks, but sharing and coauthoring typically relies on OneDriveMinimum Android version: Not confirmed from Microsoft official pages in the sources pulled here, so check Google Play on your device Excel on Android is often the best answer when your spreadsheet life is already built around Excel features and file formats. Microsoft’s Play Store text explicitly calls out sign in requirements for editing on smaller screens, and Microsoft support documentation also notes you must be signed in to share and collaborate, with files stored on OneDrive. What works well• Strong Excel workbook compatibility is the core value proposition• Clear account based collaboration requirements, which helps avoid confusion when sharing Microsoft Support• Familiar spreadsheet tools for budgets, charts, and tracking work Where it falls short• Account sign in is not optional for many editing scenarios • Collaboration features depend on storing files on OneDrive or OneDrive for Business • Lifewire noted that Excel can be the largest app among the ones they reviewed, which can matter on budget phones with limited storage Who should pick this over othersPick Microsoft Excel for Android if you receive Excel workbooks from work, if you rely on Excel conventions, or if you want the closest thing

Android TV Apps That Make Your Living Room Smarter

Android TV turns an ordinary television into something closer to a simple living room computer. It runs a version of Android that is built for big screens and remote controls and uses the Google Play Store so you can add streaming services, games, tools, and more. Android With the right Android TV apps you can do much more than watch one or two streaming services. You can browse the web on your TV, stream your own movie library, keep kids entertained with safe shows, check the weather, and fill the room with music. In this guide we will walk through nine carefully selected Android TV apps. You will see what each one does, why it is useful, and a few alternatives in case a specific app is not available on your device or in your region. Key takeaways Understanding Android TV and its apps Android TV is a smart TV platform created by Google. It runs on televisions and streaming boxes from brands such as Sony, TCL, Hisense, Nvidia Shield, and many others. Instead of using separate menus for each manufacturer, you get a consistent home screen with access to the Google Play Store for Android TV. Android Android TV apps are versions of Android applications that are designed for use with a remote from several meters away. Buttons are larger, navigation usually follows simple left right up down directions, and video or audio playback is prioritized. Compared with platforms like Roku or Apple TV, Android TV stands out because Apps matter because they decide what your TV can do Because many apps share accounts with mobile and web versions, cross device syncing is also important. Your YouTube subscriptions, Spotify playlists, Plex libraries, and iHeartRadio stations usually follow you from phone to TV as soon as you sign in. Plex How we chose our favorite Android TV apps There are thousands of Android TV apps. To keep this guide practical, the nine apps below were chosen using these criteria To check whether an app is compatible with your own device, open Google Play on your Android TV, search for the app name, and look for any compatibility warning. If the app does not appear, you can also check the Google Play listing from a browser while signed into the same Google account and see if your device appears in the install list. There are many other excellent Android TV apps. Think of this list as a carefully curated starting point that covers most everyday needs. Detailed guide to favorite Android TV apps 1. Google Chrome browser on your TV PlatformAndroid TV via sideloading Chrome from outside the Android TV section of Google Play or pushing the installation from a browser. Chrome also runs on Android phones, tablets, and computers, which helps with syncing bookmarks and history. AirDroid Best forPeople who occasionally need a full web browser on TV to open sites without dedicated Android TV apps. Key features on TV Pros Cons and limitations How to get and use it on Android TV Because of the sideload requirement, Chrome is better for confident users If Chrome is not available For most people, a dedicated TV browser such as Puffin TV Browser is simpler. Puffin is built specifically for Android TV, has a remote friendly interface, and is available through Google Play on many devices. puffin.com 2. Twitch live streaming and game content PlatformTwitch offers an Android TV app and can also be accessed through browsers and casting. Best forViewers who enjoy watching live games, chat driven shows, or creative livestreams on a large screen. Key features on TV Pros Cons and limitations How to get and use it on Android TV Alternatives If the Twitch app is not available, you can use the Puffin TV browser or another Android TV browser to open twitch dot tv directly, or look for third party Twitch clients that are clearly documented and well reviewed. 3. VLC media player for Android TV PlatformVLC for Android is available on Google Play and supports phones, tablets, and Android TV devices. Best forPeople who plug USB drives or external hard drives into their TV and need a player that can handle almost any video or audio format. Key features on TV Pros Cons and limitations How to get and use it on Android TV Alternatives Kodi is another powerful free media center that can organize and play local and network digital media with a ten foot user interface designed for TVs. 4. Plex media server client PlatformPlex Media Server runs on computers, network attached storage, and some powerful Android TV devices such as Nvidia Shield. The Plex app itself is available on Android TV through Google Play. NVIDIA Best forViewers who have a large personal collection of movies, shows, music, or photos and want to stream it around the home with a slick interface. Key features on TV Pros Cons and limitations How to get and use it on Android TV Alternatives If you prefer open source solutions, Jellyfin and Emby offer similar media server functionality on Android TV devices. Their exact features and pricing differ, so review their official documentation before choosing. 5. YouTube the mainstream video platform PlatformYouTube for Android TV is available in the Android TV section of Google Play and comes preinstalled on many smart TVs. Google Play Best forAlmost everyone. YouTube is one of the easiest ways to watch news, educational videos, music videos, sports highlights, and more on TV. Key features on TV Pros Cons and limitations How to get and use it on Android TV Alternatives If you want live television with cloud DVR, YouTube TV is a separate subscription service that runs on many of the same Android TV devices. 6. PBS KIDS Video safe and educational kids shows PlatformPBS Kids Video offers mobile apps and an Android TV version that provides a curated experience for children. Best forFamilies with young children who want a trusted source of free and educational content. Key features on TV Pros Cons

Next Generation Photography Apps That Transform Your Phone in 2026

Smartphone cameras have grown from simple snapshot tools into serious imaging systems. Multi lens phones, larger sensors, and clever software mean that many people now rely on mobile photography instead of a dedicated camera. In 2026, the real revolution is not only inside the camera hardware but inside the photography apps you install. These apps let you shoot in RAW, fine tune exposure, add cinematic filters, design Stories, and even create huge high resolution prints without touching a computer. They also bring desktop level editing and AI powered tools to your pocket. Google Play By the end of this guide, you will understand the main categories of photography apps, what has changed in 2026, and how to choose a small set of tools that actually solve your real problems, from low light blur to social media layouts. Key Takeaways Insight into The Cutting Edge Photography Apps What we mean by cutting edge photography apps In this article, “cutting edge photography apps” means mobile apps for iOS or Android that go clearly beyond the default camera and gallery. They add things like: Apps like Halide, Hydra, Snapseed, Unfold, and 1967 are good examples of these ideas in action. Why they matter to everyday users Until a few years ago, manual camera controls and RAW files felt like features for professionals. Now they are packaged in friendly interfaces. Halide Mark II, for example, offers pro style tools such as histograms, focus peaking, and long exposures while still presenting a clean layout. It supports RAW, JPEG, and HEIC capture and can even trigger shots through Apple Shortcuts so that you fire the camera by voice. App Store On the editing side, Snapseed stays completely free and ad free while providing roughly twenty five to thirty tools and filters. It opens both JPG and RAW files and offers brushes, healing, HDR, perspective correction, and special Portrait and Head Pose modes, which can adjust faces and eyes with fine control. Google Play For people who mainly care about social content, apps like Unfold and 1967 offer elegant templates and retro filters that are hard to recreate by hand. Unfold provides hundreds of templates for Stories, posts, and Reels, with optional paid collections through Unfold Plus and Unfold Pro. The Official Squarespace Newsroom Hydra focuses on high resolution and difficult lighting. Earlier versions stacked up to sixty frames to create up to thirty two megapixel images. Hydra 2 pushes things further with extreme HDR, denoising, and resolutions up to around one hundred ten megapixels on supported devices, using AI based processing. In short, the same phone that you use for messaging can now rival an entry level dedicated camera in many situations, as long as you pair it with the right app. Real trends shaping photography apps in 2026 Several clear trends are driving these changes. For you as an everyday user, this means less friction between “take a quick snapshot” and “create something worth printing or sharing in a Story.” Step by step guide to choosing and using the right photography apps Instead of downloading every popular photography app you see in a list, follow a practical method. Step 1: Decide what you actually want to fix or improve Ask yourself a few simple questions. List two or three goals. They will guide every other decision. Step 2: Match your goals to app categories Here is how common goals map to different categories and example apps. You do not need one app from every category. Start with one capture app and one editing app, then add a specialist tool if you notice a clear gap. Step 3: Check platform support and pricing Before you fall in love with an app, make sure it fits your device and budget. If pricing details are unclear or seem to change often, treat them as approximate, since developers can adjust subscription tiers and in app purchases without much notice. Step 4: Compare results with real test photos Choose one or two typical scenes and shoot them with both your default camera and the new app. Good test subjects include a city skyline at night, a portrait near a window, and a backlit scene with both shadows and highlights. For each app, look closely at: This hands on comparison tells you more than any screenshot or app store description. Step 5: Learn the two or three features that matter most Every app has a learning curve, but you do not need to master everything at once. Focus on: Step 6: Build a simple workflow from capture to sharing or printing A practical mobile photography workflow in 2026 might look like this: Keep this workflow as short as possible. Extra steps should only exist if they clearly improve the final image. Key advantages of understanding these apps in 2026 When you know what these photography apps can do, you unlock several practical benefits. Better control over exposure, focus, and color Pro style camera apps give you tools like manual focus, focus peaking, and detailed exposure controls. Halide, for instance, provides focus peaking and a focus loupe so that you can see exactly which parts of the scene are sharp, along with histograms and exposure guides. More creative looks with filters and vintage styles Apps in the 1967 family and similar filter tools let you apply film like color treatments, grain, and light leaks that would be time consuming to create manually. Many of these filters were designed by studying real film stocks, which helps them feel more authentic. Stronger storytelling through layouts and Stories Story and layout apps such as Unfold make it much easier to combine multiple photos, videos, and text into a single Story or Reel with consistent fonts, borders, and colors. This is useful for travel diaries, product launches, or simple weekend recaps. Higher resolution and better low light performance High resolution tools like Hydra stack multiple captures into a single detailed image, which can be valuable when you plan to crop heavily or print large. Their

Turn Old Devices Into Smart Guards With These Updated Four Camera Apps

Want better home security without drilling holes, running cables, or buying an expensive full system? You are not alone. Many people would rather reuse a spare phone or tablet than invest in a full kit that ties them to one brand. Home security camera apps let you turn old smartphones, tablets, computers, and even an Xbox One with Kinect into powerful security cameras. With the right app, you get motion detection, alerts, recording, and remote viewing with very little hardware cost. In this guide, you will learn how these apps work, how to build a simple setup, and how four must have camera apps for 2025 compare. You will also see privacy tips, real life examples, and answers to common questions, so you can upgrade your home security with confidence. Key Takeaways Insight into Home Security Updated Camera Apps Home security camera apps are mobile and desktop applications that turn existing devices into internet connected cameras and viewers. Instead of buying a dedicated camera, you log in to an app on a spare phone or tablet and set that device in a fixed position. Then you install the same app on another phone, tablet, or computer to watch the video feed and manage settings. Most home security camera apps share a similar basic structure: These apps are attractive in 2025 for three main reasons. First, they are low cost compared with buying a full multi camera system. Second, they let you reuse older phones and tablets that no longer feel fast enough for daily use but still have working cameras. Third, they offer flexibility for renters and frequent movers who want cameras they can pack in a bag. Consumer tech guides now routinely list camera apps like Alfred among top options for turning old devices into makeshift security cameras. backstreet-surveillance.com Here are the four main apps this guide will cover and what makes each one stand out, based on current app store descriptions and developer information. Together, these four options cover common scenarios, from simple front door monitoring with a phone to a private local baby monitor using your game console. Step by Step Guide to Building a Simple App Based Home Security Setup You do not need a background in networking to build an app based home security system. Start small and follow these steps. 1. Decide what you want to monitor Think about why you want a security camera app in the first place. Typical examples include: Write down one or two main camera locations so you do not try to monitor everything on day one. 2. Choose your spare devices Next, look at the devices you already have. Good candidates are: Make sure each device can stay plugged in and has a fairly stable Wi Fi signal where you want to place it. This matters for both video quality and reliability. Consumer Reports recommends checking Wi Fi signal strength where you mount any security camera and adjusting your router position if needed. Consumer Reports 3. Pick the right home security camera app Now match your devices to the apps. When you compare, look at: App store listings and official developer pages are your most reliable sources for current plan details and technical limits. 4. Install and set up the app on your camera device Once you choose an app, follow these typical steps on the device that will act as the camera. Position the device where you want it to monitor, connect it to power, and angle the camera so it covers your target area without pointing into private spaces like bathrooms or bedrooms. 5. Install and configure the viewer app On your main phone, tablet, or computer, install the same app or the matching viewer. For Viewer for Baby Monitor for Kinect, you use the Kinect app on the Xbox One as the broadcaster and the viewer app on Windows or iOS as the receiver. 6. Turn on motion detection and alerts Most home security camera apps let you enable motion detection or human sensing and adjust sensitivity. Turn notifications on, start with a medium sensitivity level, and then adjust after your first test runs so that normal shadows and light changes do not constantly trigger alarms. 7. Set recording quality and storage In each app, check settings for: Alfred, AtHome, and Manything all offer cloud recording on various subscription tiers, while Viewer for Baby Monitor for Kinect focuses on local streaming with no cloud component. 8. Apply privacy and safety best practices Strong security settings help prevent the kind of hacking incidents that have affected some baby monitors and home cameras in recent years. Follow privacy and security guidance from trusted organizations such as the Federal Trade Commission, Consumer Reports, and national privacy regulators. Penn State Open Resource Publishing Key steps include: Because privacy laws differ a lot between countries and even between states, you should always check local rules before you rely on hidden camera apps, especially if you plan to record visitors, caregivers, tenants, or staff. 9. Run test scenarios Before you trust this setup, run several tests. If anything feels unreliable, adjust camera position, resolution, or app settings until you are comfortable. 10. Consider multi camera and mixed setups Once your first camera works, you can expand, but pay attention to subscription limits. For example, Manything and similar cloud based services often require paid plans to use more than one camera or to extend storage time. Some households mix options. For example, you might use Alfred on a spare Android phone for the front hall, AtHome on an old tablet for detailed human detection in the kitchen, and Viewer for Baby Monitor for Kinect only at night when your Xbox One is idle in the nursery. Key Advantages of Knowing The Must Have Home Security Camera Apps Understanding these apps and how they compare gives you several advantages. Cost savings and reuse Flexible viewing and remote access Ideal for renters and temporary setups Extra features beyond basic recording These four apps

Android Call Recorder Apps That Truly Go Beyond Simple Recording

Android phones now offer more ways than ever to record calls, but the details can be confusing. Some phones include call recording in the default Phone app, while others rely on third party tools that may not even appear in Google Play anymore. On top of that, privacy rules and consent laws vary from country to country and even from one state to another. Google Help This guide walks through how modern Android call recording actually works, what you can do with built in tools on Google Pixel and Samsung phones, and how specialist apps add real extra value with automation, cloud backup, security, and smarter organization. You will also see where the limits and risks are so you can decide what is appropriate for your device, region, and comfort level. Key takeaways Insight into Android call recorder apps that do more than record What is a call recorder app in this context On Android, a call recorder is any tool that can capture the audio of a phone conversation or VoIP call and save it as an audio file on your device or in the cloud. Basic tools simply capture the call and store it. When we talk about apps that do more than record, we mean tools that add features such as You can get some of these features directly in the Phone app on recent Pixel and Samsung devices, while others are still only available in dedicated apps like Cube ACR. Built in call recording versus third party apps According to Google Phone app support pages and recent coverage of Pixel feature updates, newer Pixel models such as the Pixel 6 and later can use the Phone app to start call recording manually and, in many regions, to always record selected contacts or unknown numbers. Recordings are stored on the device, and Google explicitly reminds users that they are responsible for following local laws. Google Help Samsung documents a similar built in feature on many Galaxy phones. Their support pages explain how to open the Phone app, tap the menu, go to settings, and then open a Record calls menu to turn on manual or automatic recording. They also note that the feature does not work with Wi Fi calling and that exact menus vary by device and software version. Dedicated apps such as Cube ACR, Call Recorder by LoveKara, and Super Call Recorder try to fill gaps that built in tools do not cover, for example However, these apps are more sensitive to device, Android version, and vendor customizations. Even developers state that they cannot guarantee correct operation on every model, especially on recent Android versions that restrict background audio capture. Why extra features matter in real use In practice, people rarely want to record every single call. Instead, they want tools that fit specific tasks, for example In these cases automation, labeling, notes, and simple search are as important as the raw recordings. Without them, you are left with a folder full of file names that are hard to navigate. Apps like Cube ACR and some LoveKara based tools allow recording rules and different ways to sort and filter so that you can find critical calls quickly. At the same time, call recordings involve sensitive personal and business data. If someone gets access to your call recorder folder, they may hear passwords, card details, or confidential negotiations. That is why features like PIN lock, local only storage, and clear deletion controls matter just as much as convenience features. The current Android policy landscape Google has tightened access to audio capture APIs over several Android releases, particularly from Android 10 onward, and updated its Play Store Accessibility policy in April 2022 to explicitly state that the Accessibility API is not designed for remote call audio recording. As a result, many classic call recorder apps that relied on that API were removed from Google Play or forced to disable key features. 9to5Google Developers now commonly use a mixture of Sideloading APK files from outside Google Play is allowed, but security researchers consistently warn that installing apps from unknown sources is a real risk and that you should be very selective and rely on reputable sites, open source stores such as F Droid, or official developer pages. Based on the available data as of late 2025, you should assume that call recording on Android is more fragile and policy dependent than it used to be. That is why the rest of this guide focuses on careful selection and safe use, not just on lists of apps. Method and step by step guide to choosing and using these tools Step one: Check whether built in call recording is available On recent Pixel phones, Google describes a Call recording menu under Call Assist in the Phone app settings. During an active call, you can open Call Assist and tap a visible Call recording button if the feature is available for your region and model. Google Help On many Samsung Galaxy phones, Samsung explains that you can open the Phone app, tap the three dot icon, choose Settings, then Record calls. There you may see options to record calls manually or to enable automatic recording for all calls, selected numbers, or unknown numbers. Samsung also notes that this feature does not work with Wi Fi calling and that the menu layout can differ by country and Android version. Samsung jp If you do not see any recording options, your carrier or region may block call recording even if the hardware would support it. In that case you can only rely on third party apps where they are still functional and lawful. Step two: Understand the legal position where you live Before you record any conversation, you need to understand consent rules in your jurisdiction. Reputable legal and compliance guides describe two broad models. For example, United States federal law accepts one party consent, but several states such as California and Florida add stricter all party rules. The United Kingdom often

Switching From Android to iPhone A Calm Step by Step Guide

Switching from Android to iPhone can feel exciting and a little scary at the same time. You probably rely on your current phone for everything from banking and messaging to photos and work, so the idea of moving and learning a new system can feel risky. This guide walks you through what really happens when you move from Android to iPhone, what transfers easily, what needs extra care, and which tools to use. With a bit of preparation and a clear plan, most people move their important data safely and start using their new iPhone with confidence. Key takeaways Understanding the switch from Android to iPhone At a high level, Android and iOS are two different operating systems with their own app stores, account systems, and backup methods. On Android you usually sign in with a Google account, get apps from the Google Play Store, and often back up through Google services such as Google Drive, Google Photos, and Google Contacts. On iPhone you sign in with an Apple ID, download apps from the App Store, and back up with iCloud or a computer. This matters because you are not just moving files. You are shifting from one ecosystem to another. Your Google account does not disappear when you move to iPhone. In fact, you can add the same Google account in Settings on the iPhone so that Gmail, Google Contacts, and Google Calendar continue to sync there. According to Google support, you can simply add your Google account in iPhone settings and toggle on contacts and calendars to keep them in sync. Google Help At the same time you will create or sign in to an Apple ID, which becomes the main account for the App Store, iCloud backups, iMessage, FaceTime, and purchases. According to Apple, the latest iOS versions are designed to work closely with iCloud and Apple services for backups and security, so an Apple ID is essential for getting the full experience on a modern iPhone. Apple Support Here are a few things that will feel familiar when you move from Android to iPhone A few things will feel new or different Once you know these differences, the rest of the guide will make more sense because you can see how your old Android habits map to the new iPhone world. Pre switch checklist and backup plan Before touching the new iPhone, it is worth spending a little time preparing your Android phone. This is where many people either save themselves a lot of stress or create headaches later. Why backing up first is critical Transfers usually go smoothly, but not always. Wi Fi can drop, a battery can die, or a cable can be loose. If anything goes wrong and you do not have a full backup, you risk losing photos, messages, or documents that exist only on the phone. Making one or two backups before you start gives you a safety net. Use this checklist before you start the move Taking twenty to thirty minutes for this checklist can turn a stressful afternoon into a smooth one. Method step by step guide to move from Android to iPhone Step 01: Choose your transfer method There are three main ways most people move their data. You can combine methods. For example, use Move to iOS for messages and core data, then a computer to bring over a large music collection. Step 02: Set up the new iPhone If the iPhone is brand new or you have decided to erase it If the iPhone is already in use and you do not want to erase it, you cannot use Move to iOS without wiping it first, as Apple clearly notes. In that case you will rely on cloud and computer based methods instead. Step 03: Use Move to iOS for the main transfer These are the general steps, based on Apple s own instructions. If the transfer fails, Apple suggests checking that the phones stay awake, turning off apps or settings that interfere with Wi Fi on Android, restarting both phones, and trying again. Step 04: Transfer key data types in more detail Move to iOS covers a lot, but it helps to understand each category so you are not surprised later. Contacts If you use Move to iOS, your contacts from the Android phone, including those stored on the device or synced from Google, normally appear in the Contacts app on the iPhone. If you prefer to rely on Google instead, you can add your Google account on the iPhone and enable contact sync in Settings. Changes then stay in sync between your Google account and the iPhone contact list, as Google s documentation describes. Practical tipAfter the move, open Contacts on the iPhone and scroll through a few letters to confirm that the most important people are there. Fix missing entries while you still have the Android phone. Text messages and messaging apps Move to iOS can bring across message history from the built in SMS and MMS app on Android, so your regular text messages appear in the Messages app on iPhone. For third party messaging apps the situation varies. Always assume that two factor authentication apps and codes will need special attention. Move to iOS does not reliably move those. Use backup codes or migration tools that your individual services provide before you switch phones. Photos and videos Move to iOS can transfer camera photos and videos and your photo albums from the Android device into the Photos app on the iPhone. If you already use Google Photos or another cloud photo service, a cloud based approach might be easier. Make sure everything is backed up from Android, then install the same app on iPhone and sign in. You can either keep using that service or download important photos into the iPhone Photos library. For very large libraries or when you want more control, Apple recommends the manual method using a computer. Whichever method you choose, check that recent trips, events,

Why Your iPhone Is Safer From Viruses Than You Think, And When To Worry

If you have ever seen a scary pop up that said “Your iPhone has a virus,” you are not alone. Many iPhone owners worry that one strange message or a hot battery means their phone has been “infected” or “hacked.” The truth is that classic computer style viruses are very rare on iPhone because of how Apple designed iOS and the App Store. At the same time, there are very real threats such as phishing, shady configuration profiles, and apps that misuse permissions. This guide will walk you through what is real and what is mostly fear, show you how iPhone security actually works, and give you a simple checkup you can do today to decide whether you can relax or whether it is time to take action. Key Takeaways Understanding iPhone Viruses And Real Threats Before you can judge whether your iPhone is in danger, it helps to be clear on a few basic terms. VirusIn classic computer security, a virus is a program that installs itself, runs on its own, and then spreads to other systems without the user doing very much. On older desktop systems, a virus could attach itself to other programs or files and silently move from device to device. MalwareMalware is a broader term for any harmful software. It includes viruses, but also worms, trojans, spyware, and adware. Malware on phones usually needs some kind of user action for example, installing an app, tapping a link, or accepting a profile. PhishingPhishing is a social trick. Instead of attacking the device directly, the attacker tries to fool you into entering your password, bank details, or verification code on a fake site or in a fake message. Security researchers consistently describe phishing as one of the main ways attackers target phone users. Why classic viruses are rare on iPhone Apple designed iOS so that each app runs in its own isolated space called a sandbox. According to Apple’s own security documentation, third party apps on iOS are restricted from accessing files stored by other apps or from making changes to the device outside their own container. Apple Support For a traditional virus to spread, it would need to install itself, run freely, and talk directly to other apps or system files. iOS blocks most of the paths that older viruses used: On top of that, Apple vets apps before they appear on the App Store. Apple’s review guidelines focus on safety, performance, and legal compliance, and security checks are part of that process. Apple Developer Security writers who study iOS point out an important side effect of this design. Real time antivirus tools that scan every file are not possible on iPhone in the same way as on Windows. Any antivirus style app you install on iOS is itself sandboxed and cannot scan other apps or system files directly. So the combination of sandboxing, code signing, and App Store review makes the classic virus model very difficult on iPhone. “No viruses” does not mean “no risk” None of this means iPhone users are perfectly safe. Several other threats matter much more in real life: For everyday users who keep iOS up to date and use the normal App Store, the bigger danger is usually giving data away accidentally rather than a virus silently taking over the device. How iPhone Security Really Works You do not need to be a security engineer to understand the big pieces of iPhone protection. Think of iOS security as layers that work together. App sandboxing Apple’s platform security guide explains that each third party app runs in an isolated environment with its own directories and limited access to hardware features. In simple terms, this means: Some shared resources, like the photo library or location services, are controlled through permissions. An app has to ask, and you see a system prompt where you can allow or deny. App Store review and code signing Before an app appears in the App Store, Apple reviews it against safety and content guidelines. The review is not perfect, as the SparkCat incident and other rare cases show, but it filters out many obviously malicious or broken apps. Every app that runs on iOS is also signed with a certificate. Code signing helps the system verify that: Unsigned or tampered code is blocked during the boot and install process. System updates and security patches Apple regularly publishes iOS updates that include security fixes and new protections, not just new emoji and features. The platform security documentation explains that each release layers new exploit mitigations on top of the old ones. If you let your iPhone stay on an old system version for many months, you miss these patches. That gives attackers more opportunity to use publicly known flaws. Built in protections and prompts Modern iOS versions include several safety nets: These features do not remove all risk, but they raise the cost for attackers. In practice, most criminals aim for easier paths such as phishing rather than rare, expensive exploits. When You Should Actually Worry Every phone has glitches. An app can crash, the battery can drain faster after a system update, or Safari can misbehave on a poorly coded website. These issues are annoying, but they are not clear proof of malware. Here are clearer red flags that deserve your attention. Suspicious profiles, VPNs, or device management entries If you open Settings and see a “Profile Downloaded” banner or configuration profiles you do not recognize under General then VPN and Device Management or similar menus, that is a concern. Malicious profiles can: If you never set up a company device management account yourself, any unexpected profile is a strong reason to act. Repeated prompts for passwords on strange sites Phishing often looks like this: If you see a page that asks for sensitive data and you arrived there from an unexpected message, close it. Check by going directly to the official site or app instead of using the link inside the message. Apps you do

How to Turn On Two Factor Authentication on Your iPhone and Keep Your Apple ID Safe

Two factor authentication on iPhone adds a second lock on top of your Apple ID password. When it is on, anyone who tries to sign in as you needs both your password and a one time verification code that goes to your trusted devices or trusted phone numbers. That extra step matters a lot because your Apple ID controls iCloud, your photos, your messages, backups, and purchases. If someone gets into that account, they can often see far more than what is stored on the iPhone in their hand. In this guide you will learn, in calm and simple steps, how to turn on two factor authentication, how to add and manage trusted devices and phone numbers, and what to do when things go wrong, such as losing your phone or not receiving a code. By the end, you should feel confident that your Apple account is much harder for an attacker to break into. Key Takeaways Insight Into Two Factor Authentication on iPhone What two factor authentication means for Apple ID Two factor authentication, often shortened to 2FA, is a security system that requires two separate proofs that you are who you say you are. With Apple, the first factor is your Apple ID and password. The second factor is a six digit verification code that is sent to your trusted devices or trusted phone numbers when you sign in on a new device or in a new browser. Apple Support In practical terms, this means that even if someone guesses or steals your password, they still cannot sign in to your Apple account unless they also have access to one of your trusted devices or numbers. Where Apple uses two factor authentication Apple uses this two step check whenever you sign in with your Apple Account on The same protection applies when you make sensitive changes, such as updating your password or security settings, because Apple may ask for a verification code from a trusted device before it accepts the change. Why this matters for everyday users Most people keep almost everything in their Apple account today. That often includes If an attacker gets into your Apple account they can see or change many of these things, even from their own device. Two factor authentication greatly reduces this risk because they would also need your physical device or a trusted phone line, not just a password taken from a data leak or a phishing message. Security organizations and consumer security guides consistently recommend two factor authentication as one of the most effective ways to protect online accounts. Default behavior on newer Apple IDs and iOS versions According to Apple Support, if you create a new Apple ID on a device running at least iOS 13 point 4, iPadOS 13 point 4, macOS 10 point 15 point 4, or newer, that account will automatically use two factor authentication. Apple Support Apple also notes that you can use two factor authentication with your Apple Account if you have a device with the latest iOS, iPadOS, or macOS, or if you have access to a web browser and a phone number, although some older or special account types may remain ineligible at Apple’s discretion. So if your iPhone is up to date and your Apple ID is relatively new, you may find that two factor authentication is already on. The next section shows how to check that status and how to enable it if it is not. Method: Step by Step Setup Guide This section walks you through the process in small, clear steps. If you feel nervous about changing security settings, move slowly and check each screen before you tap. There is no time pressure. Step 01: Check your iOS version and Apple ID status Check your iOS version Apple strongly recommends keeping iOS up to date because each release includes security fixes as well as new features. The current major iOS line is iOS twenty six, and Apple lists the latest security release under its security updates page. If your iPhone cannot update to a very recent version, you can still use two factor authentication in most cases, but menus might look slightly different from the screenshots you see online. Check whether two factor authentication is already on On recent iOS versions you should see a clear status, such as If it already says On, your Apple ID is protected with two factor authentication and you can skip ahead to the sections on managing trusted devices and numbers. If it is off or you see an option to turn it on, follow the next steps. Step 02: Turn on two factor authentication for Apple ID on iPhone Apple’s own instructions for turning on two factor authentication start from the Settings app. If you are upgrading an older account, Apple may first ask you to confirm the answers to your security questions before it lets you continue. This is normal and is another check that you are the real owner of the account. Enter and confirm a trusted phone number Apple requires at least one trusted phone number during enrollment. A trusted phone number is a number Apple can use to send verification codes by text message or automated phone call when it needs to confirm your identity. For most people, a mobile number that receives text messages is the easiest option. A landline number can also be used with phone calls in many regions, but you will need to listen to the spoken code. If the code is correct, your number becomes a trusted phone number and two factor authentication is activated for your Apple Account. From this point forward, when you sign in to your Apple account on a new device or browser, Apple will ask for both your password and a verification code sent to a trusted device or trusted number. Step 03: Add and manage trusted devices Apple defines a trusted device as an Apple device such as iPhone, iPad, Apple Watch, Apple Vision Pro,

How to Check If Your PC Can Use DirectStorage in Windows 11

NVMe SSDs and DirectX 12 GPUs are the key to faster gaming DirectStorage is one of those Windows 11 gaming features that you keep hearing about whenever people talk about faster loading times and next generation storage. It can sound mysterious, but in practice it comes down to a few clear checks on your storage drive, graphics card, and Windows version. In this guide I will walk you through how to see whether your current Windows 11 PC can actually use DirectStorage right now, using tools that are already built into the system. I will also explain what to upgrade if you are missing a requirement and what kind of real world improvement you can expect. Key Takeaways DirectStorage in Windows 11 at a Glance DirectStorage is a Windows feature in the DirectX family that lets games load data more efficiently from a fast NVMe SSD straight to the graphics card. Instead of sending game data through several layers of the operating system and making the CPU decompress everything, DirectStorage lets the game batch many small requests and move them to the GPU in a more direct way. Microsoft Learn In simple terms, this means: Microsoft created DirectStorage first as part of the Xbox Velocity Architecture for modern Xbox consoles. Later the same idea came to Windows PCs so that games can use the same style of high bandwidth input output on powerful NVMe drives. Microsoft for Developers For you as a player, the key benefits are: Two important points often get missed in marketing: Requirements Checklist for DirectStorage Support Before you open any menus, it helps to know what DirectStorage expects from your PC. Microsoft lists the feature on the Windows 11 specifications page and in DirectStorage documentation. Storage NVMe SSD connected through PCIe DirectStorage is designed for NVMe SSDs on the PCIe bus rather than for SATA SSDs or mechanical hard drives. Microsoft states that DirectStorage requires an NVMe SSD that uses the Standard NVM Express Controller driver and that game files need to be stored on that drive. Some additional practical notes from Microsoft partners and storage vendors: In everyday language, an NVMe SSD is the slim gum stick style drive that plugs into an M.2 slot on your motherboard and talks directly to the PCIe controller, while a SATA SSD or hard drive usually uses a rectangular 2.5 inch or 3.5 inch form factor with a cable. Graphics DirectX 12 GPU with Shader Model 6.0 Microsoft states that DirectStorage requires a DirectX 12 GPU with Shader Model 6.0 support. Many modern gaming graphics cards from Nvidia, AMD, and Intel already meet this requirement. Practical points: The Xbox Game Bar interface in Windows 11 provides a simple label such as “Your system is DirectX 12 Ultimate ready” under the Graphics section of the Gaming features panel. Acer Corner If you see a message like this, it is a strong sign that your GPU can support DirectStorage when paired with the right storage. Integrated graphics on older laptops often only support earlier versions of DirectX or older shader models, so they may not meet the DirectStorage requirement. Operating system DirectStorage is available on both Windows 10 and Windows 11, but Microsoft repeatedly describes Windows 11 as the best environment for DirectStorage because the storage stack and input output path have been updated. Windows Central Key points: For this guide we focus on Windows 11, since that is what most modern DirectStorage information and user interfaces are designed for. Method: Step by Step Guide to Checking DirectStorage Support In this section we will use tools that are already on your Windows 11 PC. You do not need to install any special utilities just to check DirectStorage. We will: Step 1: Check DirectStorage status with Xbox Game Bar According to Microsoft and several hardware guides, Xbox Game Bar in Windows 11 includes a Gaming features section that reports whether DirectX 12 Ultimate and DirectStorage are supported on your system. Acer Corner Follow these steps: You should now see a panel with two main sections. On one of my own mid range Windows 11 gaming PCs that has an NVMe SSD and a modern GPU, the Gaming features panel shows DirectX 12 Ultimate support at the top, and further down it lists the primary NVMe game drive as DirectStorage supported. On an older desktop I tested that has a SATA SSD and an older graphics card, the same panel shows that the GPU does not support DirectStorage and the drive is not DirectStorage supported. That machine still runs games, but it cannot use this feature. If the panel shows that DirectStorage is not supported, do not panic yet. The next steps will help you see which part of the system is the blocker. Step 2: Confirm whether your storage drive is NVMe Even if the Game Bar already shows DirectStorage status for drives, it is useful to confirm what type of storage you have. Here is a simple method using Task Manager: For each disk, look at the name next to the small drive icon: On one of my test laptops, Disk 0 shows a model name that includes “NVMe” and Performance view confirms that it is an SSD. This is the drive that the Game Bar lists as DirectStorage supported when I install games on it. On another older tower PC, Disk 0 only shows as “SSD” with no NVMe in the name, and benchmark tools confirm it is a SATA drive. Xbox Game Bar lists that drive as not DirectStorage supported even though it is solid state. If you want even more detail, you can also: This path helps you confirm which physical SSD or HDD contains your game library. Combine that with the Task Manager view so you know whether your game install is on an NVMe drive. Step 3: Check the graphics card capabilities Next we confirm your GPU model and DirectX support level. Option A – Check GPU model in Settings Here you will see

Easy Way to Set Up Google Assistant on iPhone for Everyday Use

Google Assistant on iPhone is a free app from Google that lets you use your voice or the keyboard to search the web, control smart home devices, manage your Google Calendar and tasks, and more, all from your Apple device. It lives as a separate app rather than replacing Siri, so you are really adding a second assistant rather than swapping one out. If you feel a bit uneasy about mixing Apple and Google services, you are not alone. Many iPhone owners use Gmail, Google Maps, YouTube, or a Nest smart speaker and are simply not sure how Google Assistant fits into the Apple world. This guide walks you through everything from installing the app to creating routines and using Google Assistant to find a misplaced iPhone. We will go through installation, first time setup, quick ways to trigger Google Assistant, useful every day commands, find my phone tricks, and privacy controls inside both iOS and your Google account. The instructions are written for regular users, not only for tech hobbyists, so you can follow along even if you usually avoid digging into settings menus. Key Takeaways Insight into Google Assistant on iPhone What Google Assistant on iPhone actually is Google Assistant is Google’s voice driven helper. On Android phones it is deeply integrated into the system and can take over many device controls. On iPhone it works as a regular app that you open when you want help. It does not replace Siri as the system assistant and it cannot be set as the default assistant for the side button or for CarPlay. Apple community support answers are very clear that you cannot switch the default assistant to Google Assistant on iPhone. Apple Support Discussions In practice, you use it like this: open the Google Assistant app, tap the microphone, or say the wake phrase when the app is listening, then ask your question or give a command. Google Help Requirements and compatibility To use Google Assistant on iPhone you need: Google does not publish a single hard cutoff iOS version in public help pages, but App Store listings show ongoing updates through twenty twenty four and twenty twenty five, which indicates that any modern iPhone running a supported iOS release should work. Why it matters if you already use Google services If you already live in the Google ecosystem, Google Assistant can feel more natural than Siri for certain tasks. According to Google’s own product pages, Assistant is designed to manage tasks, plan your day, control your home, and get quick answers, especially when you are on the move. On iPhone this translates into helpful abilities such as: If you own an Android tablet, a Chromebook, or Google Nest speakers, using Google Assistant on iPhone also ties those devices together so the same routines can run across your whole home. What Google Assistant can and cannot do on iOS Because of how iOS handles system assistants and app permissions, Google Assistant on iPhone has real limits compared with Android: On the other hand, you still get strong capabilities that work well inside the app: accurate web search, fast answers, reminders and calendar entries, smart home control, routines, and find my phone features. Method: Step by Step Setup and Usage Guide Step One: Prepare your iPhone and Google account Step Two: Install Google Assistant from the App Store If you do not see Google Assistant in your local App Store, there are two possibilities. Either the app is not available in your country for now, or Google has started limiting new downloads as part of its shift toward Gemini on some mobile platforms. News reports in twenty twenty five mention that Assistant is gradually being retired on certain phones in favor of Gemini, although at the time of writing the iOS app listing is still active. Step Three: First launch and sign in If you choose Allow for notifications, Assistant can show reminders, alerts from routines, and other messages. If you choose Do not allow, you can still use Assistant inside the app but timed reminders and certain alerts may not appear on your lock screen. You can change this later under Settings then Notifications then Google Assistant. Step Four: Grant important permissions For Google Assistant to hear your voice and respond correctly, you need to grant certain iOS permissions. You do not have to turn everything on at once. A safe approach is to enable only what you need today, then add more permissions later if you discover a feature that requires them. Step Five: Customize Google Assistant on iPhone Once basic access is working, it is worth spending a few minutes in Assistant settings so the app behaves the way you prefer. Step Six: Set up fast ways to trigger Google Assistant On iPhone, quick access is the difference between actually using Assistant or forgetting it exists. Here are practical options. Open the app and tap the microphone The simplest method is: This method always works but can feel slow if the app is buried in a folder. Use the wake phrase inside the app According to Google support documentation, on iPhone you can say “Ok Google” or “Hey Google” inside the Assistant app and then ask your question. Some users report that the wake phrase works only when the app is in the foreground and the phone is awake, not from a fully locked state. That behavior matches Apple’s privacy model, where third party apps cannot listen all the time in the background the way the built in system assistant can. Create a Siri Shortcut that opens Assistant You can chain Siri to Google Assistant with a simple shortcut so that a phrase like “Hey Siri, open Assistant” launches the Google Assistant app. Guides for similar setups, such as using Siri with Google Voice or using Siri to control Google based smart lights, show the same pattern. A common approach is: From now on, you can say “Hey Siri, Assistant” and after a brief pause

The Easy Way to Block Ads in Safari on iPhone, iPad, and Mac

You sit down to read a news article and the page feels like a carnival. Banners blink, video ads start talking to you, and a tiny X to close a pop up is almost impossible to tap. Pages load slowly, your data plan feels like it is disappearing, and you start to worry that all of this tracking is not great for your privacy either. The good news is that Safari has simple built in tools to reduce the worst pop ups and tracking, and there are easy content blocker apps that can do even more without requiring you to be a tech expert. According to Apple Support, Safari already includes features that limit cross site tracking and show warnings about fraudulent sites, and you can add content blockers on top for extra protection. In this guide, you will learn in plain language how Safari ad blocking works, how to pick a safe method for your iPhone, iPad, or Mac, and how to turn everything on step by step without feeling like you might break something. Key takeaways What ad blocking in Safari actually is Before you start flipping switches, it helps to understand what is really happening when you “block ads” in Safari. Blocking requests, not just pictures When Safari works with a content blocker, it does not simply hide pictures of ads. It changes what your browser is allowed to request from the internet. Most ad and tracking systems live on separate servers with very predictable web addresses. A content blocker uses a large rule list that says something like “if a page tries to contact these ad servers or tracking domains, do not load them.” Safari follows those rules and simply never downloads those pieces. In practical terms, that means: Hiding unwanted page elements Some content blockers also hide or rearrange elements that are not strictly ads but are annoying, such as: Developers like the team behind 1Blocker explain that their tools can hide banners, widgets, and other distractions along with traditional ads and trackers. Built in Safari tools versus content blockers There are two big categories of tools inside or on top of Safari. Why iPhone and iPad use content blocker apps On iPhone and iPad, Safari does not let each app run arbitrary code in the background to block ads, because that would slow things down and could be unsafe. Instead, Apple designed a system where the content blocker app sends a rules file to Safari. Safari itself then applies the rules when you browse. For you, this means two things: Why blocking ads in Safari matters If you are already used to ad filled pages, it is natural to ask “Why bother changing anything?” Faster and cleaner browsing Every banner, video, and tracker is extra content that has to be downloaded and executed. Content blocker descriptions in the App Store and on developer sites routinely highlight faster browsing once ads and trackers are blocked, because Safari has fewer elements to load. In everyday terms, this often looks like: Reduced data usage and potential battery savings When you do not download ad images, videos, and tracking scripts, your device sends and receives less data. Developers of content blockers such as Content Blocker and 1Blocker specifically list lower data usage and improved battery life as key benefits, because your device simply does less work and transfers fewer megabytes while you browse. This can be especially helpful if: Fewer distracting or risky ads Most ads are just annoying, but some can: Blocking many third party ad networks reduces the chance that you see these kinds of ads, even though no solution can guarantee perfect protection. Better privacy Advertising trackers try to follow what you read and click across many sites. Apple explains that Safari includes features to limit cross site tracking and to minimize the data passed to third parties. When you combine these built in protections with a strong content blocker, you: The downside and why whitelisting matters There is a real tradeoff. Many websites pay their writers, editors, and hosting bills with advertising income. If everyone blocks all ads all the time, smaller sites in particular may struggle. You may also see: Whitelisting is the compromise. Most content blockers let you allow ads and scripts on specific domains that you choose, often with a single tap in the address bar. That way you can: Step by step methods to block ads in Safari This section walks through practical methods you can start using right away. Pick the method that matches your device and comfort level, and remember that you can always undo a change later. Method One: Use a content blocker on iPhone and iPad Safari content blockers on iPhone and iPad rely on a system that first appeared in iOS 9. Current content blocker apps may require newer versions, and for example the modern 1Blocker app lists iOS 16 or later as a requirement in the App Store. If your device can run a recent iOS or iPadOS version, you will usually get the best experience by staying fully updated. Step 01: Choose and install a content blocker Treat these apps as examples, not the only options. New blockers appear and old ones change, so always check current details in the App Store listing. Step 02: Complete the basic setup in the app You might also see a screen that reminds you to enable the blocker in Settings. That is normal. Step 03: Enable the content blocker in Safari settings Apple Support describes Safari pop up and security options inside Settings under the Apps section. Safari extensions and content blockers live there as well. On iPhone or iPad: If you skip this step, the app is installed but Safari will not actually block anything. Step 04: Test the difference in Safari You should notice: Many content blockers show a small report inside the app that lists how many requests they blocked for a page. That can help you see that they are actually

How to Set Up New Android Without Losing Stuff: Step-by-Step Guide

Getting a new Android phone should feel exciting, not terrifying. If you are worried about losing years of photos, WhatsApp chats, contacts, and app data, you are not alone. The good news is that modern Android phones are designed to copy most of your important data for you, as long as you choose the right method and prepare properly. This guide walks you through the main ways to set up a new Android without losing your stuff, explains what usually transfers and what does not, and gives you practical, real-world tips for avoiding those “uh oh, where did my photos go?” moments. You do not need to be a tech expert to follow along; you just need both phones, Wi-Fi, your Google password, and a bit of patience. Key Takeaways Understanding the Basics of Setting Up a New Android Without Losing Data When people say they want to “set up a new Android without losing any of their stuff,” they usually mean: Modern Android setup wizards and tools like Google’s “Copy apps and data” flow are built specifically to move this information from your old device or from a backup. The three main setup scenarios Why careful setup matters Method: Step by Step Setup Guides for Different Situations Before You Start – Critical Prep Steps Do these things before you tap anything on the new phone: Having these things sorted up front dramatically reduces the chance that you will need to start over. Option One – Move From Old Android to New Android This is the most seamless scenario. According to Google’s Android setup guide, the typical flow is: turn on the new device, connect to Wi-Fi, choose to copy apps and data, and then connect or scan a QR code with the old phone. When to use this method Wireless vs cable transfer In real-world use, a cable is usually the “pro” choice, especially for big photo libraries or if your Wi-Fi is not very fast. Step-by-step: Android to Android transfer Once you reach the home screen, apps will continue downloading in the background. Photos from cloud services may take additional time to appear. Option Two – Move From iPhone to Android Moving from iPhone to Android is very doable, but the rules are slightly different. According to Google’s official “Copy apps and data from an iPhone” support page, you can: Critical prep: turn off iMessage and FaceTime Apple and Google both advise that you disable iMessage before removing the SIM card; otherwise, SMS messages from iPhone users may still go to the old iPhone instead of your new Android. On your iPhone: If you no longer have the iPhone, Apple provides an online deregistration tool for iMessage so you can still receive texts on your new phone. What usually transfers from iPhone When you follow Google’s switch instructions, you can typically bring over: Things that often do not transfer: Step-by-step: iPhone to Android with a cable Step-by-step: iPhone to Android with Switch to Android app (wireless) If you meet the version requirements (Android 12 or newer and iOS 15 or newer), you can also go wireless: Option Three – Set Up a New Android From a Google Cloud Backup Use this when: Google’s backup help pages explain that an Android device can automatically back up app data, call history, contacts, settings, and SMS to your Google account, and that these backups are available when you sign in on a new device. Step-by-step: restore from Google cloud backup What to Do Right After the Transfer Finishes Once you reach the home screen on your new Android, do a quick post-setup check: If anything looks missing, do not panic yet; many items (especially cloud-based photos and apps) sync over the first few hours. Key Advantages of Setting Up Your New Android Carefully Doing this properly takes some time, but it pays you back later: Common Mistakes to Avoid Here are pitfalls that come up again and again, and how to avoid them: Expert Tips and Real-Life Style Examples Here are a few realistic scenarios and “pro tips” that make the move smoother. Example 1: Parent upgrading from a five-year-old Android to a new mid-range phone They mostly care about: Pro tips: Example 2: Long-time iPhone user switching to Android for the first time They are nervous about: Pro tips: Example 3: User whose old Android was stolen, relying on Google backup They are worried that everything is gone. Pro tips: “Pro mode” behavior that makes every future upgrade easier Frequently Asked Questions Q1: Do I really need a Google account to set up my new Android and move data? In practice, yes. Official Android setup instructions show that copying apps and data, restoring backups, and using Play Store all rely on signing in with a Google account. You can technically skip Google sign-in and use the phone in a very limited way, but you will lose: For almost everyone, using a Google account is the safest way to avoid data loss. Q2: Can I use my new Android without Gmail as my main email? Yes. You need a Google account for core Android services, but your day-to-day email can be something else. Google’s own Gmail help pages explain that the Gmail app on Android can add non-Gmail accounts such as Outlook, Yahoo, or other IMAP or POP services. So you can: Q3: How can I move WhatsApp or other chat apps to my new phone without losing conversations? For WhatsApp: Other chat apps vary: Q4: What can I do if I no longer have my old phone but still want my data? Your main options are: If backup was never turned on and everything was stored only locally on the lost phone, there is unfortunately no reliable way to recreate that data. Q5: How long does the transfer usually take, and can I use the phones while it happens? According to Google’s copy-apps help article, copying data between Android devices can take from a few minutes to over an

How to Burn an ISO File to a USB Drive Using Rufus – Updated

How to write an ISO file to a USB on 2025:Download Rufus → put your USB in → pick the ISO → Start.Rufus erases everything and formats the USB drive to install a bootable Windows 10/11, Linux, or recovery software. What You’ll Need to Burn an ISO to a USB The next time you want to bring your favourite tool or an operating system with you, carry the entire collection of tools in a sufficiently large USB drive using USB keys and boot from it. The term ISO file refers to a complete digital copy (binary image) that’s an exact duplicate of the disk it was copied from – useful for OS installers, antivirus tools, and system diagnostics. While it doesn’t work like simple file copying, burning an ISO makes a USB’s partition and boot information contextually aware enough to start your system off of it. For those struggling with creating a bootable USB with your swearing good cheer, Rufus is still the number-one zero-cost program of choice – fast, portable, and verified fully compliant with UEFI PCs as well as those not running non-Enterprise Windows 8 through 11. What You’ll Need Requirement Description ISO file The operating system or tool image (For example, Windows 11 ISO, Ubuntu 24.04 LTS ISO) USB drive Minimum 8 GB (everything will be wiped) Rufus tool Free utility from rufus.ie Windows PC To use Rufus and create the bootable USB How to Burn an ISO to USB in Rufus 1. Download and Open Rufus Go to rufus.ie and grab the portable version (you don’t need to install it).Run the .exe, then grant any permission requests.Optional: turn on auto-update for future releases (since Rufus 4.6, updates are signed by Pete Batard). 2. Insert Your USB Drive Plug in your USB flash drive.Rufus will detect it automatically; select it in the Device drop down.Warning: The drive will be reformatted – back up any important files first. 3. Select the ISO File From Boot selection, choose Disk or ISO image → SELECT.Locate your ISO (e.g., Win11_24H2_English_x64.iso) → click Open.Rufus verifies the image; if it’s not supported, redownload from Microsoft or Linux. 4. Modify Settings in Rufus (Defaults Are Fine) Setting Recommended Option Purpose Image Option Standard Windows install (Windows ISOs) Setup (Using Wine for older LMDE needed when installing with a Windows ISO) Partition Scheme GPT for modern UEFI PCs; MBR for legacy BIOS According to your motherboard firmware File System NTFS (default); FAT/FAT32 not recommended but may be necessary for legacy OS NTFS supports files over 4 GB Volume Label Custom name (optional) Helps label the drive For older or reused drives, turn on “Check device for bad blocks” in Advanced Format Options. 5. Start the Burning Process Click START → DATA DELETION CONFIRMATION.Rufus formats the drive and writes the bootable data.Time: 2–20 minutes depending on image size and USB speed.When you see READY, click Close and safely eject your USB. Boot from the USB Drive Insert it into the computer you want to install or repair.Reboot and enter the boot menu (usually F2, F10, F12 or Esc).Select your USB as the boot device and follow on-screen instructions. Examples: Secondary Option: Accessing ISO Files without Booting If you only need the ISO’s contents (not a bootable USB):Right-click the ISO → Open with → 7-Zip/WinRAR → Extract to USB Drive.This copies files but does not create a bootable image. Pro Tips for 2025 Users Tip Benefit Use USB 3.0/3.2 ports Up to 10× faster write speed Prefer Rufus Portable Runs without installation Check ISO checksum (SHA-256) Verifies integrity against official sources Use GPT + UEFI Faster boot and modern firmware support Try Ventoy (ventoy.net) Multi-boot multiple ISOs from one USB Common Troubleshooting Issue Solution Device not found Reinsert drive or restart Rufus ISO too big Use 8 GB + drive or reduce ISO size Boot fails Switch GPT ↔ MBR or NTFS ↔ FAT32 “Unsupported ISO” error Download official image or update Rufus Why Rufus Is Trustworthy Rufus has been developed since 2011 by Pete Batard (Akeo Consulting).It’s digitally signed, ad-free, and open-source on GitHub.Each release is SHA-verified and trusted for professional IT use.Always download only from rufus.ie – never third-party mirrors. Conclusion Creating a bootable USB drive from an ISO in 2025 is easier than ever with Rufus.In just a few clicks, you can make installation media for Windows 11, revive an old PC with Linux, or build a portable recovery toolkit. Lightweight, efficient, and reliable, Rufus remains the gold standard for ISO-to-USB creation – a true all-in-one solution for both personal and B2B tech workflows. FAQs Q1. How to burn an ISO image on a DVD instead of USB? Right-click the ISO → Burn disc image → follow Windows 10/11 prompts. Q2. Can I use Rufus to create a Windows 10 or 11 On-The-Go USB? Yes, use an original Windows ISO for standard installation media. Q3. How do I create a bootable or live USB for macOS? Use Terminal’s createinstallmedia command or tools like balenaEtcher. Q4. How to create bootable USB for Linux? Most Linux ISOs work directly in Rufus. Alternatives: UNetbootin, balenaEtcher, Ventoy. Q5. Is Rufus safe? Yes. 100 % free, open-source, and widely trusted by Microsoft and Linux communities. Louis MuganLouis Mugan is a seasoned technology writer with a talent for turning complicated ideas into clear, practical guidance. He focuses on helping everyday readers stay confident in a world where tech moves fast. His style is approachable, steady, and built on real understanding. He has spent years writing for platforms like EasyTechLife, where he covers gadgets, software, digital trends, and everyday tech solutions. His articles focus on clarity, real-world usefulness, and helping people understand how technology actually fits into their lives. Outside of his regular columns, Louis explores emerging tools, reviews products, and experiments with new tech so his readers don’t have to. His steady, friendly approach has made him a reliable voice for anyone trying to keep up with modern technology. get in touch at louismugan@gmail.com

In 2025, Is Uber Still Cheaper Than a Taxi?

In 2025, Uber is generally cheaper than taxis for medium to long rides in most U.S. cities – but not always. Taxis can be cheaper in thick downtowns, like New York City or Chicago, particularly during periods of high demand or when Uber’s surge pricing is in effect. The cheaper one is determined by distance, when you book and whether the local traffic at that time needs more trains. Let’s Start With The Modern Uber vs Taxi Debate Rideshare apps such as Uber and Lyft have altered the way people travel in cities, but that old yellow taxi hasn’t gone away. So which of them actually saves you money in 2025? Uber afford you tap-to-book convenience, upfront pricing and cashless payment versus taxis with regulated fees and no surge surprises. The reality: sometimes Uber costs half as much and other times it’s twice. Let’s unpack how the costs actually stack up in several major cities and what circumstances tip the scales. Uber vs Taxi 2025: A Peek at the Average Cost City by City City (2025) Avg Taxi Fare (5 mi) Avg UberX Fare (5 mi) Typical Victor Los Angeles ≈ $18 – $20 ≈ $14 – $16 Uber (less on off-peak) Washington D.C. ≈ $15 – $17 ≈ $15 Within striking distance Philadelphia ≈ $16 ≈ $17 Taxi a little bit cheaper New York City ≈ $19 ≈ $21 (during surge ≈ $28) Taxi usually cheaper Uber was cheaper in 2024: Uber was cheaper in 16 of 20 U.S. cities, according to an analysis based on a GoBankingRates study – with dense areas such as NYC or Chicago being exceptions. (Fare estimates based on municipal taxi rates and Uber’s 2025 Price Estimator.) What Makes the Price Go Up or Down Surge Pricing Uber jacks up fares 1.3× to 3× when demand is high.A $12 ride quickly becomes $22 when the surge manager springs to life. Pro Tip: Wait 5 to 10 minutes, or walk a few blocks away – rates can sometimes fall fast. Traffic and Wait Time Taxis base most charges on distance and idle time.Uber is billed by time as well as distance, so Uber can get more expensive in gridlock. Tipping and Fees Taxi: 15 to 20% tip expected.Uber: Tips are optional in their app, and are often lower. Extra Fees: Uber has booking and cancellation fees; taxi drivers rarely seek payment before arrival. Airport Trips (2025 Snapshot) LAX → Downtown LA: UberX ≈ $35 | Taxi ≈ $50 – $60JFK → Midtown NYC: Taxi flat ≈ $70 | Uber ≈ $65 – $80 (varies based on surge) Uber takes long suburban rides, but taxis can beat surge fares in large urban areas. When Uber Wins vs Taxis Still Rule Scenario Cheaper Choice (2025) Reason Long rides (> 5 mi) & light traffic Uber Lower per-mile rate + cashless convenience Intown city rides (< 2 mi) Taxi Flat starting fare; no surge During rush hour or big events Taxi Surge pricing jacks up Uber Late night, off-peak Uber Easier to get a driver + lower base fare Downtown or business area Uber App that tracks and has competitive pricing Example in the Wild (Los Angeles 2025) The 6-mile, 20-minute ride (from LAX to Culver City): When traffic is thin, Uber makes money. In rush hour, taxis win. Verdict – Which One Should You Go For? Choose Uber if you value: Choose Taxi if you prefer: Final Takeaway Even in 2025, far fewer Americans than not will take to riding bicycles as often, or more so, than a trendily aspirational minority shares such prideful images of itself on social media today. For the vast majority of people living anywhere but the hearts of big cities few kilometers from their workplaces, Uber and its counterparts remain cheaper and more convenient forms of “cool” transportation. But surge pricing, traffic, and city-specific rules can reverse the outcome quickly – so always compare both apps (or the meter rate) before you ride. Bottom Line: Always compare both apps every time before you ride – because in 2025, the cheapest option can change minute by minute. FAQs Q1. Why can Uber be more expensive than cabs? Because Uber uses dynamic pricing. Fares increase with demand at peak times, during concerts, or when it rains. Q2. Is Uber safer than a taxi? Both are regulated differently. Uber introduces GPS tracking, driver ratings, and in-app emergency features.Taxis depend on city licensing and local background checks. Q3. Is being an Uber driver better than a taxi driver? It depends. Uber drivers cover their own fuel and maintenance but can earn bonuses and flexible income.Taxi drivers enjoy stable meter rates but less surge exposure. Q4. Is it possible to view the price of Uber before ordering? Yes. Click to see the full fare and surge multiplier before confirming the ride. Q5. Short City Rides: Which One Is Right for You? Taxi. Base fare with flat meter pricing is cheaper for 1 – 2 mile trips in the city. Louis MuganLouis Mugan is a seasoned technology writer with a talent for turning complicated ideas into clear, practical guidance. He focuses on helping everyday readers stay confident in a world where tech moves fast. His style is approachable, steady, and built on real understanding. He has spent years writing for platforms like EasyTechLife, where he covers gadgets, software, digital trends, and everyday tech solutions. His articles focus on clarity, real-world usefulness, and helping people understand how technology actually fits into their lives. Outside of his regular columns, Louis explores emerging tools, reviews products, and experiments with new tech so his readers don’t have to. His steady, friendly approach has made him a reliable voice for anyone trying to keep up with modern technology. get in touch at louismugan@gmail.com

Regarding COM Surrogate Safety issue – Updated Windows Guide

Yes, COM Surrogate is totally safe. COM Surrogate is a legitimate Windows process called dllhost.exe. It’s what allows the “Component Object Model” (COM) objects to be run safely outside the main process, which makes it possible for File Explorer to generate thumbnails and previews without crashing. Malware can masquerade as COM Surrogate if not located in its proper folder (usually C:\Windows\System32 or C:\Windows\SysWOW64). If you see it in another folder such as Downloads or AppData, this could be a virus impersonating. If you’ve ever taken the time to look at the processes in Task Manager when your computer is running, you’ve probably seen something named “COM Surrogate” or dllhost.exe. The good news: in the vast majority of cases, it’s completely safe – it’s just doing part of what Windows does to keep itself running smoothly. COM Surrogate makes sure dynamic code, such as DLLs that are often used for generating thumbnails, or for media playback (which is a heavy use of dynamic code) don’t crash the entire system if something goes wrong. All the same, malware authors do sometimes use this name in an attempt to deceive. Understanding how to verify it can help protect your PC. What Is COM Surrogate (dllhost.exe)? COM Surrogate is the friendly name for dllhost.exe, which was new in Windows 7 but is still essential on Windows 10 and 11. “COM” refers to Component Object Model – Microsoft’s framework for safely enabling different software components (DLLs) to communicate. Simply put, COM Surrogate is just a protective container. It runs potentially unstable DLLs in isolation, so that if a preview handler or codec crashes, File Explorer doesn’t. Example:When you open a folder full of photos and view their thumbnails, the behind-the-scenes process COM Surrogate is making them safely. Why You See COM Surrogate in Task Manager If you press Ctrl + Shift + Esc, you will see several COM Surrogate sessions. These jobs run as DLL-based task instances for each type of: Normal behaviour: Several COM Surrogate processes running at once with minimal CPU or RAM usage.Potential problem: High CPU spikes or repeated crashes – often caused by corrupt media files or outdated codecs, not malware. Fix Tip: Updating graphics drivers, uninstalling problematic codec packs, or using System File Checker usually resolves the issue. Is COM Surrogate a Virus? Generally, no. COM Surrogate comes from Windows. But since it has a generic process name (dllhost.exe), some malware authors attempt to mimic it. You’ll always see a genuine COM Surrogate process in: If you see dllhost.exe anywhere else (for example, in Downloads or Temp folders), that’s strong evidence of malware. Other red flags: How to Verify Whether COM Surrogate Is Safe Follow these verification steps (Windows 10 / 11): If the file path seems sketchy or doesn’t show a Microsoft signature, immediately run a full antivirus scan using Windows Defender or trusted tools like Malwarebytes. When COM Surrogate Is Causing Issues Investigate further if you notice: These often indicate a bad codec, unstable DLL, or hidden malware infection. How to Get Rid of a Fake COM Surrogate (Safe Steps) Note: Simply deleting the file might not remove the infection. Some malware re-spawns via scheduled tasks or registry entries. Use reputable removal tools for a full cleanup. Should You Disable COM Surrogate? No, never disable it. COM Surrogate is essential for: If COM Surrogate causes trouble, it’s almost always due to a faulty DLL or codec – not the process itself. Fix it by updating Windows, graphics drivers, or media codecs. Pro Tips for Windows Security Conclusion COM Surrogate (dllhost.exe) is a valid Windows process that keeps your computer stable by isolating risky DLL-based tasks like previews and codecs. While malware can imitate it, the real process is safe – as long as it resides in System32 or SysWOW64 and carries a Microsoft signature. If you ever notice suspicious behavior, check the file path, confirm the signature, and run a malware scan. With basic vigilance and updates, COM Surrogate will remain the quiet, safe helper it’s meant to be. FAQ Section Q1. Why does COM Surrogate keep popping up in Task Manager? Windows uses it to manage COM tasks like thumbnails and previews. Multiple occurrences are normal and harmless. Q2. Is it safe to end the COM Surrogate process? Yes, temporarily – but Windows will restart it automatically. Ending it only pauses thumbnail or preview generation briefly. Q3. How do I determine if COM Surrogate is a virus? Check its file location and signature. Anything outside System32/SysWOW64 or unsigned by Microsoft is suspicious. Q4. Is COM Surrogate the same as dllhost.exe? Yes. COM Surrogate is simply the Task Manager name for dllhost.exe, which hosts COM objects securely. Q5. Is there a COM Surrogate in Windows 11? Absolutely. It’s built into all modern versions of Windows (7 through 11) and continues to play a vital role in stability and file handling. Louis MuganLouis Mugan is a seasoned technology writer with a talent for turning complicated ideas into clear, practical guidance. He focuses on helping everyday readers stay confident in a world where tech moves fast. His style is approachable, steady, and built on real understanding. He has spent years writing for platforms like EasyTechLife, where he covers gadgets, software, digital trends, and everyday tech solutions. His articles focus on clarity, real-world usefulness, and helping people understand how technology actually fits into their lives. Outside of his regular columns, Louis explores emerging tools, reviews products, and experiments with new tech so his readers don’t have to. His steady, friendly approach has made him a reliable voice for anyone trying to keep up with modern technology. get in touch at louismugan@gmail.com
Notifications Of Instagram’s Screenshot – Complete & Updated Guide

No, Instagram does not notify you when screenshotting posts, stories, reels or someone’s profile. The only exceptions are: Everything else – posts, stories, reels and profile pages can still be screenshotted or recorded privately without alerting the person who posted it. How things have changed with Instagram – it has piled on layers of privacy and safety tools, but the question of what happens to a photo once it’s snapped remains one of its most enduring myths. So, does Instagram notify when you screenshot their story or post? Profile? Short answer: Mostly no – other than disappearing messages. Fact-checker, each scenario and when (and why) Instagram sends screenshot alerts in 2025. Does Instagram Notify You of Screenshots on Posts or Reels? Instagram’s Help Center and reputable published sources including Android Authority (2025) indicate you can screenshot or record: These actions remain completely private. The owner of the content will not get an alert or indicator from Instagram’s servers. Pro Tip:Instead, save the post in Instagram, either using its built-in Save or Collections feature. Can Someone See If You Screenshot Their Instagram Story? Eversince there has been no prompt to screenshot/zap for story. You can: Please note: Instagram frequently tries new privacy settings as a test, so make sure to update your app and refer to the Help Center for potential new experiments. Does Instagram Send A Notification When You Screenshot DMs? Yes – but just for disappearing media. When someone sends you a disappearing photo or video – that is, they took it using Instagram’s camera and then sent it as View Once or Allow Replay – the sender will be notified if you take a screenshot of it. However: Pro Tip:If someone shares a “View Once” or “Vanish” message with you, it’s private. These are intended to vanish – saving or sharing them violates digital etiquette and, in some places, the law. What About Vanish Mode? Both parties see a banner that says “Vanish Mode is on.” When you capture a screenshot in Vanish Mode: Tip: Don’t screenshot anything in Vanish Mode if you want to keep your trust mutually – these are meant to self-destruct. Does Instagram Notify Screenshot on a Profile or Bio? The answer is NO. You can screenshot: without generating any alerts. If privacy is a concern for you, think of: Don’t Be Fooled by Fake Third-Party Apps That Claim to Detect Screenshots Warning: Instagram also severely limits the kind of third-party app access to your account, so members of Facebook and Instagram’s third party fact checking program could not use an outside app to tell who is a screenshot from their stories, for example. Do not download any: Most are scams or phishing services that may: If you’ve used such apps: How to Protect Your Privacy and Stay Safe Online in 2025 Enable Private Mode: You can set privacy for who views your photos. Scrub Your Followers: Eliminate sketchy or unfamiliar accounts. Don’t Share Sensitive Info: There are some details you have to share, such as your address, finance and medical circumstances and the race of the client involved. ESPECIALLY not in DMs or disappearing media access! Keep Your App Updated: Privacy tools change and the updated ones will keep you secure. Don’t Fall for Screenshot Trackers: They don’t work, and are risky. FAQ Section Q1: How can I disable Instagram notifications? Can I just get some peace and quiet? Go to Profile › Menu › Notifications, then turn off categories like likes, comments or messages. Q2: How to screenshot on Instagram? Android: Power button + Volume Down (You have other Android options here)iPhone: Side + Volume Up (or Home + Power on older models) Q3: Do you get notified if I unsend on Instagram? No, unsending deletes the message for both of you with no warning. Q4: Can you adjust Instagram notification sounds? There are no in-app sound modifications on Instagram.iPhone: Settings › Sounds & Haptics › Default AlertsAndroid: Settings › Sound & Vibration › Notification Sounds Q5: Does Instagram notify when you record a reel or video? NoFIILM Recording of reels, stories and posts NoFIILM does not store private reel / stories or post as it is not checked by server. Louis MuganLouis Mugan is a seasoned technology writer with a talent for turning complicated ideas into clear, practical guidance. He focuses on helping everyday readers stay confident in a world where tech moves fast. His style is approachable, steady, and built on real understanding. He has spent years writing for platforms like EasyTechLife, where he covers gadgets, software, digital trends, and everyday tech solutions. His articles focus on clarity, real-world usefulness, and helping people understand how technology actually fits into their lives. Outside of his regular columns, Louis explores emerging tools, reviews products, and experiments with new tech so his readers don’t have to. His steady, friendly approach has made him a reliable voice for anyone trying to keep up with modern technology. get in touch at louismugan@gmail.com

Scroll to Top